4
vehiclemanufacturer'scorporateheadquarters,ifnecessary,forspecificair
bag information for the vehicle make, model, and front compartment
configurationinvolvedinyourcommunicationequipmentinstallation.
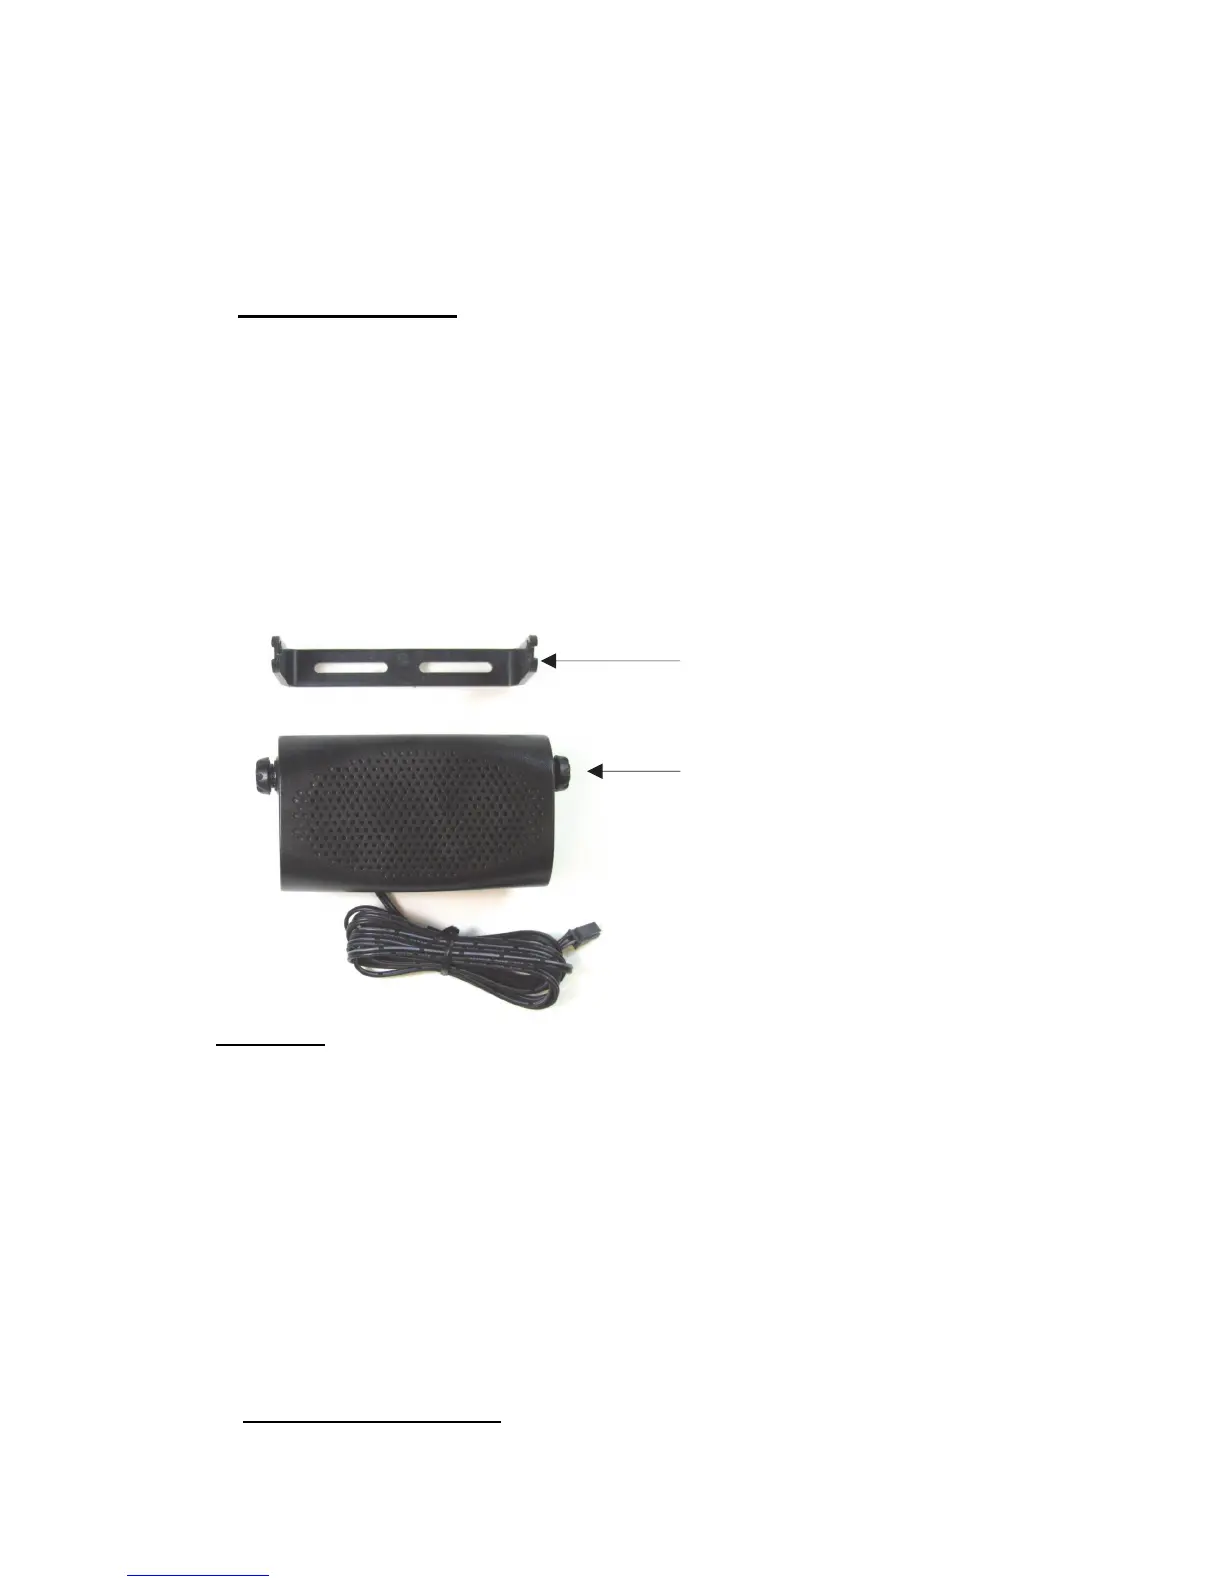
A.SpeakerInstallation
1.MounttheSpeakerbeneaththedashboard,onthepassenger'ssideof
thevehicle,outofthewayofthepassenger.Do notmounttheSpeaker
onthedashboardortherearwindowshelf.
2.TheSpeaker shouldbe locatedmorethan fourfeetfromthe junction
box.
3.TheSpeakerincl
udesamountingbracket,permittingittobemounted
inavarietyofways.Loosenthethumbscrewsonthesideofthespeaker
and using the mounting bracket as a template, drill the necessary
mounting holes and secure the bracket with the self‐tapping screws
provided.
Diagram1
4.Position the Speaker on the mounting bracket and secure it by
tightening the thumbscrews. The mounting bracket is used to
permanentlymounttheSpeakerin place whilepermittingittobetilted
toadesiredangle.
5.Feed thecableoutofsighttothelocationwhereyouintendtomo
unt
thejunctionbox.
6. The speaker should be located at least 3 ft (1m) from the visor
microphone. Avoid placing the speaker where it faces the visor
microphone.
B.MicrophoneInstallation
1. The Microphone supplied has noise cancellation features and as such
the selection of the correct position for the microphone is vital for the
successfulperformanceoftheCarKit.
\
Mountin
 Loading...