™
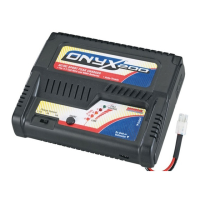
AC/DC ADVANCED BALANCING CHARGER
Quick Reference Guide to Programming
NOTE: This guide does not replace the entire instruction manual as supplied with this charger. Read
the provided manual in its entirety before use, paying particular attention to all safety warnings!!
DTXP4225 QRG
1. START: Connect the charger to power. The CHARGE START screen will appear, with the active battery memory number shown in the
top right corner (>0<). All settings for this memory will automatically scroll across the bottom of this screen or can be scrolled through using
the ▼ and ▲ buttons. If these settings are acceptable for the battery to be charged, press and hold START and charge will begin.
2. SELECT A MEMORY: All ten memory pro les are pre-programmed with charge settings as
shown in the chart. Press CHANGE then ▼ or ▲ to nd the correct pro le. Press CHANGE again
to con rm. Press and hold START and charging will begin.
3. MANUAL SETUP: Follow the steps below to nd the BATTERY SETUP screen to adjust the
charger settings to match a speci c battery.
PRESS
PRESS
PRESS
PRESS
PRESS
PRESS
PRESS
PRESS
PRESS
PRESS
PRESS
PRESS PRESS
PRESS
TO
CHARGE
START
SCREEN
BATTERY TYPE: Press CHANGE,
then ▼ ▲ to find the proper battery type.
Press CHANGE to confirm.
CELL[02]: Press CHANGE, then ▼▲ to
find the proper number of cells in the
battery (confirmed by the voltage shown
at the bottom of the screen). Press
CHANGE to confirm.
CAPACITY: Press CHANGE, then ▼▲
to find the rated capacity value of the
battery. Press CHANGE to confirm.
CURRENT: Press CHANGE, then ▼▲
to find the desired current. Press
CHANGE to confirm.
S_TIMER: Press CHANGE, then ▼▲ to
find the desired backup safety timeout for
char
e. Press CHANGE to confirm.
MELODY: Press CHANGE, then ▼▲ to
change the melody type. Press CHANGE
to confirm.
BEEP OFF: Press CHANGE, then ▼▲
to turn ON or OFF. Press CHANGE to
confirm.
INPUT VOLTAGE: Shows the voltage
at the charger’s input.
OUTPUT VOLTAGE: Shows the
voltage at the charger’s output.
PEAK VOLTAGE: Shows the maximum
voltage measured on the battery during
charge.
CHG CAPACITY: Shows how much
energy was delivered to the battery during
charge.
CHG TIME: Shows how many minutes
elapsed during the charge process.
5. START CHARGE: After all settings are made, press until the
CHARGE START screen shows. Press and hold START for 2 seconds
and fast charge will begin.
MEMORY NO.
Battery Type
Cell Count
Capacity (mAh)
Current
Safety Time (minutes)
Delta Peak (mV/C)
Trickle Current (mA)
0
LiPo
2
4000
4.0A
120
–
–
1
LiPo
2
5000
5.0A
120
–
–
2
LiPo
2
5700
5.7A
120
–
–
3
LiPo
3
5000
5.0A
120
–
–
4
LiPo
3
6400
6.4A
120
–
–
5
NiCd
6
1800
1.8A
90
10
200
6
NiMH
6
3000
3.0A
90
8
250
7
NiMH
6
5000
5.0A
90
8
250
8
NiMH
7
3000
3.0A
90
8
250
9
NiMH
7
5000
5.0A
90
8
250
WARNING!! NEVER LEAVE A BATTERY UNATTENDED WHILE BEING CHARGED! REFER
TO THE PROVIDED INSTRUCTION MANUAL FOR FULL DETAILS.