Do you have a question about the Dutchmen Kodiak 300BHSL and is the answer not in the manual?
Identify the location of grey and black water drains on the campsite.
Confirm campsite is large enough for trailer slides and clearance.
Inspect for overhead hazards like branches or power lines and report unsuitable spots.
Back in or pull through to park the trailer approximately 1 foot short of the final spot.
Use a level to check side-to-side balance and adjust with leveling blocks under tires.
Disconnect the power cord from the pulling vehicle.
Remove the safety pin from the trailer hitch latch.
Lower the trailer's tongue jack leg to the ground, but do not lift yet.
Secure trailer tires with chocks to prevent movement after disconnecting.
Lift the tongue jack to release the trailer from the hitch ball.
Remove towing safety chains from the vehicle once the trailer is clear.
Place the trailer hitch safety pin in the trailer's toolbox.
Move the towing vehicle 5-8 feet forward away from the trailer.
If necessary, install a safety lock on the trailer tongue.
Use a level on the floor to ensure the trailer is level front-to-back with the tongue jack.
Lower corner jacks onto blocks for stabilization only; do not use for leveling.
Connect sewer hoses to the front black and grey outlets.
Install water hose but do not turn on water; use a pressure regulator.
Deploy the trailer's entrance stairs.
Extend the kitchen slide first.
Close and latch interior doors before extending the living room slide.
Extend the living room slide, stopping when a loud noise is heard or movement ceases.
Open the bunk bedroom door and extend its slide.
Turn on propane bottles and light stove burners briefly to purge air.
Turn on the water heater using propane, electric, or both for faster heating.
Turn on the refrigerator on its auto setting.
Adjust the thermostat for heating, air conditioning, or fan operation.
Raise the TV antenna or connect cable TV.
Insert chemicals into the toilet's holding tank.
Put all tools back into the toolbox and lock the storage area.
Open the vent latch for the kitchen stove range hood.
This document outlines the comprehensive setup procedure for a Dutchmen Kodiak 300BHSL recreational vehicle (RV), detailing steps from initial campsite inspection to final system activation. It serves as a guide for users to properly position, stabilize, connect utilities, and prepare the RV for occupancy, emphasizing safety and correct operational sequences.
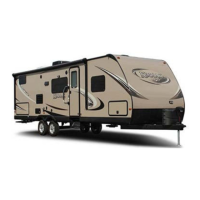
The Dutchmen Kodiak 300BHSL is a travel trailer designed for recreational camping, offering living space, sleeping quarters, and essential utilities for extended stays. The setup process described in this manual enables the RV to transition from a towed vehicle to a stationary, fully functional living unit. This involves:
The manual details a step-by-step approach to using the RV's features during setup, ensuring a smooth and safe experience.
Campsite Inspection (Step 1): Before positioning, users must verify the campsite's suitability. This includes checking for the location of grey and black water drains, ensuring ample space for the RV's two-foot Mega-Slides on the driver's side and the 1.24-foot kitchen slide on the passenger side, and identifying any potential obstructions like tree branches or power lines. If obstructions are present, users are advised to request a different spot from campground personnel rather than attempting to clear them independently. This proactive step prevents potential damage to the RV.
Trailer Positioning (Step 2): The RV should be backed in or pulled through the camp spot, stopping approximately one foot short of the desired final position. A level, typically found in the "bear cave" at the front of the RV, is used on the back bumper to check if the trailer sits level. If not, orange pads or wood blocks are placed under the lower sides' tires. The manual provides a clear indicator: if the bubble is all the way to the right (passenger side), the trailer is lower on the driver's side, requiring leveling blocks under the driver's side tires. This iterative process ensures the RV is perfectly level before proceeding.
Power Connection (Step 3): The power cord is connected from the trailer to either the campground outlet or a generator. The cord requires a 30 AMP outlet. The plug must be pushed into the trailer's electrical inlet, turned a quarter-inch clockwise, and then secured with the grey safety nut, tightened until snug without excessive force. Users are reminded to turn on the breaker at the power outlet. A small blue light on the trailer's electrical inlet cover lid indicates power. If the light is off, campground personnel should be contacted. This ensures a stable and safe electrical supply.
Hitch Disconnection and Stabilization (Steps 4-15): This sequence involves removing the power cord from the pulling vehicle, detaching the safety pin from the hitch latch, and lowering the power tongue jack leg. The trailer's tongue hitch latch is lifted and pulled back. If it doesn't move, rocking the pulling vehicle in neutral may help. The tongue jack continues to lower until the trailer lifts off the pulling vehicle's hitch ball. Once detached, the towing safety chains are removed. The towing vehicle is then moved 5-8 feet forward. A safety lock can be installed on the trailer tongue. The level is placed on the "Bear-Caves" floor, parallel to the sides of the trailer, to level it front-to-back using the tongue jack, with a recommendation to keep the front slightly higher than the back. Finally, all four corner jacks are lowered onto leveling blocks until snug, with one more turn of the crank. The manual explicitly states that these jacks are for stabilization only, not leveling, to prevent damage.
Utility Hookups (Steps 16-17): All sewer hoses are installed, preferably to the front black and grey outlet, as bathroom tanks tend to fill faster than the kitchen grey water tank. The water supply hose is connected, but water should not be turned on yet if at a campground. For dry camping, this step is skipped. A critical safety warning is provided: NEVER HOOK UP HOSE TO TRAILER WITHOUT A PRESSURE REGULATOR, as this will damage the trailer's water pipes.
Slide-out Extension (Step 19): The manual outlines a specific order for extending slides to prevent damage. A second person is required to watch outside the trailer to ensure no obstructions. The sequence is:
Water System Activation (Step 20): All faucets are opened, and the water supply is turned on (or the water pump if dry camping). The water pump switch is on the control panel (top right upon entering the RV). Users wait for most air to escape the pipes, then shut all faucets except one hot water faucet, allowing the water heater to fill and air to escape.
Propane and Appliance Activation (Steps 21-25): Stove burners and the oven are ensured to be off before turning on propane bottles. All three stove burners are turned on one at a time and lit for a few seconds to purge air from the propane lines, then turned off. On the control panel, the water heater is turned on. There are two switches: propane and electric. Both can be used for fast hot water, or electric only to conserve propane. For dry camping, propane is recommended. The refrigerator is set to auto. The thermostat is adjusted for heating, AC, or fan only.
Entertainment and Final Touches (Steps 26-30): The TV antenna is raised (using a crank between the TV and couch in the ceiling) or connected to a cable TV connection. Chemicals are inserted into the toilet's holding tank (from under the bathroom sink). All tools are returned to the toolbox and locked in the "bear cave." The vent latch for the kitchen stove range hood is opened. Finally, users are encouraged to enjoy their KODIAK!
While the document primarily focuses on setup, it implicitly includes elements that contribute to the longevity and proper functioning of the RV, which can be considered maintenance-related usage features:
The document serves as a comprehensive operational guide, ensuring that the Dutchmen Kodiak 300BHSL is set up correctly, safely, and efficiently for an enjoyable camping experience. It prioritizes user safety and the preservation of the RV's systems through detailed, sequential instructions and clear warnings.
| Length | 33 ft 11 in |
|---|---|
| Sleeping Capacity | 8 |
| Number of Slide Outs | 2 |
| Air Conditioning | 13, 500 BTU |
| Furnace | 30, 000 BTU |
| Fresh Water Capacity | 52 gal. |
| Black Water Capacity | 28 gal. |
| Width | 8 ft 0 in |
| Water Heater | 6 gallons |