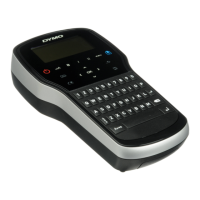
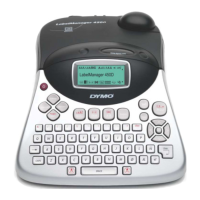
How to use your DYMO
LabelMANAGER 100+
What LabelMANAGER 100+
can do for you
With the DYMO LabelMANAGER 100+
(LM100+) you can create a wide variety of
high-quality self-adhesive labels. You can
choose to print them in a range of different
sizes and styles. The LabelMANAGER 100+
can print on 1/4" (6 mm), 3/8" (9 mm) or
1/2" (12 mm) width. DYMO tape cassettes
are available in a wide range of colors: split
back tape for easy removal from the tape.
Visit www.dymo.com for information on
obtaining tapes and accessories for your
LM100+.
Warranty Registration
Please complete the warranty registration
card and return it to the relevant customer
service address, within seven days– see the
warranty booklet for details.
Getting started
STEP ONE - insert the batteries
• Apply pressure to thumb catch and open
hinged access door – see fig A, page 2.
• Insert six (6) AA batteries, observing the
polarity markings A1, and close cover.
Note: Remove batteries if the LM100+ is to
remain unused for some time.
AC ADAPTOR (optional)
• Connect the AC adaptor to socket B1.
Inserting the adaptor plug disconnects the
supply from the batteries.
• Unplug the AC adaptor from the
LabelMANAGER 100+ before
disconnecting the main power to the
adaptor, otherwise last label memory
settings will be lost (see also ON/OFF).
STEP TWO - insert the cassette (see p.2)
• Press catch in and open hinged access door.
• Ensure tape and ribbon B3 are taut across
mouth of cassette and tape passes between
guideposts before installing as shown.
If necessary, turn spool B4 clockwise to
tighten ribbon.
• Check that cassette switch D4 is set for
the cassette type – see page 2. A notch in
the cassette will fit over the switch when
it is set correctly.
• Insert cassette with tape and ribbon
positioned as shown between print head C1
and pinch roller C2.
• Push firmly C3 until cassette clicks into place.
Ensure tape and ribbon are positioned
correctly.
• Close door B5 until it clicks shut.
3