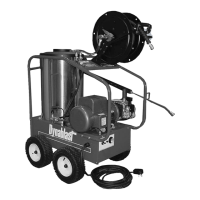
SETTING UP
When unpacking the unit, if you find damage due to shipping contact your dealer immediately.
ELECTRICAL SUPPLY
Arrange with an electrician to install a properly grounded, three wire receptacle. To protect the receptacle from
splashes, the recommended height above the ground level is a minimum of four feet. A ground fault interrupter
(GFI) is highly recommended for any electrically powered machine. Make sure the supply voltage is correct. The
voltage is shown on the rating plate of the unit, or see "Specifications and Features" sheet in this manual.
- DO NOT CHANGE THE AC PLUG ON THE PRESSURE CLEANER TO A DIFFERENT TYPE.
- DO NOT CUT OFF THE GROUND PIN OR THE OPERATOR WILL BE EXPOSED TO SEVERE SHOCK.
- KEEP ELECTRICAL CORDS AND CONNECTIONS DRY AT ALL TIMES.
INCOMING WATER SUPPLY
Connect a garden hose to the water inlet of the unit. The water supply must be able to deliver 5-8 gallons per
minute at a minimum pressure of 5 psi. See "Specifications and Features" sheet in this manual.
OUTGOING (HIGH PRESSURE) WATER
To the water outlet fitting, connect the high pressure hose, trigger gun, extension and nozzle.
PUMP - OIL
Before operating the pump, check to see that the oil is level with the dot on the sight gauge which is located at the
rear of the pump. The oil level can also be checked using the dipstick which is attached to the oil filler cap. Ensure
that the vent hole in the cap/dipstick is clear of dirt. When oil is required, use #20 or #30 non-detergent heavy
duty oil.
BURNER - FUEL
Fill the burner fuel tank with no. 1 or no. 2 fuel oil
BURNER START UP INSTRUCTIONS
(In the event that the burner has been replaced)
1. Turn on the burner switch. If the burner does not start immediately, reset the Manual Overload Switch on the
motor.
2. As soon as the burner motor starts rotating, bleed (prime) the fuel pump. To do this, attach the clear plastic
hose over the vent plug. Loosen the plug and catch the fuel in an empty container. Tighten the plug when all
the air appears to be eliminated.
3. If the burner stops during bleeding, wait three to five minutes for the control Safety Switch to cool, then reset
it manually.
4. If the burner stops after flame is established, additional venting is probably required. Repeat the bleeding
procedure.
CAUTION - Do not attempt to start the burner when excess fuel has accumulated, or when the
furnace or boiler is full of vapour, or when the combustion chamber is hot.
2
DEF SERIES
 Loading...