8
1. AXLE AND REAR
DEC K ASS EM BLY
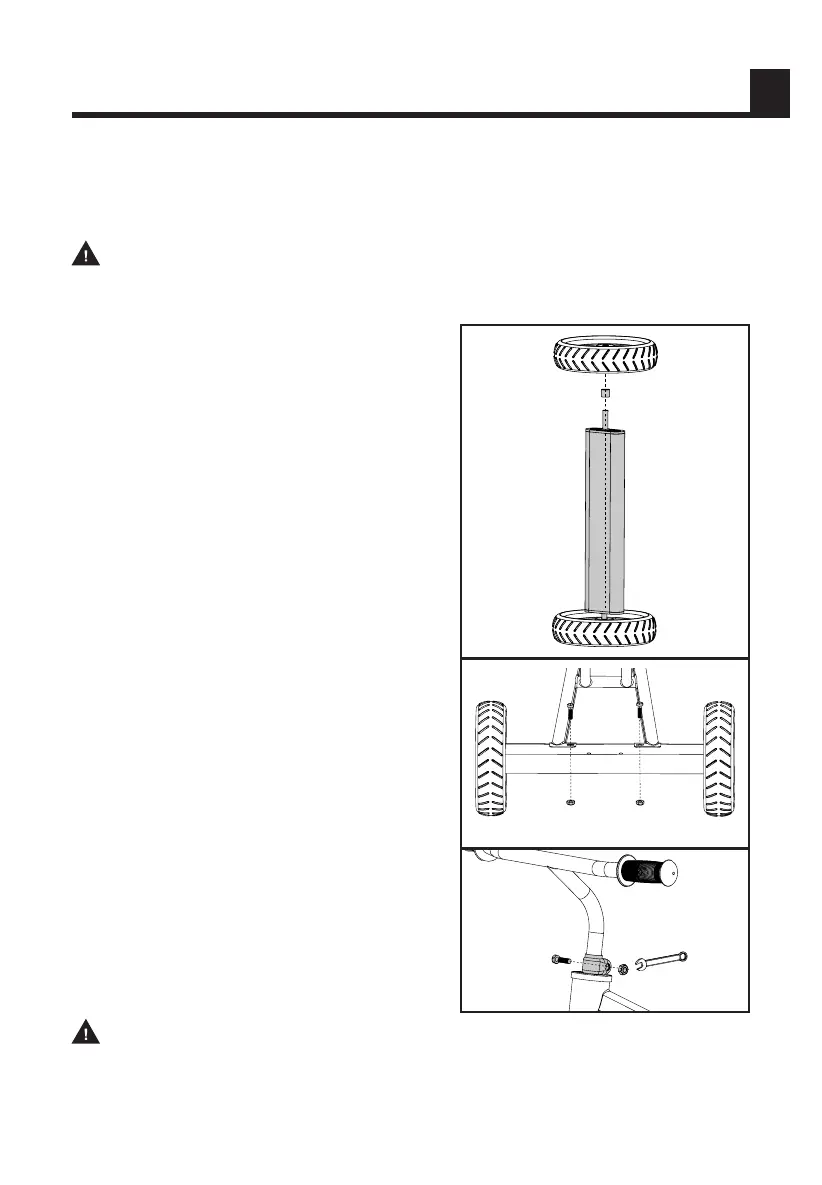
• Slide the axle through the rear deck of the
trike.
• Insert one plastic spacer onto the axle then
snap the rear wheel to the axle until it locks
into place.
• Repeat the last step on the other end of the
deck (see figure 1).
2. FRAME AND REAR
AXLE ASSEMBLY
• Insert the rear deck into the slots on back
of the frame.
• Be sure the seat mounts on the frame are
facing upwards.
• Insert both bolts into the corresponding
holes on the top of the deck.
• Attach both nuts under the deck and
tighten them securely with the bolts as
shown (see figure 2).
3. HANDLEBAR AND
FORK AS SE MBLY
• Insert fork into bottom of the head tube on
the frame (note: there is a slot in the fork
stem, making sure it is facing backward).
• Slide a plastic washer followed by a locking
ring over the top of the fork.
• Insert handlebar into the fork.
• Ensure the handlebar is perpendicular to
and properly oriented to the front wheel.
• Ensure the minimum insertion line is below
the locking ring.
• Verify the fork is flush with the head tube of
the frame and tighten the locking ring with
an adjustable wrench (see figure 3).
The trike comes partially assembled. Adult assembly is required. Trike contains
small parts and are a choking hazard to children under the age of 3 years.
WARNING: Children can be harmed by small parts, sharp edges and sharp points
in the trike’s unassembled state. In the unassembled state, this package contains small parts.
Adult assembly is required; children should not handle parts, or help in assembly of the trike.
WARNING: Failure to properly install the handlebar and secure it to the fork can
result in the handlebars falling off and cause risk of injury. Periodically check to ensure the
handlebar is securely attached.
TOOLS REQUIRED:
Phillips Head Screwdriver and an Adjustable Wrench.
Figure 2
Figure 3
SETUP, ASSEMBLY AND ADJUSTMENT
D
Figure 1
 Loading...