INTRODUCTION
COMPONENT LIST
POWER BOARD SETUP
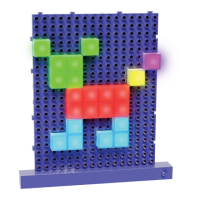
E-Blox
®
Lite Blox
™
is specially designed to make it fun and easy to build cool light pictures and patterns.
Just follow these step-by-step instructions to insert the batteries and setup the power board and then plug
the LED Blox into the power board to build pictures and patterns that illuminate. Some of the LED Blox
even flash and change colors to make your pictures and patterns look really cool!
STEP 1 – Remove the Try Me
packaging plastic piece from the
battery module. In order to turn
on the Power Board properly,
it is important to remove the
plastic piece near the power
button as shown below.
STEP 2 – To replace the 3 “AAA” batteries that come with your product with 3 fresh
“AAA” batteries, remove the screws from the bottom of the battery module as shown
below. Flip the module over and take off the top cover. New alkaline batteries are
recommended for best results. Never mix different types of batteries together in the
battery module! Secure the top of the battery module by putting back in the screws.
STEP 3 – Attach the battery module to the Power Board as
shown below. Once in place, flip the Power Board over and
push the battery module lock switches as shown on the right
to firmly hold the battery module to the Power Board.
x1
x1
x8x4
White
Battery Module
LED Blox
Power Board
Removal Tool
Red Green Blue Color-changing
x8 x8 x2
x1
Note:
Do not mix old and new batteries.
Do not mix alkaline, standard (carbon-
zinc), or rechargeable batteries.
Screws
Power
button
Lock Switches
Push
OVER æ