Complete these checks before every ride
Pre-Ride Checks
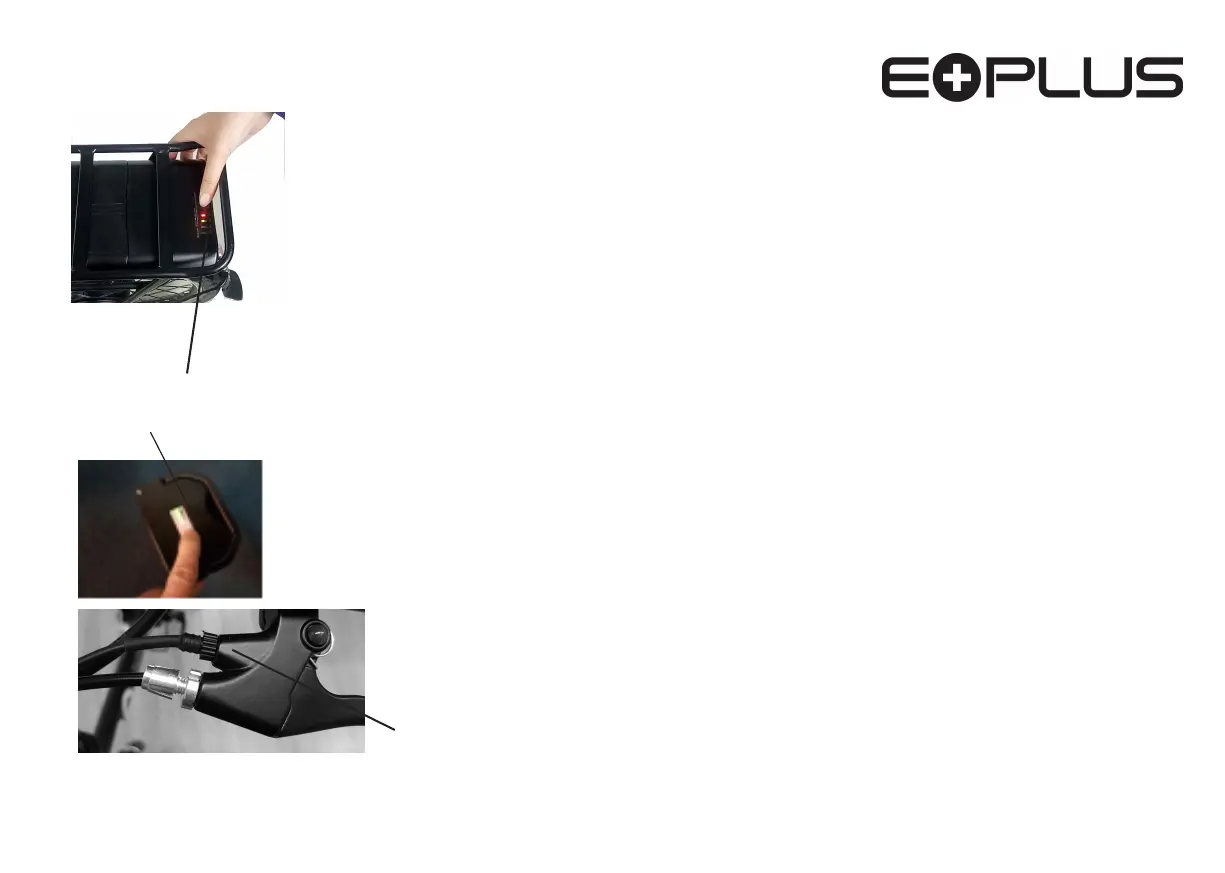
2. Press the power button on the Controller on your handlebars to switch on
3. ‘MODE’ is set on ‘1’
THAT‘S IT........You’re ready to go.
4. To start , simply begin to pedal. Once the crank is turning you will feel the
motor kick-in and the electric system begin to assist you.
5. You have 3 levels of assist, 1, 2 and 3, and its a good idea to
try all 3 levels
to give you a feel of the effect this has on your riding.
6. Remember, stopping pedaling or braking cuts the motor assist, so you can
always feel safely in total control.
Getting Started
1. Switch the battery ‘ON’ by pressing the switch button.
POWER ASSISTED BICYCLES
7
(Fig.19.20)
1. Check to make sure all nuts/fastenings are tight
2. Check that your tyres are inflated sufficiently (see tyre
wall )
3. Check that the brakes are working correctly
4. Check your battery for charge.
(Fig.13)
(Note: Your new e.bike is supplied with a partial charge)
Fig.15
Applying the brakes activates the brake sensor which
cuts the power to the motor.
Fig.13
P
r
ess this butt
on to show battery
charge level, the battery needs to be
switched to ‘ON’ to do this..
Fig.1
4