5. Add Camera to VMS
Change IP Address to Static
There are some situations where an IP address
needs to be static and/or the camera password
changed. These steps are optional and do not
apply to everyone.
Camera Login
1. Open an Internet browser, enter the IP
address of the camera (default value:
192.168.0.120) in the address box, and press
Enter.
2. Input the username and password and click
the login button (default username and
password are both admin). Change the
password after logging in for the first time to
ensure system security. It is recommended to
restart the device after modifying the
password.
Set Static IP
1. After logging in to the camera, navigate to
Configuration > Device > Local Network.
2. Input the desired IP address in the IP Address
box and click Apply. After changing the IP
address setting, use the new IP address to
log in to the web interface in the future.
Add Camera to VMS
Once the camera is installed and configured,
you’ll need to add it to your Eagle Eye Cloud VMS
to begin viewing and saving recordings.
1. Connect the camera to Power over Ethernet
(PoE) switch/bridge/CMVR (if no PoE
available, connect camera to power supply
and switch/bridge/CMVR).
2. Log in to Eagle Eye Cloud VMS.
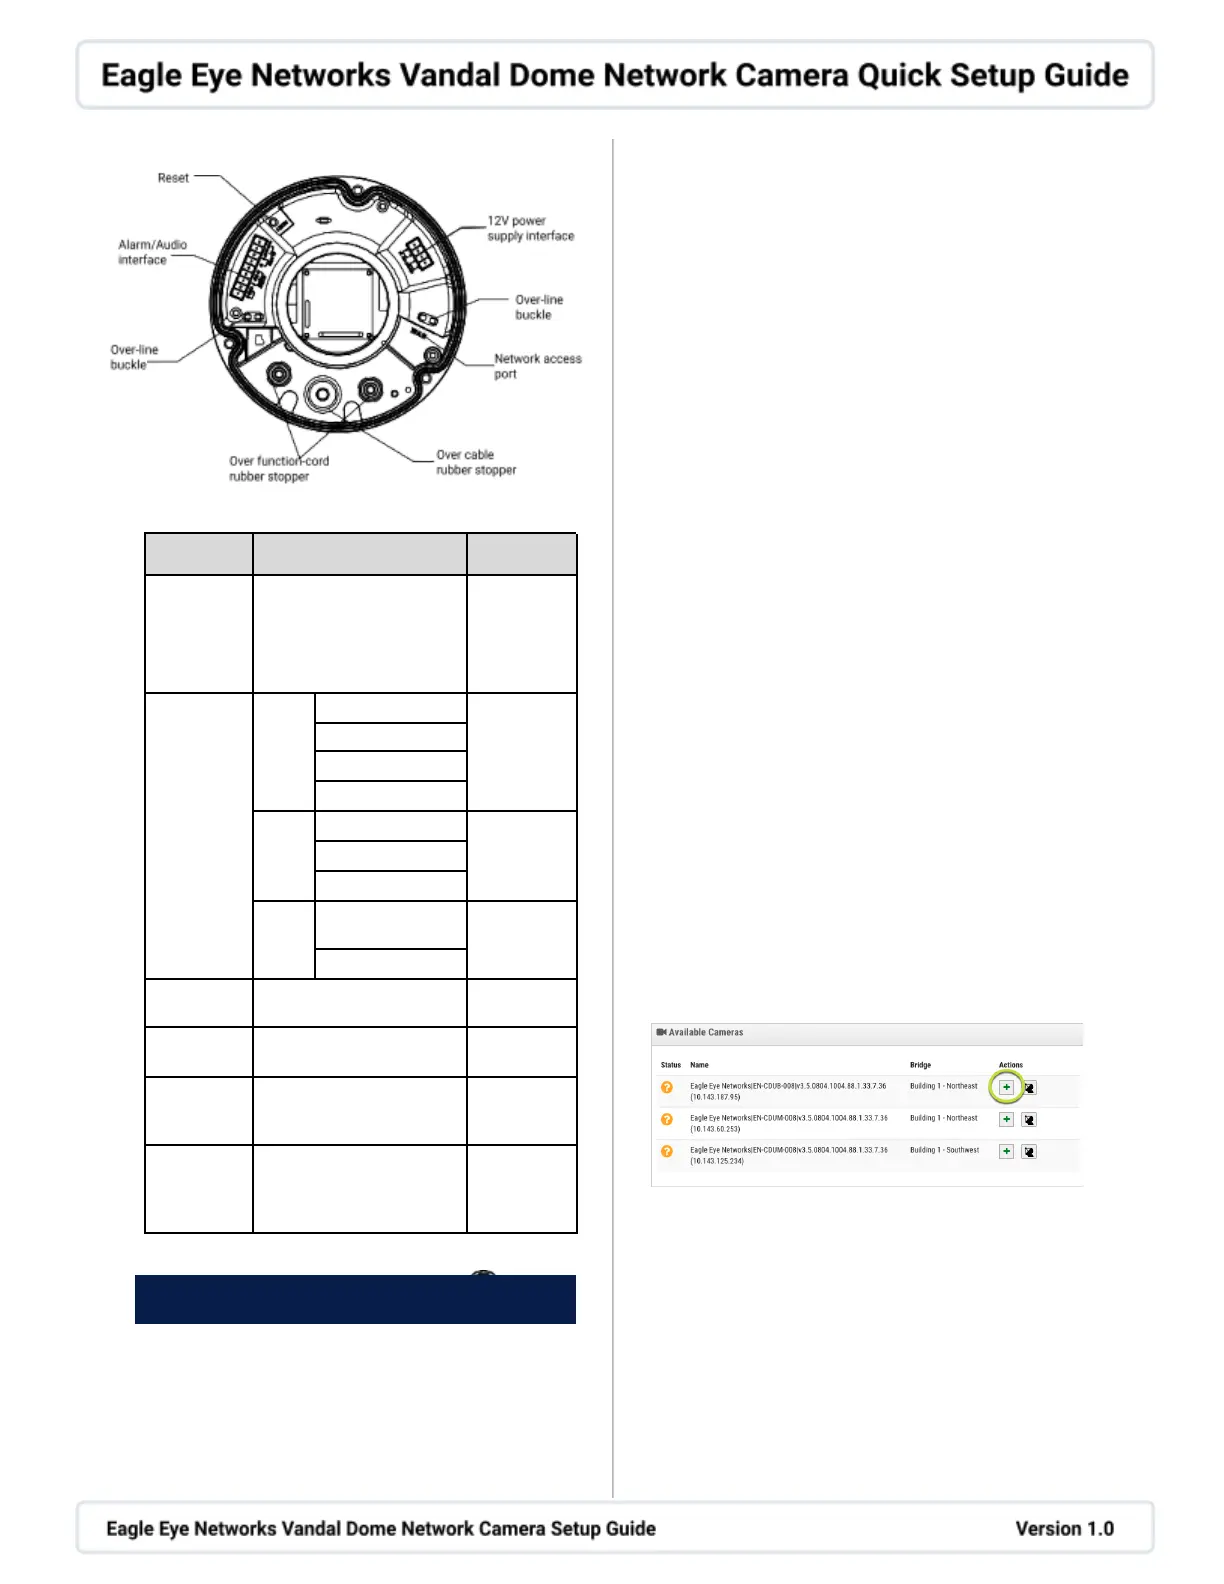
3. Navigate to the Dashboard and locate the
Available Cameras section.
4. Click the plus sign next to the camera to add
it to the VMS.


 To Previous Page
 Loading...