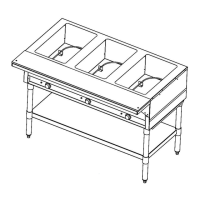
NOTE: Legs and undershelf must be
assembled BEFORE securing legs to table.
Figure 1
Optional Bolted Undershelf (for DHT Series only)
2
Note: OB/CB cabinet series do not require undershelf and leg assembly.
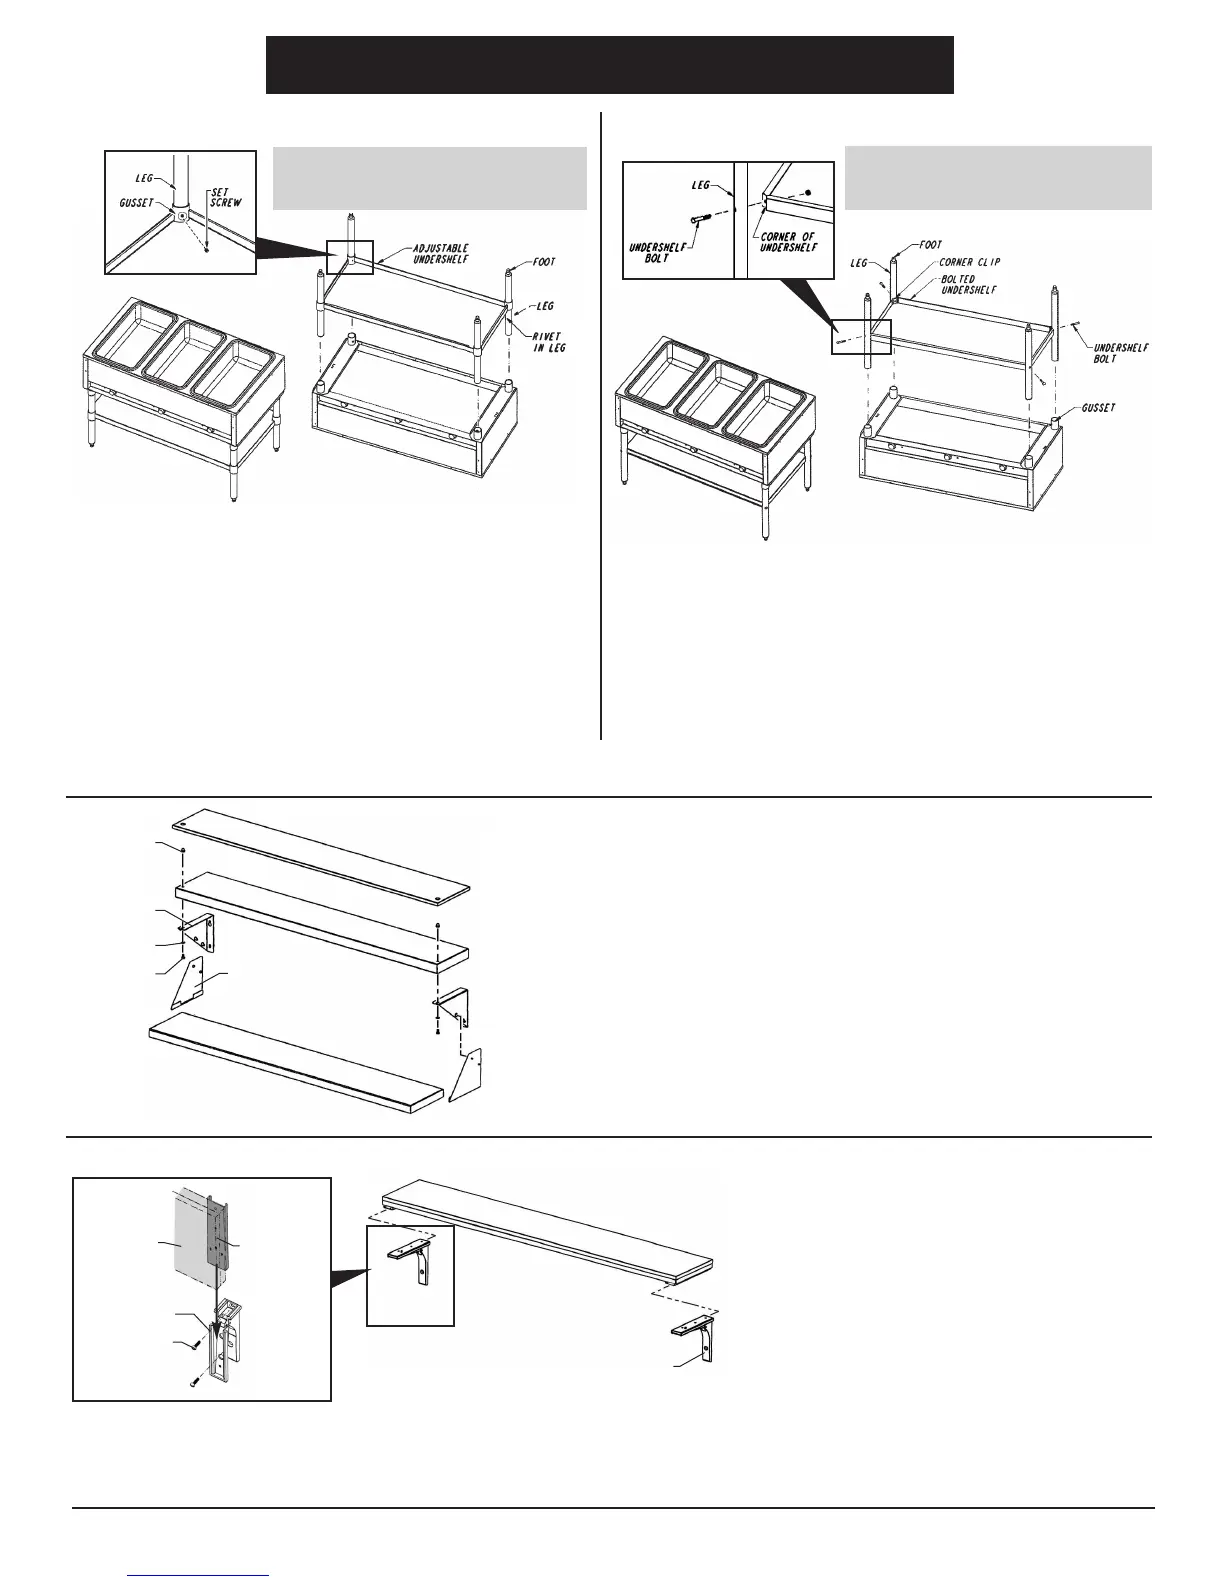
Standard Cutting Board (for all models)
1. Attach shelf support brackets to support shelf, using acorn nuts, washers, bolts
and predrilled holes. Note: acorn nuts must be at the top.
2. Install machine screws into threaded fasteners on hot food table. Do not tighten.
3. Align keyholes in mounting brackets with screws and mount support shelf/bracket
assembly to table. Tighten screws.
4. Align holes in cutting board with acorn nuts, and place cutting board onto
support shelf.
Optional Hardwood Cutting Board
with Drop Brackets (for all models)
Optional Plate Shelf
1. Hook metal plate shelf into bottom flange of plate shelf brackets.
2. Using keyholes on support shelf brackets, mount plate shelf/bracket assembly
onto support shelf/bracket assembly.
1. Place table on top with gussets facing up.
Caution: Use cardboard or other material to prevent scratching top.
2. Install legs into gussets. Make sure rivet in leg is closer to gusset than
to the foot end.
3. Align undershelf gussets with legs, and slide undershelf down legs to
desired position. Do not force or beat corners as damage could occur.
4. Tighten set screws in undershelf gussets to secure undershelf
(see Figure 1) and install feet into legs, using a rubber mallet.
5. Tighten set screws in gussets to secure legs to table.
6. Place table on back with control knobs up.
7. See applicable cutting board mounting instructions below.
NOTE: Legs and undershelf must be
assembled BEFORE securing legs to table.
Figure 1
Standard Adjustable Undershelf (for DHT Series only)
1. Place hot table on top with gussets facing up.
Caution: Use cardboard or other material to prevent scratching top.
2. Install legs into gussets.
3. Mount undershelf to legs by inserting bolt thru hole in leg and thru hole
in corner of undershelf and tighten with hex nut (see Figure 1).
4. Tighten set screws in gussets to secure legs.
5. Place hot food table on back with control knobs up.
6. See applicable cutting board mounting instructions below.
support shelf
bracket
plate shelf
bracket
washer
hex bolt
acorn nut
st
ai
nl
ess
steel
suppor
t
shel
f
opti
onal
pl
ate
shelf
cutti
ng
boar
d
drop
bracket
cut
ting boar
d assem
bly
1. Mount drop brackets to table, using machine
screws and threaded fasteners on table.
2. Mount cutting board assembly to drop brackets
on table.
3. Raise cutting board up until it is in horizontal
position and slide toward hot table.
cutting board
assembly
drop bracket
machine screws
to screw into
unit
channel (inside
cutting board
assembly)
 Loading...