6
7
Simple installation
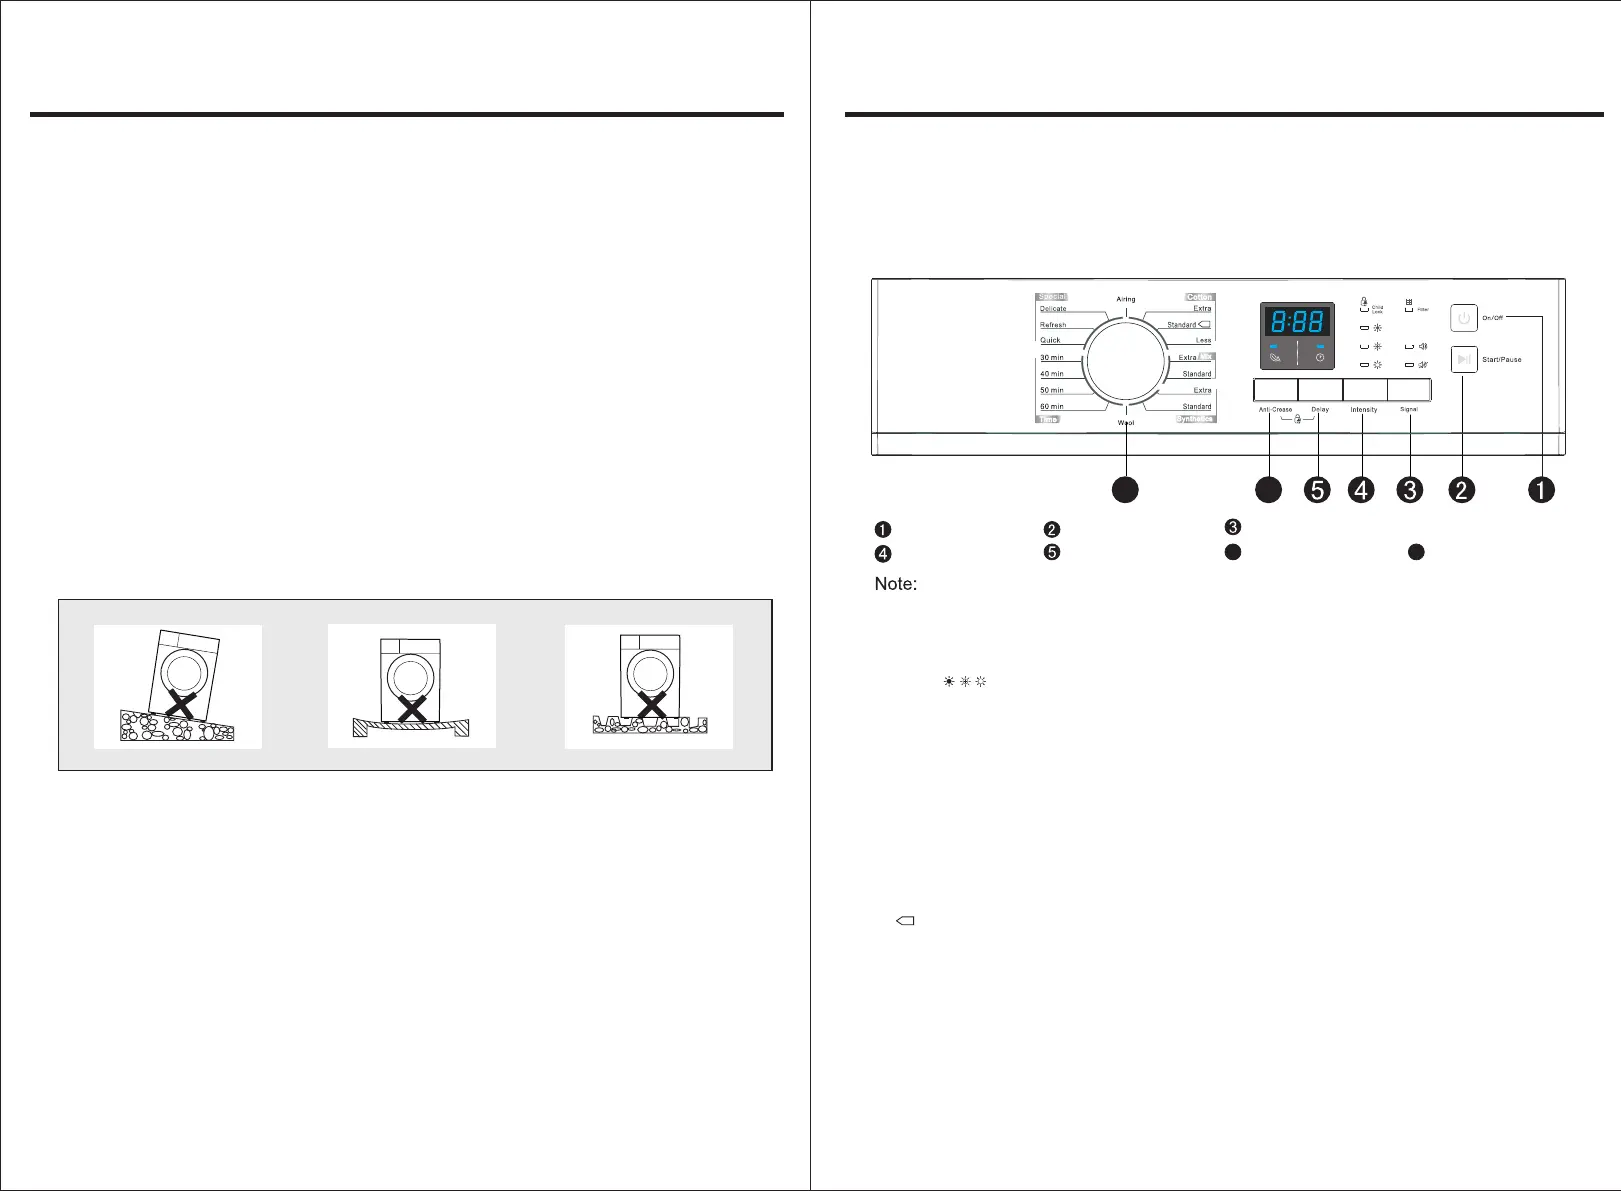
Control panel
1)
2) Press the 【 】button to
3
Press the 【Signal】button to select the on or off signal function. The buzzer will prompt from the
dryer when finishing the cycle. Press the【On/Off】 button and pull out the power cable.
Intensity select adjust the dryness level of the laundry. The level has three
grades . The drying time increases 3 minutes in every grade.
(1).The intensity function can be activated only before the programme start.
(2).Press the 【Intensity】 button repeatedly to select the drying time.
) Press the【Delay】 button to select delay clothes drying within 24 hours. You can press this key
continuously; it can be selected within 1-24 hours .
4) Press the 【Anti-Crease】button to select the fuction, at the end of the drying cycle, the anti-crease
operation time is 30 minutes (default ) or 120 minutes (selected).The 【Anti-Crease】 light shall
illuminate when the anti-crease function is selected. This function prevents the laundry from creases.
5) If users need child lock function, pressing the 【Anti-Crease】 and 【Delay】buttons simultaneously
for over 3 seconds to start child lock function.
6) Clean the filter, cabinet and inner tube.
7) This symbol means the energy efficiency test programme “standard cotton programme”,
which is most suitable to dry normal cotton load at rated load capacity.
8) Please clean the filter when the“Filter” light is flashing, after the dryer stop.
On/Off
Start/Pause
Intensity Delay
Anti-Crease
6
Control panel
Following are instructions for starting and using your new dryer. Please refer to specific sections
of this manual for more detailed information.
Important Warning: To reduce the risk of fire, electric shock, or injury to person, read this entire
manual, including the Important Safety Instructions, before operating this dryer.
67
Signal
Program Knob
7
Transport
Move cautiously. Do not grasp any salient parts of machine. The machine door can not be
used as the handle for delivery. If the dryer can’t be transported erect, the dryer could be slant
to right less than 30° .
Installation Position
Level
Adjusting
Once in its permanent operating position,
check that the dryer is absolutely level with the aid
of a sp
irit level. If it is not, adjust the feet with a tool.
Power Supply Connection
1.Make sure that the voltage of the power supply is the same as the electric specification of the dryer.
2.
2.Do not connect the dryer with the power connection board, the universal plug or socke
1.It is recommended that, for your convenience, the machine is positioned close to your washing
machine.
2.
3.
The tumble dryer must be installed in a clean place, where dirt does not build up. Air must be able
to circulate freely all round the appliance. Do not obstruct the front air inlet or the air intake grilles
at the back of the machine.
To keep vibration and noise to a minimum when the dryer is in use, it should be placed on a firm
and level surface.
4.The feet must never be removed. Do not restrict the floor clearance through deep pile carpets,
strips of wood or similar. This might cause heat built-up which would interfere with the operation
of the appliance.
V.1