EasyManua.ls Logo

EastPoint Sports GO! GATER SPIKE 'N SMASH User Manual

Default Icon
8 pages
To Next Page IconTo Next Page
Page #1 background imageLoading...
Page #1 background image
SPIKE ‘N SMASH
TM
SPIKE ‘N SMASH
MC
Assembly Instructions
Instructions d’assemblage
1-1-18512-F
CONTACT INFO / POUR NOUS JOINDRE
Hours / Heures d’ouverture
Monday to Friday / du lundi au vendredi
(9am to 5pm EST) / (de 9 h à 17 h HNE)
Technical Support / Assistance technique
Email us at / Envoyez-nous un courriel à : consumerservice@eastpointsports.com
Visit us at / Visitez-nous au : www.eastpointsports.com
Call / Appelez-nous au : 973-585-4747
www.eastpointsports.com
Question and Answer IconNeed help?

Do you have a question about the EastPoint Sports GO! GATER SPIKE 'N SMASH and is the answer not in the manual?

EastPoint Sports GO! GATER SPIKE 'N SMASH Specifications

General IconGeneral
BrandEastPoint Sports
ModelGO! GATER SPIKE 'N SMASH
CategorySports & Outdoors
LanguageEnglish

Summary

Assembly Instructions

Contact and Support Information

Provides contact details, operating hours, and support channels for assistance.

Parts Identifier

How to Use the Parts Identifier

Guide on using the parts list for assembly verification.

Parts and Accessories List

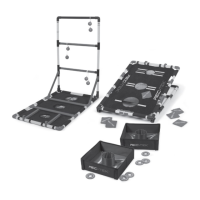
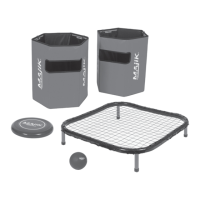
Detailed list of all components and accessories included in the game set.

Assembly Instructions

Preparation for Assembly

Inspect and lay out all parts before beginning the assembly process.

Step 1 Assembly

Assemble the first leg components and pole.

Step 2 Assembly

Connect poles to leg assemblies with pin locks.

Step 3 Assembly

Further connect poles to leg assemblies.

Step 4 Assembly

Connect poles to leg assemblies and prepare for netting attachment.

Step 5 Assembly

Attach the netting to the assembled frame.

Step 6 Assembly

Final adjustments to the net structure.

Step 7 Assembly

Prepare the pump and ball for inflation.

Step 8 Assembly

Inflate the ball using the provided pump.

Step 9 Assembly

Tighten the net and consult the rule book for variations.

Flip, Fold, & Go Assembly

Step 1: Flip Game

Carefully flip the game onto its side.

Step 2: Fold Legs

Push the close button and fold down all legs.

Step 3: Ready to Go

Final step indicating the game is ready.

Limited Warranty

Warranty Coverage Details

Specifies what is covered and not covered under the warranty terms.

Obtaining Warranty Service

Details the procedures and requirements for making a warranty claim.

Related product manuals