Congratulations!
Your installation is complete.
¡Felicitaciones!
Haz finalizado la instalación.
Félicitations!
Vous avez terminé l’installation.
1514
The Stow Company 3311 Windquest Drive Holland, MI 49424 © The Stow Company Printed in U.S.A.
p: 800.562.4257 616.399.3311 f: 616.399.8784 www.easytrack.com Item # RB1448-INS 09/16
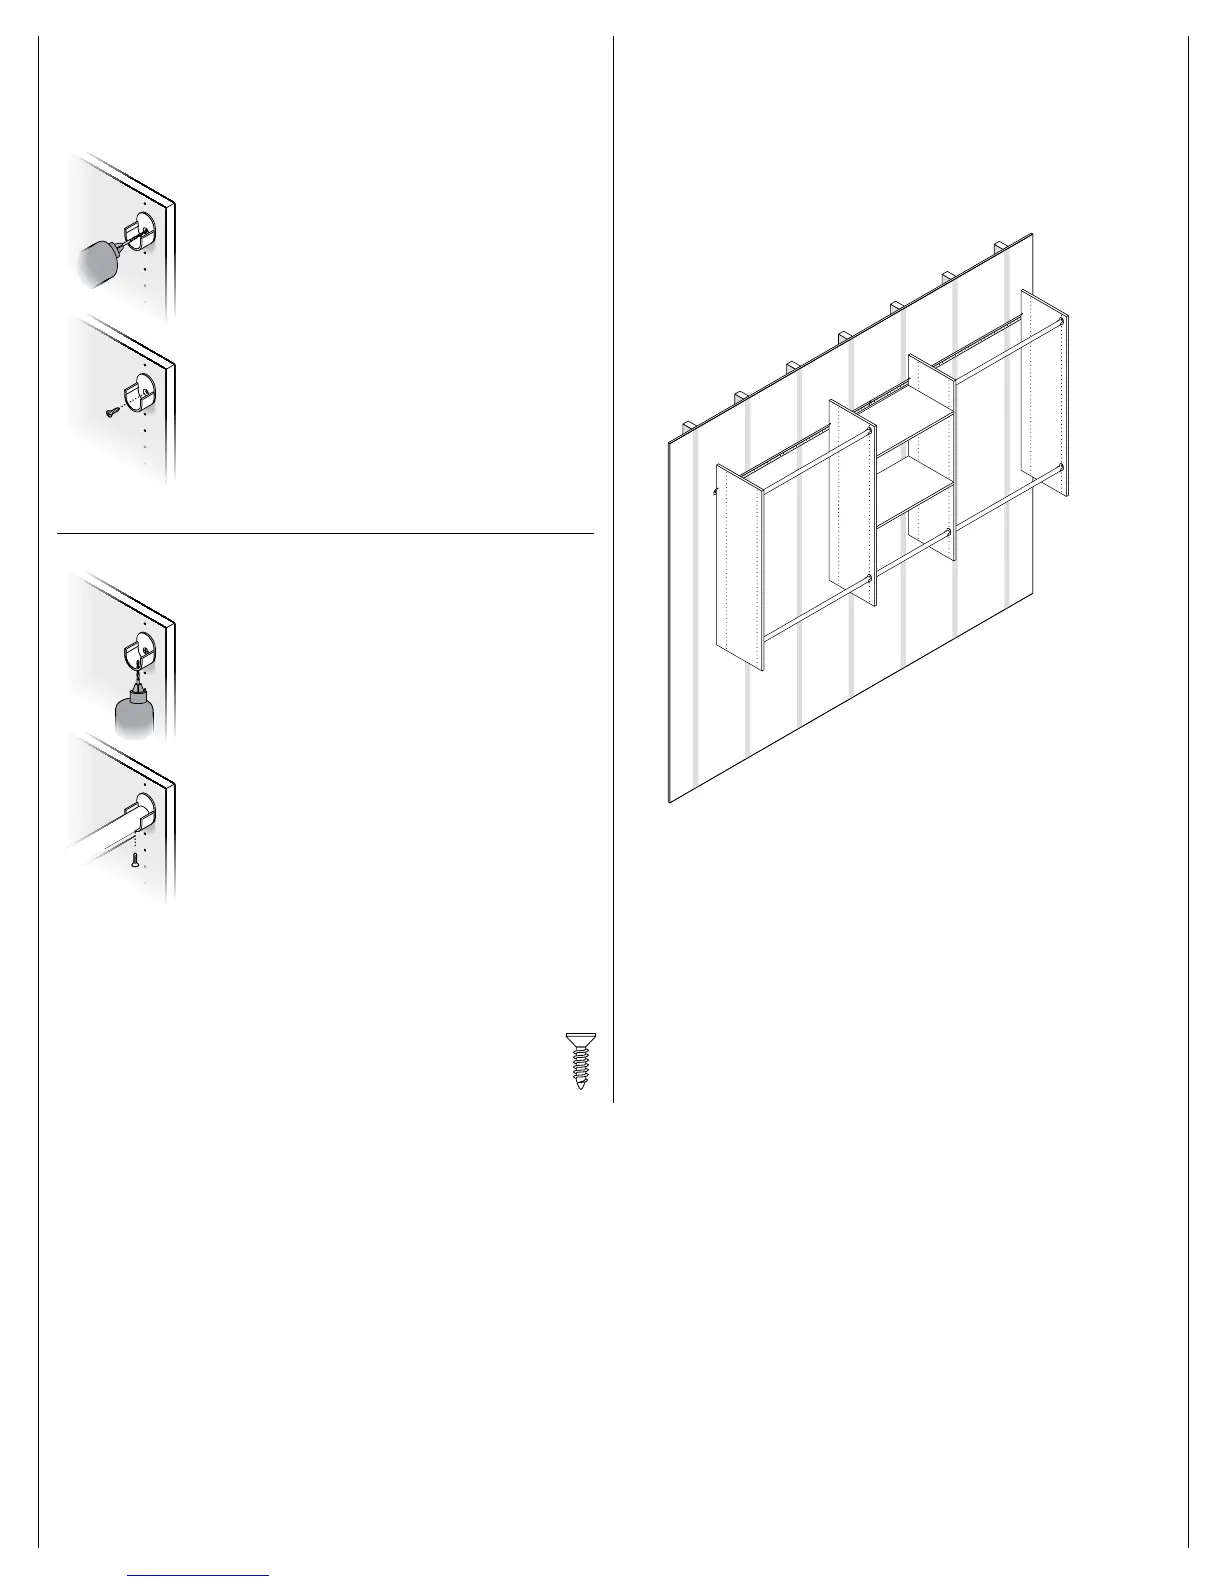
OPTIONAL STEP FOR ADDED STABILITY.
PASO OPCIONAL PARA MAYOR ESTABILIDAD.
ÉTAPE OPTIONNELLE POUR PLUS DE STABILITÉ.
For chrome and plastic holders
Para porta varillas de cromo y plástico
Pour supports de chrome et de plastique
Drill
1
⁄8" pilot holes into vertical panels through the existing hole
in rod holders.
Taladra un orificio guía de
1
⁄8" (3.175 mm) en los paneles
verticales por el orificio existente en los porta varillas.
Percer des trous de
1
⁄8 po dans les panneaux verticaux par le
trou existant des supports de tige.
Screw rod holders to the vertical panels through the existing
hole, using a #6 x
1
⁄2" zinc screw.
Atornilla los porta varillas a los paneles verticales por
el orificio existente, usando un tornillo zinc Nº 6 x
1
⁄2"
(12.7 mm).
Visser les supports de tige aux panneaux verticaux en passant
par le trou existant, à l'aide d'une vis Nº 6 x
1
⁄2 po en zinc.
For plastic holders only
Sólo para porta varillas de plástico
Pour les supports de plastique seulement
Drill
1
⁄8" pilot holes in the bottom of each rod holder.
Taladra un orificio guía de
1
⁄8" (3.175 mm) en la parte inferior
de cada porta varilla.
Percer des avants-trous de 1/8 po dans le bas de chaque
support de tige.
Screw through the pilot hole into the wardrobe rods, using
a #6 x
1
⁄2" zinc screw.
Atornilla por el orificio guía dentro de las varillas del
guardarropa, con un tornillo zinc Nº 6 x
1
⁄2" (12.7 mm).
Visser dans les tiges de penderie en passant par le trou
existant, à l'aide d'une vis Nº 6 x
1
⁄2 po en zinc.
#8 x 2" screw
#6 x
1
/
2"
zinc screws
Toggle bolt
#6 x ½" zinc screws
#6 x ½" tornillos zinc
#6 x ½" vis en zinc
 Loading...