(800)448-3873•Grant,MI49327
www.easypro.com
5601•4/19
5
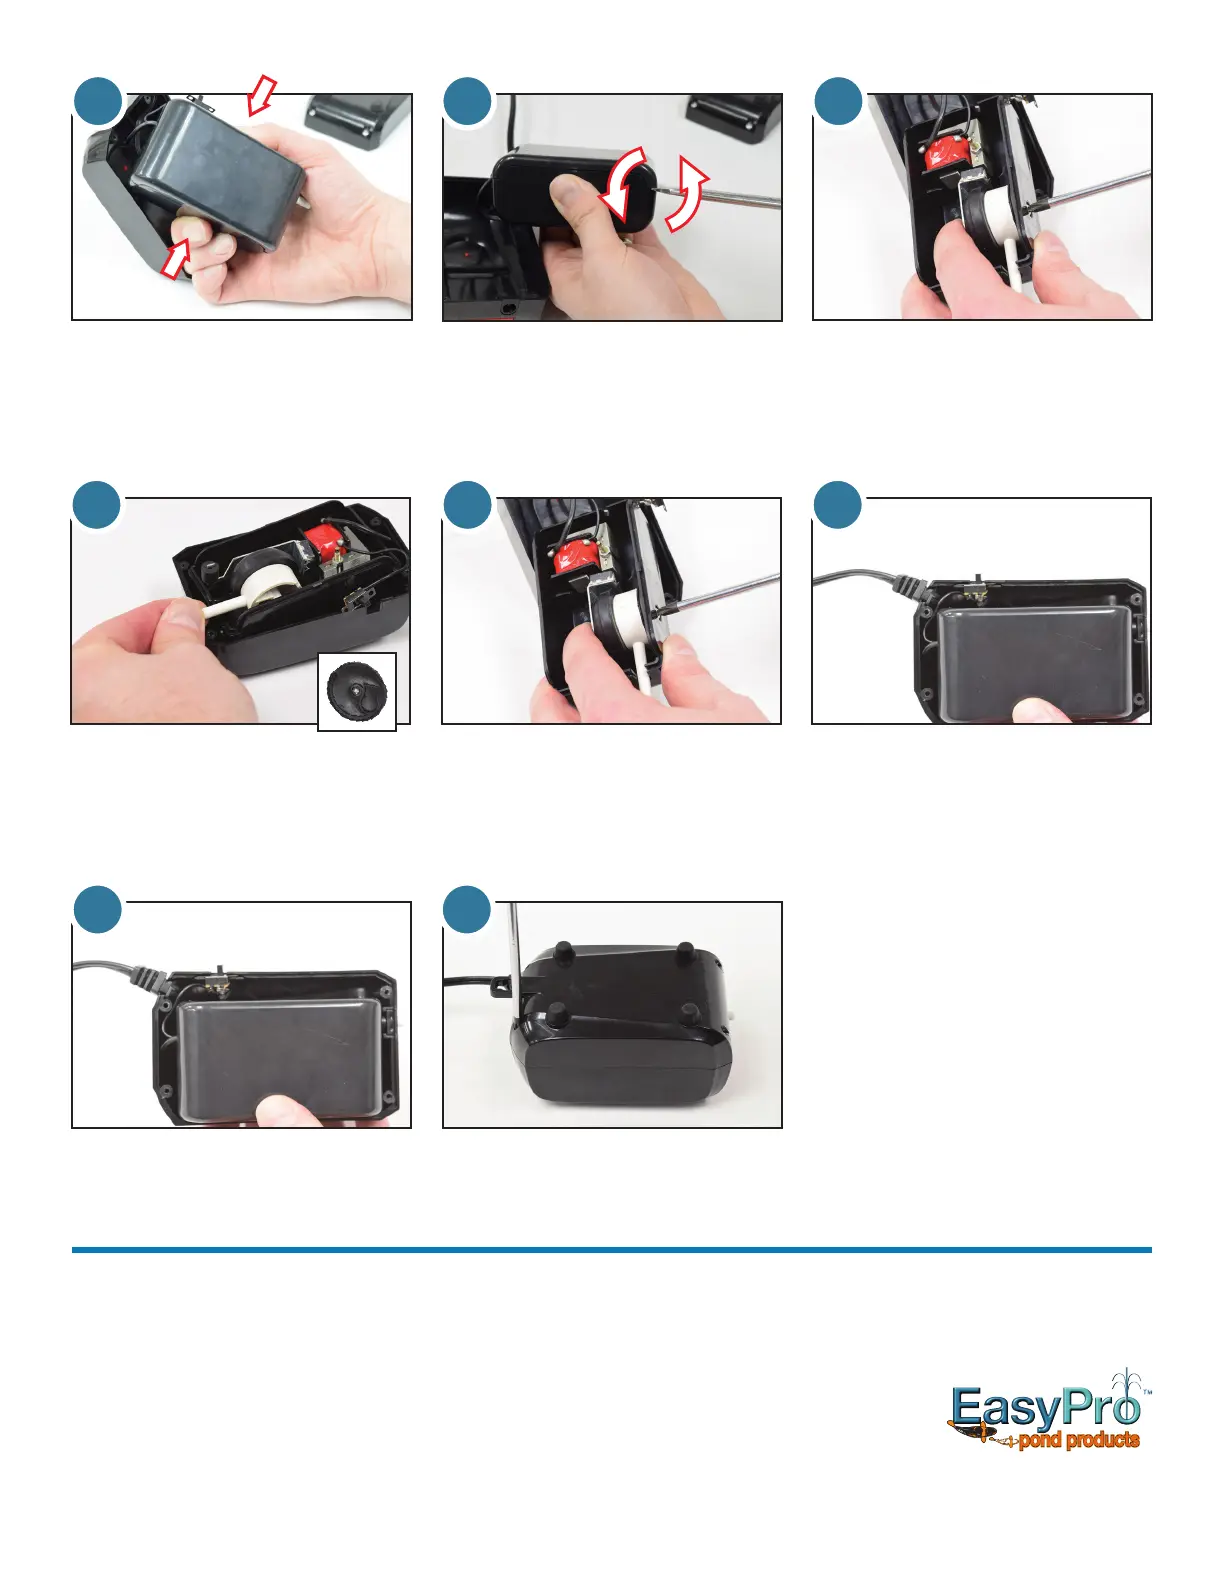
5.Withlido,removescrew
from side of housing that holds
diaphragm assembly in place.
9.Placeinternalhousingbackinto
top of main housing. Arrange cords
and switch to avoid pinching when
reassembling main housing.
10. Re-install bottom of main housing
and secure with four screws.
3. To remove lid of internal housing, lift
internal housing without straining
electrical cords, squeeze longer
sides tightly to create a small space
whereaatscrewdrivercanbe
placed.
3 4
4. Instead of prying, use a slight
twisting motion with the screw
driver to release the lid of the
internal housing.
109
6 7
6.
Remove diaphragm assembly from
unit. Inspect magnets and clean
if needed. Remove and save the
black seal shown in the inset photo.
This is not included in this repair kit.
You will use this in step 7.
7.Presstheblacksealintotheside
of the new diaphragm assembly
Install new diaphragm assembly by
holding it securely to the side while
tightening screw.
8. Arrange electrical cords in slot
and press lid back onto internal
housing.
8
Replacement Parts
Airstone:part#CRAS1Checkvalve:part#CASCV
Troubleshooting
Loss of air output but unit is running:
• Checkthattheowcontrolisturnedup.
• Checktomakesurelinesarenotkinkedorplugged.
• Inspecttheairstonestoensuretheyareclean.Replaceor
clean as necessary.
• Inspectdiaphragms.Replaceasnecessary.
Unit is not running:
• TheGFCImayhavetripped.
 Loading...