EasyManua.ls Logo

EasyPro Compact Aeration Series User Manual

EasyPro Compact Aeration Series
2 pages
To Next Page IconTo Next Page
Page #1 background imageLoading...
Page #1 background image
CMC3 - Single Outlet Compressor
top of main housing
internal housing lid
bottom of main housing
internal housing
1 2
1. Unplug unit and remove four
screws from bottom housing.
2. Carefully lift top of housing back to
access internal housing.
Your kit includes a diaphragm assembly to return your air pump back to proper
performance.
Over time the air pressure and output will drop which typically requires
replacement of the diaphragm. This is considered normal “wear” and can be done on a
regular basis (every 6 to 12 months) or once loss of output is observed.
• Disconnecttheunitfromtheoutletandremoveanyairhoses
• Placehardwareandscrewsinorderthattheyareremoved
WARNING:Electricalshockhazard.Disconnectelectricalsupply
before performing maintenance. Failure to follow these instructions
mayresultindeath,reorelectricalshock.
WARNING:Injuryhazard.Productsurfacesbecomeveryhotduring
operation, allow surfaces to cool before handling.
WARNING:Donotuseoiltolubricateparts.CAScompressorsuseanoil
less design. Using oil may result in failure of the unit.
Before beginning you will
need:
1. #1Philipsscrewdriver
2. Flat head screwdriver
3. Clean work space
Diaphragm Replacement Instructions for CMC3 - SingleOutletCompressorusedinCAS1Kit
continued on back
Compressor Repair Kit Instructions
CMC3RK
by
Question and Answer IconNeed help?

Do you have a question about the EasyPro Compact Aeration Series and is the answer not in the manual?

EasyPro Compact Aeration Series Specifications

General IconGeneral
BrandEasyPro
ModelCompact Aeration Series
CategoryCompressor
LanguageEnglish

Summary

Safety and Preparation for Compressor Repair

General Safety Warnings

Highlights electrical shock, heat, and lubrication hazards to prevent injury.

Required Tools and Workspace

Lists necessary tools like screwdrivers and a clean workspace for successful repair.

CMC3 Single Outlet Compressor Overview

Component Identification

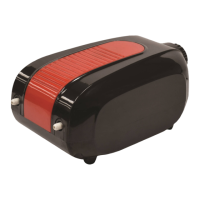
Identifies key parts of the single outlet compressor, including housing and lid.

Diaphragm Replacement Procedure

Initial Disconnection and Housing Access

Unplug unit, remove bottom housing screws, and carefully lift top housing.

Internal Housing Lid Removal

Lift internal housing lid by squeezing sides and using a flat screwdriver.

Diaphragm Assembly Removal and Prep

Remove diaphragm screw, detach assembly, clean magnets, and save original seal.

New Diaphragm Installation

Attach original seal to new diaphragm, install assembly, and secure with screw.

Final Reassembly

Arrange cords, press lid back, place internal housing, and secure bottom housing.

Troubleshooting and Replacement Parts

Troubleshooting Unit Issues

Diagnoses loss of air output and addresses units that are not running.

Available Replacement Parts

Lists part numbers for air stone (CRAS1) and check valve (CASCV).