This document is the user manual for the ECHANFIT CTM5001N Treadmill, providing comprehensive information on its assembly, operation, maintenance, and troubleshooting.
Function Description
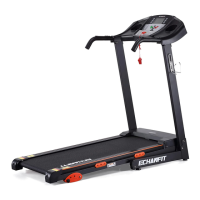
The ECHANFIT CTM5001N Treadmill is a home-use exercise machine designed for walking, jogging, and running. It features a control panel with an LCD window display that shows various exercise parameters such as speed, time, distance, calories, and fat. The treadmill offers multiple pre-set programs (P1-P15) and manual mode for customized workouts. It also includes a heart rate monitoring function, allowing users to track their pulse during exercise. The treadmill is designed with a folding mechanism for convenient storage, making it suitable for home environments where space might be a concern.
Important Technical Specifications
The treadmill has the following key technical parameters:
- Built-up Size (mm): 1369*680*1193
- Foldable Size (mm): 678*680*1218
- Running Surface Size (mm): 420*1080
- Net Weight: 87.5LB
- Max Affordable Weight: 220LB
- Running Speed Range: 0.5-8.5MPH
- LCD Window Display: Speed, Time, Distance, Calories, Fat
- Power Output: As the rating label showing
- Maximum Output Power: As the rating label showing
The treadmill is designed for home-use only and has a safety area behind it of 1000*2000MM.
Usage Features
Assembly: The manual provides step-by-step instructions for assembling the treadmill, starting from unpacking the carton and identifying parts to securing the main frame, computer frame, uprights, and various bolts and caps. A critical notice is given: "Do not get through power before complete assembly." The assembly process involves attaching the computer frame to the main frame, securing the uprights, connecting the adjustable foot pad, and inserting the safety key and wire rope assemblies.
Folding Instruction: The treadmill features a folding mechanism for easy storage. To pull up, the user lifts the base frame until a sound indicates the air pressure bar is locked into the round tube. To pull down, the user supports place A with one hand, kicks the air pressure bar, and allows the base frame to fall down automatically. A safety warning advises keeping anybody and any pet away from the machine when falling down.
Operation:
- Display Window: The LCD window displays various exercise data.
- LCD Window Display Details:
- PROG: Shows programs "----" in manual mode.
- TIME: Shows running time.
- SPEED: Shows speed. During start-up, a 3-second countdown is displayed.
- PULSE: Shows heart beat data. If there is no heartbeat, 'P' is displayed.
- CAL/DIST: Shows calories/distance.
- Button Functions:
- PROG button: Selects programs P1-P15.
- MODE button: In standby state, selects manual mode, time countdown mode, distance countdown mode, or calories countdown mode. In FAT mode, selects "Sex," "Age," "Height," "Weight."
- START button: Starts the machine at the lowest speed or at the speed of the default program after 3 seconds countdown.
- PAUSE/STOP button: Stops the treadmill and pauses the current state.
- SPEED +/-: Adjusts the speed.
- Left/Right handrail button: Speed adjustment buttons.
- Main Function:
- Start-up Quickly (Manual): Press 'START' to begin at the lowest speed or 'SPEED +/-' to adjust.
- Count Down Mode: Choose time, distance, or calories countdown mode.
- Inner Install Program: Selects programs P1-P15.
- Heart Beat Test: Hold the pulse by two hands for 5 seconds to get an accurate heartbeat value.
- Body Fat Test: In standby, press 'PROG' until 'FAT' shows in the speed window. Enter parameters (Sex, Age, Height, Weight) using 'MODE' and 'SPEED +/-'.
- Data Display and Set Range: Provides tables for parameter types (SEX, AGE, HEIGHT, WEIGHT) and their default/setting ranges, as well as BMI reference.
- Stop Function: The machine stops automatically after 2 minutes without operation or if the system detects a sleep mode. Press any key to wake up.
- Safety Key Function: Pulling out the safety key will immediately stop the treadmill.
- Running Data Display and Setting Range: Provides tables for show range, default program, default mode, and set range for speed, time, distance, and calories.
- Date Table: A detailed table showing speed values for each program (P01-P15) across 20 time intervals.
Exercise Instructions:
- Warm-up Stage: Recommended for 15-25 minutes, starting with a walk at 0.6 mph and gradually increasing to 3.0 mph.
- Exercise Stage: Walk at 3.0 mph for 12 minutes, then increase to 30 minutes, or adjust speed/incline as comfortable.
- Exercise Intensity: Gradually increase speed from 3.0 mph to 3.3 mph and then to 3.6 mph, adding 0.2 mph every 2 minutes.
- Calorie Burning: Warm-up for 5 minutes at 2.5-3.0 mph, then increase speed by 0.2 mph/2 minutes until reaching a stable speed for 45 minutes.
- Exercise Frequency: 3-5 times/week, 15-60 minutes/time. Consult a physician for personalized advice.
- Velocity of Movement: Provides guidelines for different walking and running speeds (0.6-1.9 mph for not well physically, 1.9-2.8 mph for less movement or workout, 2.8-3.8 mph for normal walking, 3.8-4.7 mph for fast walking, 4.7-5.6 mph for jogging, 5.6-7.5 mph for intermediate speed running, 7.5-8.5 mph for well experiences of running). The velocity of movement ≤ 3.8 mph is suitable for normal walking, and ≥ 5.0 mph is suitable for running.
Warm Up Instruction: Detailed stretching exercises are provided with illustrations, including knee stretches, hamstring stretches, leg and feet tendon stretches, quadriceps stretches, and sartorius muscle stretches. Each stretch should be held for 10 to 15 seconds and repeated three times.
Maintenance Features
Grounding Methods: The treadmill must be grounded to reduce the risk of electric shock. It is equipped with a cord having an equipment-grounding conductor and a grounding plug. The plug must be plugged into an appropriate outlet that is properly installed and grounded in accordance with all local codes and ordinances. Improper connection of the equipment-grounding conductor can result in a risk of electric shock. The manual includes a diagram illustrating a grounded outlet.
Running Belt Adjustment:
- Cleaning: General cleaning of the unit and the exposed part of the deck on either side of the walking belt and side rails is recommended.
- Lubrication: The treadmill is pre-lubricated, but regular lubrication is required.
- Light users (less than 3 hours/week): annually
- Medium users (3-5 hours/week): every six months
- Heavy users (more than 5 hours/week): every three months
- A professional technician is recommended for any repair needs.
- Instructions are provided to cut off power for 10 minutes after running for 2 hours before lubricating.
- Belt Adjustment: If the belt is slipping or not running smoothly, adjust the tension.
- Centering the Running Belt: If the belt drifts to the right, unplug the safety lock and power switch, turn the right adjusting bolt 1/4 turn clockwise, then start running until centered. If it drifts to the left, turn the left adjusting bolt 1/4 turn clockwise. Timely adjust the tightness of the belt for looseness after a period of time running. Pull out the safety lock and switch, turn the left and right adjusting bolt 1/4 turn clockwise, then re-start running, confirm the belt-tightness until the belt be right tightness.
Trouble Shooting Guide: A table lists common error codes (E01, E02, E03, E05, Show "----") and their corresponding reasons and solutions.
- E01 (Message wire is broken or not connected well): Check if the computer and bottom control board wire connect well; check if IC on bottom control board is loosen, reset the IC; check if the power voltage is 50% lower than the normal voltage, please use the normal voltage to test.
- E02 (Burst clash): Check if the control board is burnt with irregular smell, replace a control board; check if the motor wire is well connected, reconnect it.
- E03 (No sensor signal): Check if the signal light on control board is light on, if the signal light is burnt out, change a signal light; check if the plug of sensor is well connected; check if the magnetic sensor is broken or well connected, reconnect it or replace a magnetic sensor.
- E05 (Current overload protecting): Over rated loaded or the motor is stuck, cause excessive current, machine will start self-protecting system. Adjust the machine will restart; check if the motor has noise from motor or if the motor/bottom control board were burnt out, if burnt out, change motor and bottom control; check if the power voltage is wrong, use right voltage to test again.
- Show "----" (The safety key is not at the appointed place / The safety key sensor board is not connected well or broken): Check if the safety key is at the appointed place; check if the safety key sensor board is connected well; replace the safety key sensor board inside computer.
Warranty and Customer Support: For questions, support, or warranty claims, contact customer service at service@camelonfit.com.