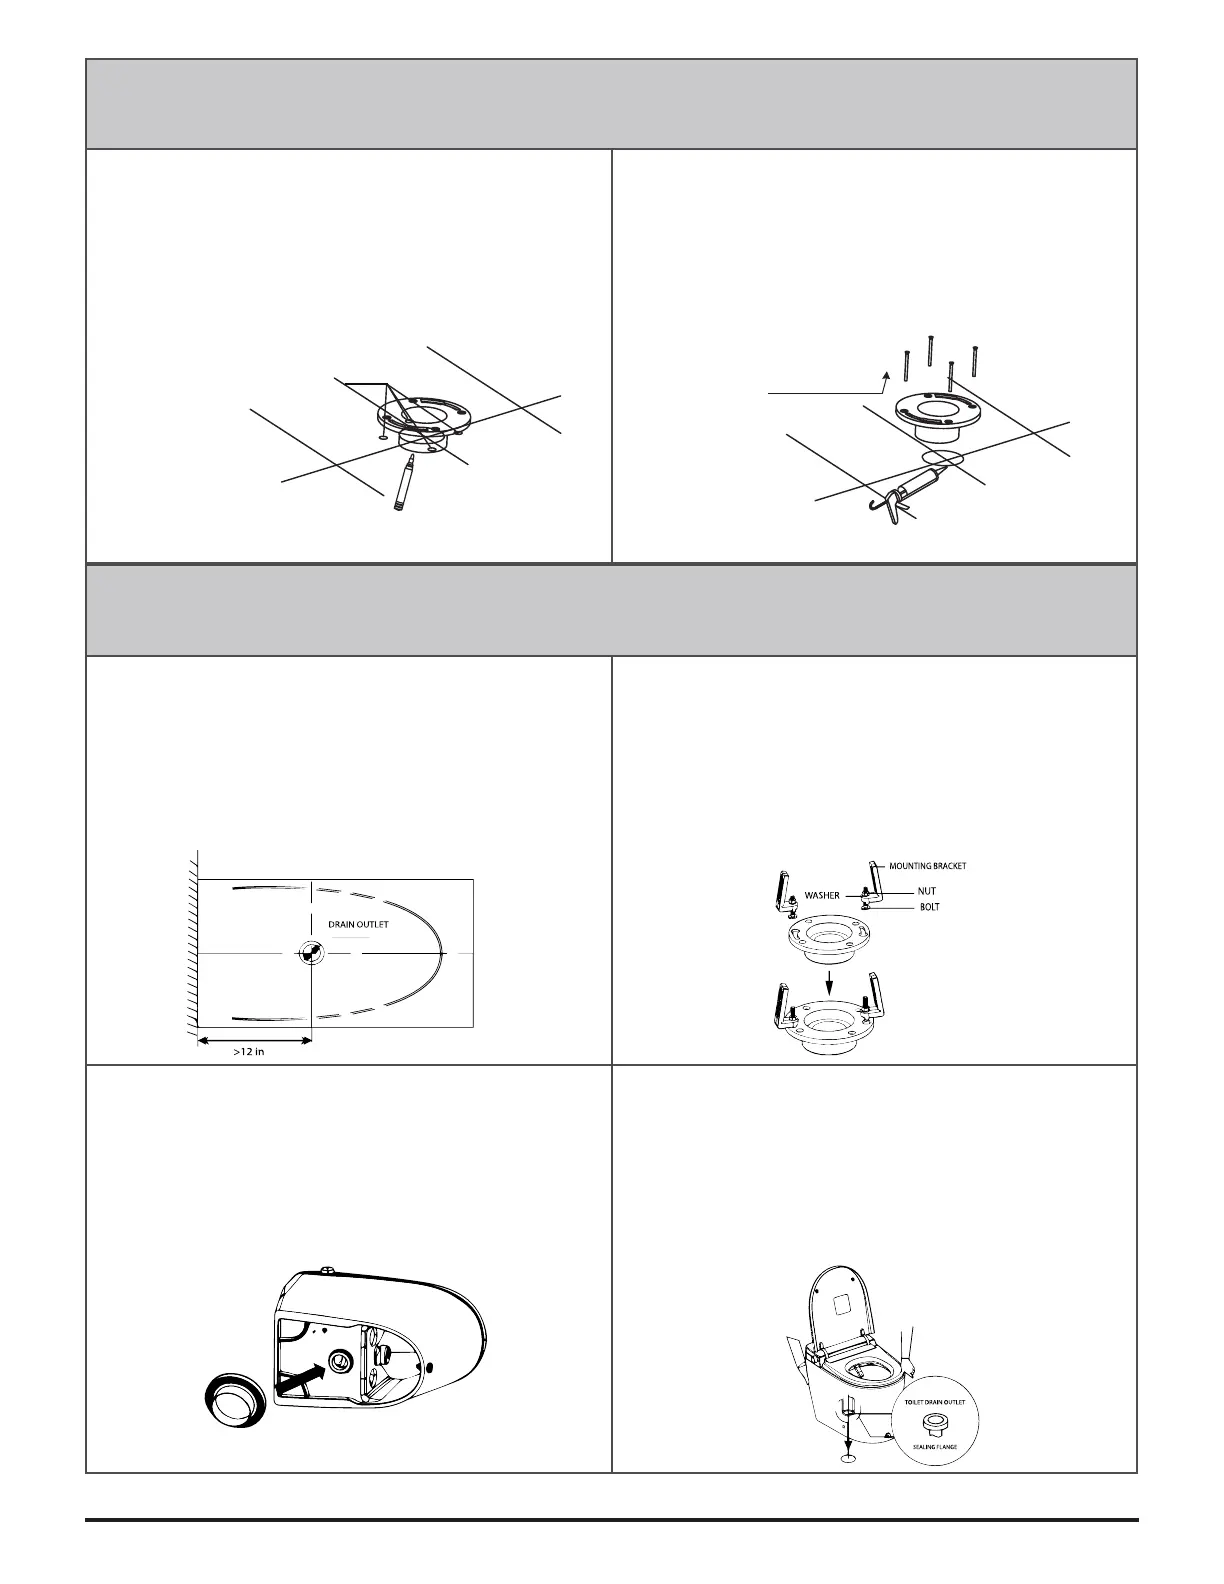
INSTALLING THE FLANGE (IF A FLANGE IS ALREADY IN PLACE, IGNORE THIS STEP)
Align the flange with the drain hole and mark the
positions of the four mounting holes of the flange
on the ground with a marking pen.
Aligner la bride sur le trou d’évacuation et marquer
les positions des quatre trous de montage sur la
bride au sol à l’aide d’un marqueur.
Put the flange on the drain hole, and fix it on the
ground with four bolts. Then seal the flange with
caulk.
Placer la bride sur le trou d’évacuation et la fixer au
sol à l’aide de quatre boulons. Puis, sceller la bride à
l’aide de mastic.
INSTALLING THE TOILET
1. Align the cardboard with the centerline of drain outlet.
Draw a contour line based on the
cardboard.
1. Aligner le carton sur l’axe central de la sortie du drain.
Tracer une ligne de contour basée sur le carton.
2. Assemble the mounting brackets with bolts then install
them to the pre-installed flange plate on the ground and
lock tight with the nuts.
2. Assembler les supports de montage avec les boulons,
puis les installer sur la plaque de bride pré-installée au sol
et verrouiller fermement avec les écrous.
3. Place the wax ring on the drain hole at the bottom of
the ceramic.
3. Placez l’anneau de cire sur le trou de vidange au
fond de la céramique.
4. Install sealing flange into the drain outlet.
5. Install the ceramic toilet on it’s corresponding position
according to the contour line.
4. Installer la bride d’étanchéité dans la sortie de vidange.
5. Installez la toilette en céramique à sa position corre-
spondante selon la ligne de contour.
 Loading...