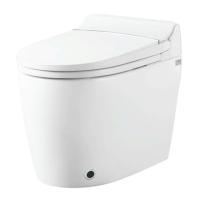
REMOTE CONTROL INSTALLATION
1. Identify a location where the remote can be easily accessed when user is sitting on the toilet.
2. Drill two 6mm 1/4 inch diameter holes on the wall.
3. Knock the anchors into the hole with a hammer.
4. Use the screws to secure the holder to the wall.
5. Remove the battery cover from the back side of the remote to install batteries.
6. Remote is now ready to be placed in the holder.
*THE REMOTE IS NOT DESIGNED TO BE WATERRESISTANT, THE HOLDER SHOULD BE INSTALLED AWAY FROM
ANY POTENTIAL SPRAY OF WATER
*USE PROPER MOUNTING TOOLS FOR SPECIAL WALL SURFACES, SUCH AS WOOD, DRYWALL, GLASS, ETC.
1. Identifier un emplacement où la télécommande est facilement accessible lorsque l’utilisateur est assis sur les
toilettes.
2. Percez deux trous de 6 mm 1/4 pouce de diamètre sur le mur.
3. Frapper les ancres dans le trou avec un marteau.
4. Utilisez les vis pour fixer le support au mur.
5. Retirez le couvercle des piles à l’arrière de la télécommande pour installer les piles.
6. La télécommande est maintenant prête à être placée dans le support.
*LA TÉLÉCOMMANDE N’EST PAS CONÇUE POUR RÉSISTER À L’EAU, LE SUPPORT DOIT ÊTRE INSTALLÉ À L’ÉCART
DE TOUT JET D’EAU POTENTIEL
*UTILISEZ DES OUTILS DE MONTAGE APPROPRIÉS POUR LES SURFACES MURALES SPÉCIALES, TELLES QUE LE
BOIS, LES CLOISONS SÈCHES, LE VERRE, ETC.
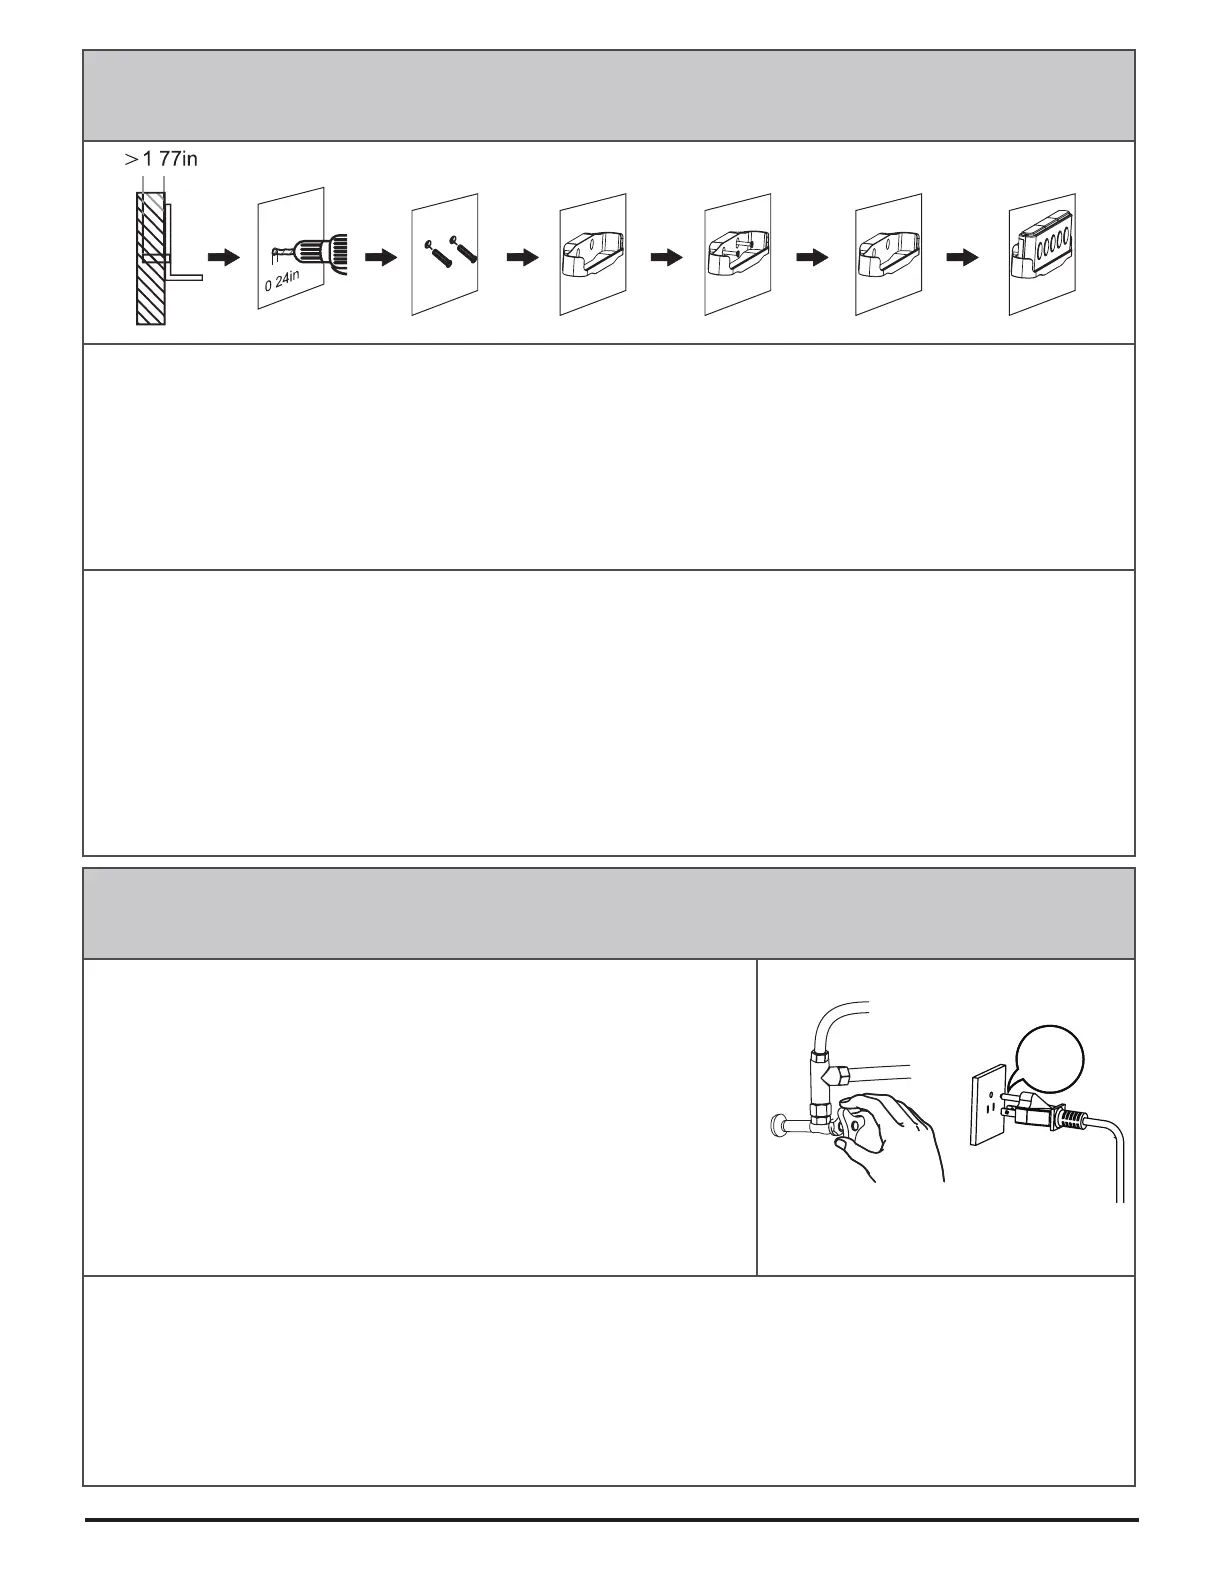
TEST WATER FLOW, POWER AND FUNCTIONS
1. Turn on the shut-off valve.
2. Check each connection to confirm there is no water leakage.
*In case of water leakage, unfasten the connection, apply sealing tape and
fasten again.
3. Plug in the unit to a 120V Ground-Fault Circuit-Interrupter GFCI
socket
1.
Ouvrir la vanne d’arrêt.
2.
Vérifiez chaque connexion pour confirmer qu’il n’y a pas de fuite
d’eau.
*En cas de fuite d’eau, desserrez le raccord, appliquez du ruban
d’étanchéité et revissez.
3.
Branchez l’appareil à une prise de disjoncteur de fuite à la terre
DDFT de 120V
1. A trail run of all the functions right after installation is highly recommended.
2. Please follow the operations manual for the complete list of functions and how to operate them.
*In case of malfunction or if you have any questions about a function, feel free to contact Ecoway customer service at
service@eco-way.ca
1.
Un parcours de toutes les fonctions juste après l’installation est fortement recommandé.
2.
Veuillez suivre le manuel d’utilisation pour une liste complète des fonctions et comment les utiliser.
*En cas de dysfonctionnement ou si vous avez des questions sur une fonctionnalité, n’hésitez pas à contacter le
service à la clientèle d’Ecoway à service@eco-way.ca
120V
.
.
 Loading...