7
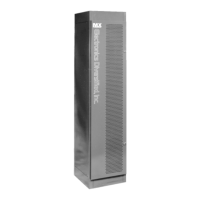
MX System Dimmer Bank
MX 1
D2 2
Please Note:
Maintenance of your Dimmer Rack and the Modules
is very Important. Such maintenance will help to
prevent failure and prolong component life.
It is very important all the slots in the rack be filled
for proper cooling airflow. If a module must be
removed, replace the module with a module blank.
WARNING:
Maximum ambient operation and storage environ-
ment for this equipment is 104°F (40°C), with 90%
humidity, non-condensing.
Extreme caution is advised when liquids, food and
cigarettes are near any equipment.
During severe electrical storms, equipment should
be disconnected.
Failure to adhere to these requirements may result
in malfunction or serious damage.
Troubleshooting Guide
Symptom Possible Cause Remedy
Nothing works, green indicators Blown fuse in rack
1, 2, and 3 are dark. Input power source is off. Check input power source.
A dimmer circuit is always OFF. The dimmer module is not plugged in. Make sure dimmer is firmly plugged in all the way.
Check control wiring connector to solid state relays.
Defective solid-state relay. Replace the solid-state relay.
Circuit Breaker is off. Turn on circuit breaker.
All of the lamps "ghost" (glow). Dimmer preheat set too high. Reduce preheat level.
Control out of calibration. Contact the factory.
The dmx signal indicator flashes, Bad DMX source. Check source.
lamps flicker, or dimmers refuse to
respond to dmx signal. Bad DMX cable. Check the dimmer pack with a known good cable.
The dimmer pack overheats. The cooling vents are blocked. Clear any obstructions to the cooling vents.
The dimmer module is full of dust. Carefully remove dust and dirt with compressed
air or a vacuum cleaner.
The dimmer is in a very warm location. Relocate the dimmer to a cooler location.
Dimmer Removal / Installation
To remove a dimmer from an MX rack please follow this
procedure:
•Be certain of the position of the Dimmer Module to be
removed. Locate this Module by using the Circuit
numbering label located to the left of the dimmers
(Ck #_ ).
•Locate the Circuit Breakers - Switches to the
left on the face of the Module to be removed.
•Move the switch toggles to the OFF position.
•Firmly grasp the top lip of the Module and pull the
Module directly out of the module bay.
To replace a dimmer module:
•Locate the correct circuit numbers, note there may be
a pair of circuits per each dimmer module.
with the appropriate shelf slots, slide the module in very
firmly to assure solid connections are made.
DO NOT SLAM MODULES INTO THE RACK!
•After carefully lining up the sides of the modules
 Loading...