25
Switching on the system
VERY IMPORTANT:
Before connecting the equipment to the power supply or mains, check that the correct
voltage has been selected using the selector on the bottom of the console. 230 V~
(default voltage), 115 V~ (depending on countr
y).
SWITCHING ON
To start up the system, press the top left key so that the console goes from OFF stand-by
to ON
.
LANGUAGE
Select the language using the
and keys.
Press OK to confirm and the key to exit.
After selecting the language the system requests the SET-UP or selection of the zones that are going
to be used.
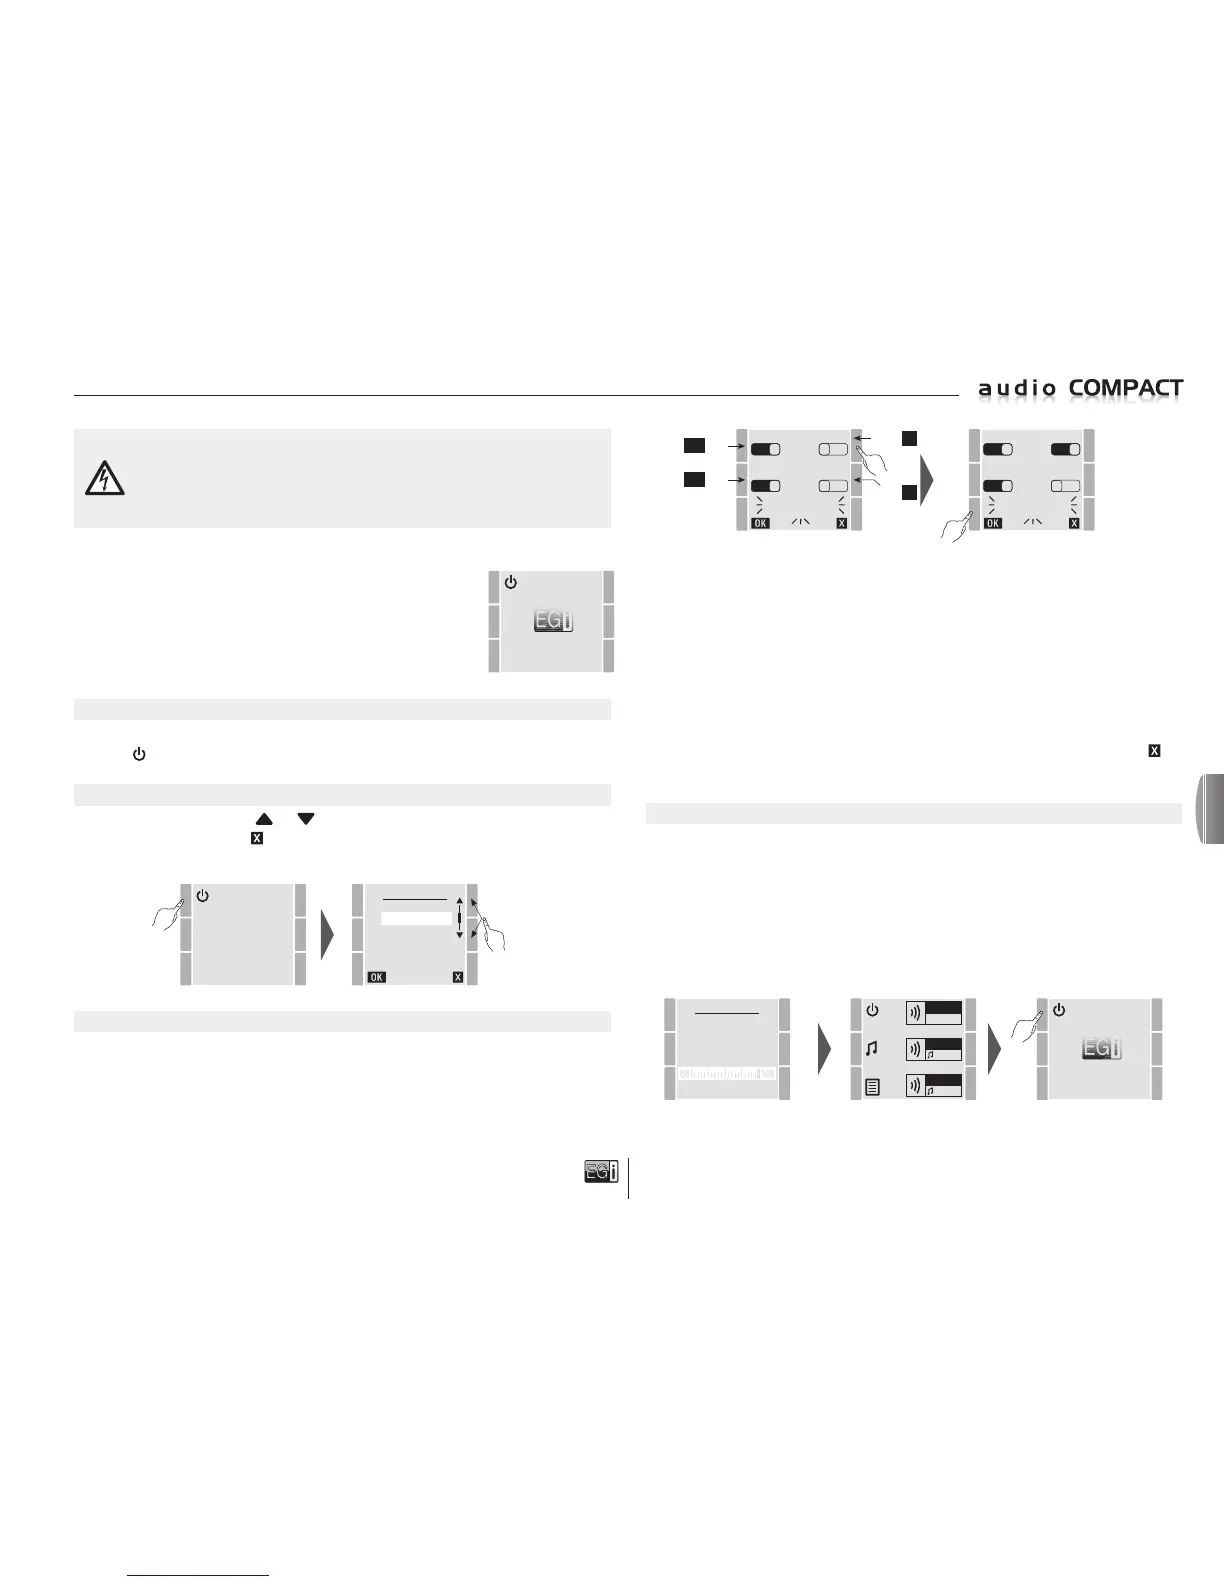
ZONE 1 ZONE 3
1 1
ZONE 2 ZONE 1+2
1 0
SELECT
ACTIVE ZONES
In the example shown above, ZONE 3 is added to ZONE 1 and ZONE 2, that are the default zones.
The system also allows Z1 and Z2 to be combined into one single zone so that the 2 rear outputs
Z1 and Z2 operate at the same time, making a total of 100 W available for one zone provided that
each output has a different line of speakers. In this case, music and messages will be played at
the same volume through both outputs.
So:
If ZONE 1 or ZONE 2 is activated, ZONE 1+2 will be automatically disabled.
If ZONE 1+2 is activated ZONE 1 and ZONE 2 are automatically disabled.
As a rule, if you are not sure we recommend activating the 3 zones individually.
Once the zones have been selected, press the OK key to proceed with SET-UP, or press the
key
to return to the home screen.
AUTOSCAN
After the zone SET-UP has been completed, the AUTOSCAN process commences.
This process memorises the 30 best radio stations according to the reception sensitivity and scans
for their names by FM/RDS. This process can take more than one minute.
Once completed, the system is now initially programmed for use and the start screen is displayed.
On the start screen the system is ON.
To switch it off, press the top left key. The console will go to stand-by mode. The console will not
lose the data (even in the event of a power cut) and will go to OFF stand-by.
AUTOSCAN
NEW
FM LIST
27/30
KISS FM
ZONE 1
FM
ZONE 2
FM
ZONE 3
FM
ZONE 1 ZONE 3
1 0
ZONE 2 ZONE 1+2
1 0
SELECT
ACTIVE ZONES
First connection
When first connected to the power supply, the system carries out an initialising
process that begins when it begins to receive power.
The EGi logo is displayed and the unit goes to stand-by.
After a few seconds the screen turns off and can be activated again
when any key is pressed.
LANGUAGE
DEUTSCH
ENGLISH
ESPAÑOL
FRANÇAIS
ITALIANO
PORTUGUES
SELECTION OF ZONES AND SET-UP
Only select the zones that are going to be used or that are connected.
For example, if only ZONA1 is required then select 1 only.
If only 2 or 3 is required, select the desired zone only.
If more than 2 or 3 zones are required, select the zones to be used, leaving the unwanted zone free.
(Console start screen)
YES / NO
YES / NO
YES / NO
YES / NO
en
 Loading...