EN
- 10 -
CAUTION!
Residual risks
Even if you use this electric power tool in
accordance with the instructions, certain
residual risks cannot be eliminated. The
following hazards may arise in connection
with the equipment‘s construction and
layout:
1. Lung damage if no suitable protective dust
mask is used.
2. Damage to hearing if no suitable ear
protection is applied.
3. Health damage caused by hand-arm
vibrations if the equipment is used over a
longer period or is not properly guided and
maintained.
4. Risk of eye damage if suitable safety goggles
are not worn.
This equipment generates an electromagnetic
fi eld during operation. Under certain
circumstances this fi eld may actively or passively
impede medical implants. To reduce the risk of
serious or fatal injuries, we recommend persons
with medical implants to consult their doctor and
the manufacturer of the medical implant prior to
using the equipment.
5. Before starting the equipment
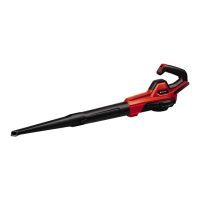
5.1 Fitting the blower tube (Fig. 3/4)
Install the blower tube onto the motor unit. The
groove (2) must be pushed into the guide (3)
when you do this. Turn the blower tube to the right
to secure it in its fi nal position on the motor unit.
Caution! The tube must be turned as far as it will
go to make sure it is fi rmly secured in position.
5.2 Fitting the battery (Fig. 6)
Important! Before fi tting the battery you must
always set the On/Off slide switch to OFF (see
section 6.1).
Press the push-lock button of the battery as
shown in Fig. 6 and push the battery into the
mount provided. When the battery pack is
positioned as in Fig. 6, make sure that the push-
lock button latches in place! To remove the
battery, proceed in reverse order.
5.3 Charging the Lithium-Ion battery
(not included)
The corresponding instructions can be found
in the original operating instructions for your
charger.
5.4 Battery capacity indicator (Fig. 7)
Press the battery capacity indicator switch (13).
The battery capacity indicator (12) shows the
charge status of the battery using 3 LEDs.
All 3 LEDs lit:
The battery is fully charged.
2 or 1 LED(s) lit:
The battery has an adequate remaining charge.
1 LED fl ashing:
The battery is empty, recharge the battery.
All LEDs fl ashing:
The temperature of the battery is too low. Remove
the battery from the device and leave it at room
temperature for a day. If the error occurs again,
this means that the battery has been completely
depth-discharged and is defective. Remove the
battery from the device. Never use or charge a
defective battery.
6. Operation
Caution!
If you point the air fl ow at other people, animals or
objects (e.g. windows), this could cause injuries
and damage. Check that all the components are
correctly seated.
•
Point the air flow away from yourself.
•
Never point the air flow at other people,
animals or objects.
•
Do not blow away any hard objects such as
stones or branches.
6.1 Switching the equipment On/Off (Fig. 5)
•
This equipment comes with an On/Off slide
switch (4).
•
To switch on, press the slide switch to the
right into the housing (ON position). The
equipment will blow at its lowest level.
•
To switch off, press the slide switch to the left
into the housing (OFF position).
Anl_GP_LB_18_200_Li_E_SPK7_USA.indb 10Anl_GP_LB_18_200_Li_E_SPK7_USA.indb 10 21.09.2023 11:01:2821.09.2023 11:01:28