GB
- 15 -
4. Technical data
Mains voltage: ...................220-240 V ~ 50/60 Hz
Power input: ............................................ 1250 W
Tank volume: ..................................................20 l
Protection class: ...........................................II /
쓑
Weight: ................................................. ca. 3.9 kg
5. Before starting the equipment
Before you connect the equipment to the mains
supply make sure that the data on the rating plate
are identical to the mains data.
Warning!
Always pull the power plug before making
adjustments to the equipment.
The appliance may only be connected to a shock-
proof socket.
5.1 Assembling the appliance
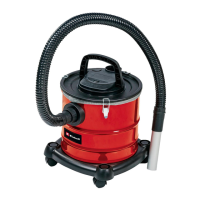
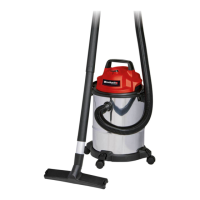
Fitting the appliance head (Fig. 2-5)
The appliance head (3) is fastened to the con-
tainer (7) by the locking hook (6). To remove the
appliance head (3), open the locking hook (6) and
remove the appliance head (3). When fi tting the
appliance head (3), make sure that the locking
hook (6) locks into place correctly.
Plug the vacuum tube (9) onto the end of the suc-
tion hose (10).
Fit the suction hose (10) onto the connection (8)
and turn until securely attached.
5.2 Fitting the fi lter
Notice!
Never use the ash vacuum without the fi lter!
Always ensure that the fi lters are perfectly secure.
Removing/fi tting the pleated fi lter (Fig. 6)
First undo the wing nut (12) and then remove the
pleated fi lter (11) and the fi lter cage (4) by pulling.
Assemble in reverse order. Check that the fi lter is
securely seated at all times.
Important!
The equipment comes with a safety switch (z)
which does not allow the equipment to be swit-
ched on when the pleated fi lter and the fi lter bas-
ket are not fi tted.
Fitting the coarse fi lter (Fig. 7)
Fit the coarse fi lter (13) as shown in Figure 7.
5.3 Fitting the wheels (Fig. 9)
Fasten the wheels (14) as shown in Figure 9.
6. Operation
6.1 ON/OFF switch (Fig. 1/2)
Press the ON/OFF switch (2) to switch the equip-
ment ON and OFF.
6.2 Blowing
Connect the suction hose (10) to the blow con-
nector (5) of the ash vacuum cleaner.
6.3 Cleaning the appliance head
Clean the appliance regularly with a damp cloth
and some soft soap. Do not use cleaning agents
or solvents; these may be aggressive to the plas-
tic parts in the appliance.
6.4 Cleaning the container
The container can be cleaned with a damp cloth
and some soft soap or under running water, de-
pending on the amount of dirt.
6.5 Cleaning the fi lter
Clean the fi lter basket (4), the pleated fi lter (11)
and the coarse fi lter (13), e.g. by tapping and
brushing or by blowing out with compressed air at
low pressure.
7. Replacing the power cable
Danger!
If the power cable for this equipment is damaged,
it must be replaced by the manufacturer or its
after-sales service or similarly trained personnel
to avoid danger.
Anl_TC_AV_1720_DW_SPK13.indb 15Anl_TC_AV_1720_DW_SPK13.indb 15 17.08.2021 14:15:4917.08.2021 14:15:49