GB
- 20 -
purchasing the article and upon presentation of
a valid bill of purchase. Also, refer to the warranty
table in the warranty provisions at the end of the
operating instructions.
•
Open the packaging and take out the equip-
ment with care.
•
Remove the packaging material and any
packaging and/or transportation braces (if
available).
•
Check to see if all items are supplied.
•
Inspect the equipment and accessories for
transport damage.
•
If possible, please keep the packaging until
the end of the guarantee period.
Danger!
The equipment and packaging material are
not toys. Do not let children play with plastic
bags, foils or small parts. There is a danger of
swallowing or suff ocating!
•
Original operating instructions
•
Safety instructions
The equipment comes with a chain (z) on the tank
bottom. The chain helps to prevent static charging
during use.
3. Proper use
The cordless wet and dry vacuum cleaner is desi-
gned for wet and dry vacuuming using the appro-
priate fi lter. The equipment is not suitable for the
vacuuming of combustible, explosive or harmful
substances.
The equipment is to be used only for its prescri-
bed purpose. Any other use is deemed to be a
case of misuse. The user / operator and not the
manufacturer will be liable for any damage or inju-
ries of any kind caused as a result of this.
Please note that our equipment has not been de-
signed for use in commercial, trade or industrial
applications. Our warranty will be voided if the
equipment is used in commercial, trade or indust-
rial businesses or for equivalent purposes.
4. Technical data
Voltage supply to motor ......................... 36 V DC
Tank volume: ................................................. 30 l
Weight (without battery): ........................... 8.8 kg
5. Before starting the equipment
5.1 Appliance assembly
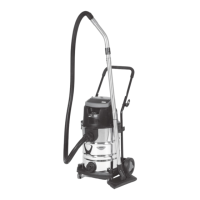
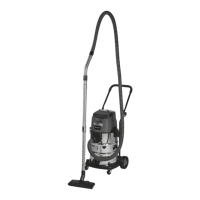
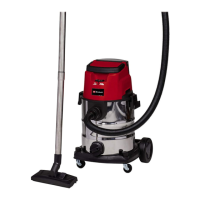
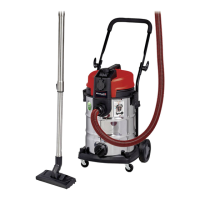
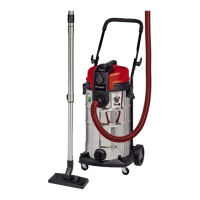
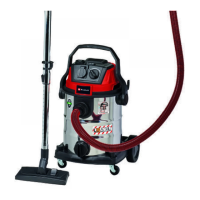
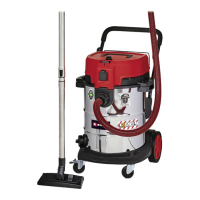
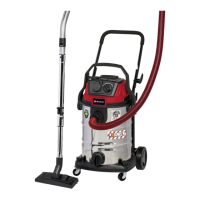
Fitting the appliance head (Fig. 1, 4)
The appliance head (3) is fastened to the con-
tainer (7) by the locking hook (6). To remove the
appliance head (3), open the locking hook (6) and
remove the appliance head (3). When fi tting the
appliance head (3), make sure that the locking
hook (6) locks into place correctly.
Fitting the wheels (Figs. 5a-5g)
Place a split pin for fi tting the wheels (31) through
the appropriate hole in the axle (33) and fi t a
washer (30), a wheel (24) and a washer to the
axle (33) (Figs. 5a-5b). Now slide the axle (33)
through the guides provided for it on the undersi-
de of the tank (7) (Fig. 5c). Fit a washer and the
second wheel (24) to the empty end of the axle
(33) and secure it with the other washer (30) and
the split pin (31) (Figs. 5d-5f). Push the covers
(32) on to the outside of the wheels (24) so that
the detents engage on the covers (32) for the
wheel (24) (Fig. 5g).
Fitting the castors (Fig. 5/13)
Fit the castors (13) into the appropriate mountings
on the underside of the tank (7). Push the castors
(13) fi rmly into the mounting until they engage
with a clicking noise (Fig. 5).
Fitting the push bar (Fig. 10)
Place the push bar (37) into the push bar connec-
tions (a) of the tank and secure the push bar with
the supplied screws (34) and fastening nuts (38)
as shown in Figure 10.
5.2 Fitting the fi lter
Notice!
Never use the wet and dry vacuum cleaner wit-
hout a fi lter!
Always ensure that the fi lters are perfectly secure!
Fitting the foam fi lter (Fig. 6/15)
For wet-vacuuming, slip the supplied foamed
plastic fi lter (15) over the fi lter basket (fi g. 3/4).
Anl_TE_VC_36_30_Li_S_Solo_SPK9.indb 20Anl_TE_VC_36_30_Li_S_Solo_SPK9.indb 20 11.06.2018 08:31:2711.06.2018 08:31:27

 Loading...