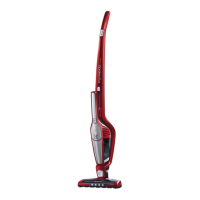
9
Be fore you s tart … ch e ck th e
voltage
Be fore conne cting th e cle ane r to
an e le ctrical s upply e ns ure th at
voltage m ark e d on th e data plate
(on th e unde rs ide of cle ane r) is
corre ct for your e le ctrical s upply. If
is not, do not us e th e cle ane r but
re fe r back to your de ale r.
ELECTRICAL SUPPLY INSTRUCTIONS
Conne cting to your e le ctrical s upply
Pe rm ane ntly conne cte d to th e cle ane r is a m ains s upply (2- core ) cable
fitte d w ith a non-re w irable plug incorporating a 13A fus e . In th e e ve nt
of th e fus e re q uiring re place m e nt th e fus e cove r s h ould be re m ove d
us ing a s m all s cre w drive r. Th e old fus e M UST be re place d by a 13A
ASTA approve d BS1362 fus e and th e fus e cove r m us t be re place d
be fore th e plus is us e d again. In th e e ve nt of los s of th e fus e cove r,
re place m e nts can be obtaine d from your Ele ctrolux de ale r or
Ele ctricity Board and m us t be of th e s am e colour as indicate d by th e
coloure d ins e rt on th e bas e plug.
If difficulty is e xpe rie nce d in obtaining a re place m e nt, contact your
ne are s t Ele ctrolux Se rvice Ce ntre . (Ple as e s e e th e s e parate Ele ctrolux
Se rvice O rganis ation le afle t).
In no circum s tance s m us t th e plug be us e d w ith out a corre ct
fus e cove r fitte d.
If th e plug th at is fitte d to your appliance is not s uitable for your s ock e t
outle t, it m us t be cut off and th e appropriate plug fitte d. Re m ove th e
fus e from th e cut off plug. Th e cut off plug s h ould th e n be dis pos e d of
to pre ve nt h az ard of s h ock s in cas e it s h ould be plugge d into a 13 Am p
s ock e t in anoth e r part of your h om e .
Th e w ire s in th e m ains cable of th is appliance are coloure d in
accordance w ith th e follow ing code :
Blue : Ne utral.
Brow n: Live .
As th e colours of th e w ire s in th e m ains cable of th is appliance
m ay not corre s pond w ith th e coloure d m ark ings ide ntifying th e
te rm inals in your plug, proce e d as follow s :
Th e w ire w h ich is coloure d blue m us t be conne cte d to th e
te rm inal w h ich m ark e d w ith th e le tte r N or coloure d black . Th e
w ire w h ich is coloure d brow n m us t be conne cte d to th e te rm inal
w h ich is m ark e d th e le tte r L or coloure d re d.
If us ing a th re e - pin plug, do not m ak e any conne ction to th e
te rm inal m ark e d w ith th e le tte r E or by th e e arth s ym bol or
coloure d gre e n or gre e n-and- ye llow . [Th is cle ane r is double
ins ulate d and no e arth - conne ction is ne ce s s ary.]
It is in your inte re s t to e ns ure th at th e plug is corre ctly attach e d
to th e m ains cable . In cas e of doubt, h ave it done by a q ualifie d
e le ctrician, as Ele ctrolux cannot re gard th e re pair of faults on
th e plug conne ction as a s e rvice th at can be give n fre e of
ch arge unde r th e te rm s of guarante e .
As a ge ne ral guide to fitting any plug
• Ens ure th e le ngth s of w ire ins ide th e plug are pre pare d
corre ctly.
• Conne ction s h ould be firm ly m ade afte r all conductor s tands
are e nte re d into th e te rm inal pos ts .
• W h e n pre paring th e cable e nds tak e care not to dam age th e
oute r s e al, or ins ulation s urrounding th e inne r conductors .
• Tigh te n all s cre w s .
• Re place th e top cove r of th e plug and s e cure .