EasyManua.ls Logo

Electrolux EFG716R - User Manual

Electrolux EFG716R
296 pages
Go to English
Print Icon
To Next Page IconTo Next Page
Loading...
EFG716R
LFG716R
BG
Ръководство за употреба | Аспиратор 2
CS Návod k použití | Odsavač par 12
DA Brugsanvisning | Emhætte 21
DE Benutzerinformation | Herd-Abzugshaube 30
EL Οδηγίες Χρήσης | Απορροφητήρας 40
EN User Manual | Cooker Hood 50
ES Manual de instrucciones | Campana extractora 59
ET Kasutusjuhend | Õhupuhasti 69
FI Käyttöohje | Liesituuletin 78
FR Notice d'utilisation | Hotte 87
HR Upute za uporabu | Kuhinjska napa 97
HU Használati útmutató | Konyhai szagelszívó 106
IT Istruzioni per l’uso | Cappa da cucina 116
KK Қолдану туралы нұсқаулары | Пештің сорғыш қондырғысы 126
LT Naudojimo instrukcija | Garų rinktuvas 136
LV Lietošanas instrukcija | Tvaika nosūcējs 145
MK Упатство за ракување | Аспиратор 154
NL Gebruiksaanwijzing | Afzuigkap 164
NO Bruksanvisning | Ventilator 174
PL Instrukcja obsługi | Okap kuchenny 183
PT Manual de instruções | Exaustor 193
RO Manual de utilizare | Hotă pentru aragaz 203
RU Инструкция по эксплуатации | Кухонная вытяжка 212
SK Návod na používanie | Odsávač pár 223
SL Navodila za uporabo | Kuhinjska napa 232
SQ Udhëzimet për përdorim | Aspirator 241
SR Упутство за употребу | Аспиратор штедњака 250
SV Bruksanvisning | Spisfläkt 260
TR Kullanma Kılavuzu | Davlumbaz 269
UK Інструкція | Витяжка 278
AR 󰥟󰥵󰥠 󰤫󰤩󰤙󰤵󰥥󰥠 |󰐊󰑉󰐚󰎗󰎧 󰎗󰑀󰎝󰎩󰎦 295

Table of Contents

Question and Answer IconNeed help?

Do you have a question about the Electrolux EFG716R and is the answer not in the manual?

Overview

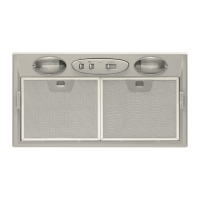
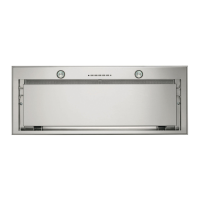
This document is a multi-language user manual for the Electrolux EFG716R and LFG716R cooker hoods.

The cooker hood is designed for domestic use above hobs, cookers, and similar cooking devices in an indoor environment. It can also be used in offices, hotel guest rooms, bed & breakfast guest rooms, farm guest houses, and similar accommodations, provided the usage does not exceed average domestic usage levels.

Control Panel Overview:

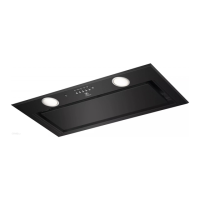
The control panel features seven buttons:

  1. Hob²Hood Indicator: Shows the status of the Hob²Hood function, which allows controlling the hood from a compatible hob.
  2. Lamp Button: Turns the lights on and off.
  3. First Speed / Off Button: Activates the first motor speed. A second press turns off the appliance.
  4. Second Speed Button: Activates the second motor speed.
  5. Third Speed Button: Activates the third motor speed.
  6. Maximum Speed Button: Activates the maximum motor speed.
  7. Filter Notification Indicator: Reminds the user to change or clean the charcoal filter and clean the grease filter.

Usage Features:

The manual recommends different speeds based on cooking intensity:

  • Speed 1 ( ): For heating food and cooking with covered pots.
  • Speed 2 ( ): For cooking with covered pots on multiple cooking zones or burners, and gentle frying.
  • Speed 3 ( ): For boiling, frying large quantities of food without a lid, and cooking on multiple cooking zones or burners.
  • Maximum Speed ( ): For boiling, frying large quantities of food without a lid, and high humidity. The hood operates at maximum speed for 6 minutes, then returns to the previous setting.

It is recommended to leave the hood operating for approximately 15 minutes after cooking to ensure complete extraction of vapours.

Hob²Hood Function:

This is an automatic function that connects the hob with the hood using an infrared signal communicator. The fan speed is automatically determined by the hob's mode setting and the temperature of the hottest cookware. The fan can also be operated manually from the hob's control panel. The function can be activated from the hob's control panel.

Filter Notification:

The filter alarm reminds the user to change or clean the charcoal filter and clean the grease filter.

  • If the grease filter needs cleaning, the filter indicator ( ) turns on for 30 seconds.
  • If the charcoal filter needs replacement or cleaning, the filter indicator ( ) flashes for 30 seconds. To reset the function, press the button ( ) for 3 seconds. To activate the function, press the button ( ) for 3 seconds; the indicator flashes twice. To deactivate the function, press the button ( ) for 3 seconds; the indicator flashes once.

Remote Control:

The appliance can be controlled with a remote control, which can be purchased from a local supplier. The connection is enabled by default. To connect or disconnect the remote control, switch off the appliance and press the button ( ) for 3 seconds. The indicator on the control panel flashes twice if enabled and once if disabled.

Maintenance Features:

  • General Cleaning:
    • Use a soft cloth with warm water and a mild detergent.
    • Avoid abrasive detergents, brushes, steam cleaners, water sprays, harsh abrasive cleaners, or sharp metal scrapers.
    • After cooking, allow the appliance to cool down and dry with a clean cloth or paper towels to prevent stains.
    • Clean the appliance and grease filters monthly.
    • Clean the interior of the appliance with a cloth.
  • Grease Filter Cleaning:
    • Grease filters are mounted with clips and pins.
    • To clean, press the handle of the mounting clip on the filter panel (1), slightly tilt the front of the filter downwards (2), and pull it out.
    • Clean the filters with a sponge and non-abrasive detergents or in a dishwasher.
    • If using a dishwasher, set it to a low temperature and a short cycle. Discolouration of the grease filter may occur but does not affect performance.
    • To remount, follow the removal steps in reverse order.
  • Charcoal Filter Replacement:
    • Charcoal filters are non-washable and cannot be regenerated.
    • They should be replaced approximately every 4-6 months or more frequently with heavy usage.
    • To replace, remove the grease filters. Press the front edge of the charcoal filter into the slot towards the bottom part, then slightly tilt the front downwards.
    • Install a new filter by following the steps in reverse order.
  • Lamp Replacement:
    • The appliance is supplied with an LED lamp and a separate control gear (LED driver).
    • These parts can only be replaced by a qualified technician. Refer to the "Service" section in the "Safety Instructions" chapter for malfunctions.

Important Technical Specifications (Troubleshooting):

  • Appliance not activating: Check if the appliance is correctly connected to the electrical supply. If the fuse is blown repeatedly, contact a qualified electrician.
  • Lamp not operating: Replace the lamp.
  • Insufficient vapour absorption: Change the motor speed to a higher setting.
  • Filter alarm indicator on: Clean the grease filter or replace/clean the charcoal filter.

Environmental Concerns:

Materials marked with the symbol (recycling symbol) should be recycled. Packaging should be placed in appropriate containers for recycling. Electrical and electronic waste marked with the crossed-out wheeled bin symbol should not be disposed of with household waste. Return the product to a local recycling facility or contact the municipal office for proper disposal.

Electrolux EFG716R Specifications

General IconGeneral
BrandElectrolux
ModelEFG716R
CategoryVentilation Hood
LanguageEnglish

Related product manuals