3.3 Gas Connection
WARNING!
The following instructions
about installation,
connection and maintenance
must be carried out by
qualified personnel in
compliance with standards
and local regulations in
force.
Choose fixed connections or use a
flexible pipe in stainless steel in
compliance with the regulation in force. If
you use flexible metallic pipes, be careful
they do not come in touch with mobile
parts or they are not squeezed. Also be
careful when the hob is put together with
an oven.
Make sure that the gas
supply pressure of the
appliance obeys the
recommended values. The
adjustable connection is
fixed to the comprehensive
ramp by means of a
threaded nut R 1/2". Screw
the parts and tighten
everything with teflon tape, if
necessary, to get the right
direction.
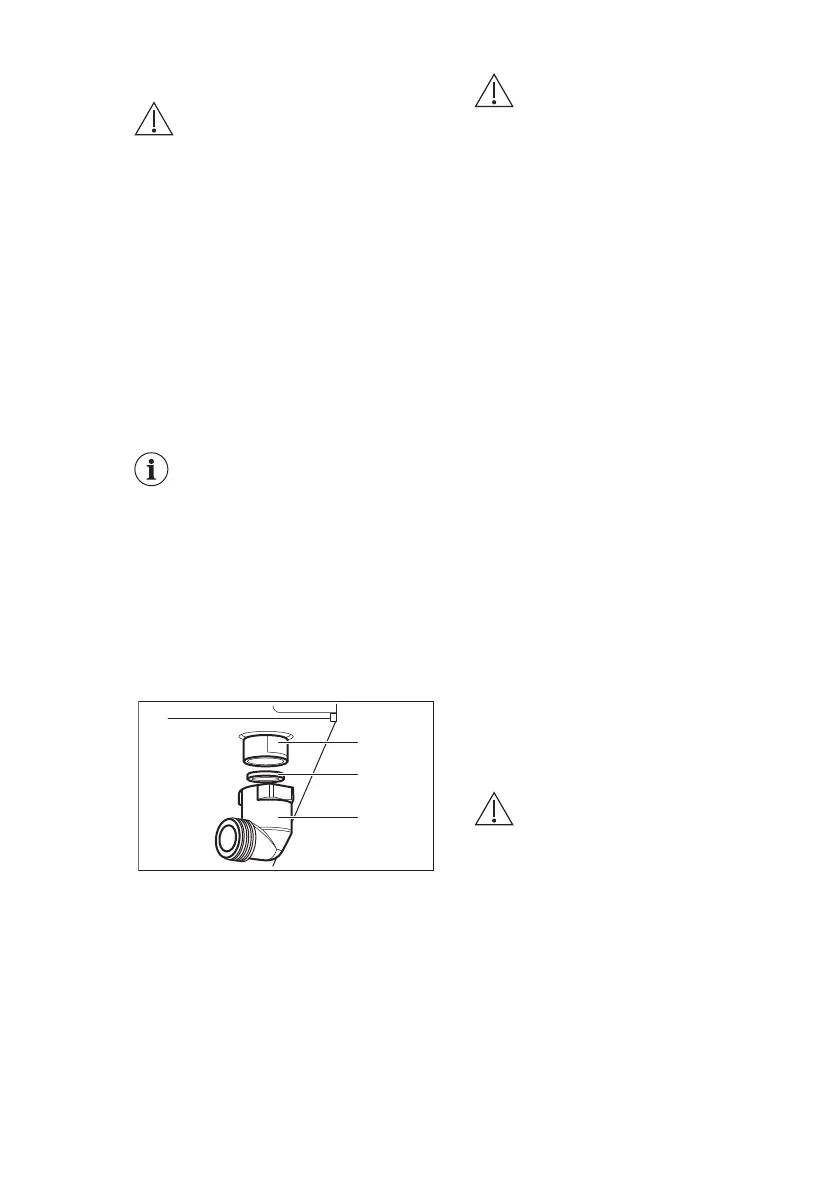
A. End of shaft with nut
B. Washer supplied with the appliance
C. Elbow supplied with the appliance
WARNING!
It is important to install the
elbow correctly. Make sure
that the shoulder is on the
end of the thread. Then
install it on the hob
connecting pipe. Incorrect
assembly may cause a gas
leakage.
Liquid gas
Use the rubber pipe holder for liquid gas.
Always engage the gasket. Then
continue with the gas connection.
The flexible pipe is prepared for apply
when:
• it can not get hot more than room
temperature, higher than 30°C;
• it is no longer than 1500 mm;
• it shows no throttles;
• it is not subject to traction or torsion;
• it does not get in touch with cutting
edges or corners;
• it can be easily examined in order to
make sure its condition.
The control of preservation of the flexible
pipe consists in checking that:
• it does not show cracks, cuts, marks
of burnings on the two ends and on its
full length;
• the material is not hardened, but
shows its correct elasticity;
• the fastening clamps are not rusted;
• expired term is not due.
If one or more defects are visible, do not
repair the pipe, but replace it.
WARNING!
When installation is
complete, make sure that
the seal of each pipe fitting
is correct. Use a soapy
solution, not a flame!
3.4 Injectors replacement
1. Remove the pan supports.
2. Remove the caps and crowns of the
burner.
3. With a socket spanner 7 remove the
injectors and replace them with the
ones which are necessary for the
type of gas you use (see table in
"Technical Data" chapter).
ENGLISH 9
 Loading...