EasyManua.ls Logo

Electrolux EHI645BB - User Manual

Electrolux EHI645BB
20 pages
Print Icon
To Next Page IconTo Next Page
Loading...
Installation & User manualInduction hob
EHI645BB, EHI845BB

Questions and Answers

Summary

Congratulations

Welcome to Electrolux

Welcome message from the manufacturer.

Before Using Your Appliance

Conditions of Use

Defines intended household and similar applications for the appliance.

Before You Call for Service

Instructions on what to do before contacting service.

Symbols and Warnings

Safety Information

Children and Vulnerable People Safety

Safety precautions for children and vulnerable individuals.

Installation Safety Warnings

Crucial safety advice for appliance installation.

Safety Information Continued

Safe Use and Operation

Guidelines for safe operation and preventing hazards.

Risk of Fire and Explosion

Warnings related to fire and explosion hazards.

Appliance Care and Cleaning Safety

Safety aspects related to cleaning and maintenance.

Safe Disposal

Instructions for the safe disposal of the appliance.

Product Description

Control Panel Layout

Illustrates and labels the appliance's control panel components.

Product Description Continued

Heat Setting Displays

Explains the various symbols and their meanings on the display.

OptiHeat Control Explanation

Details the 3-step residual heat indicator system.

Operating Instructions

Powering On and Off

Steps to turn the appliance on and off.

Automatic Switch-Off Function

Explains how the appliance automatically turns off.

Bridge Function Operation

How to use the Bridge Function with accessories.

Adjusting Heat Settings

Guide on how to set and change cooking heat levels.

Operating Instructions Continued

Automatic Heat Up Function

How to use the feature for faster heating.

Power Function and Management

Explains power boost and distribution between zones.

Timer Functions

Guide to using Count Down, Count Up, and Minute Minder timers.

Operating Instructions Continued

Stop+Go Function

How to set all zones to the lowest heat setting.

Control Panel Lock

How to prevent accidental changes to heat settings.

Child Safety Device Operation

Features and operation of the child safety lock.

Hob²Hood Function Details

Details the automatic hood control system.

Automatic Mode Settings

How to change the automatic hood operation mode.

Helpful Hints and Tips

Fan Speed, Light, and Sound Control

Manual fan control, auto light, and OffSound settings.

Induction Cookware and Zone Usage

Guidance on suitable cookware and using cooking zones.

Understanding Operating Noises

Explanation of normal sounds during appliance operation.

Helpful Hints and Tips Continued

Energy Saving Tips

Advice on how to conserve energy while cooking.

Cooking Zone Efficiency

Explains how cookware diameter affects zone efficiency.

Hob²Hood Function Tips

Advice for optimal use of the Hob²Hood feature.

Examples of Cooking Applications

Cooking Application Guide

Provides examples of heat settings, uses, times, and power consumption.

Information on Acrylamides

Health advice regarding acrylamide formation during cooking.

Care and Cleaning

Cleaning Procedures

Instructions for cleaning the appliance after use.

Troubleshooting

Surface and Activation Issues

Problems related to surface marks, pitting, and appliance activation.

Operational and Function Errors

Issues with signals, heat indicators, and specific functions.

Troubleshooting Continued

Sensor and Signal Problems

Issues with hot sensor fields and lack of panel signals.

Indicator Codes and Error Messages

Explains symbols like , P, E, and E4 errors.

Installation

Built-in Appliance Requirements

Guidelines for installing the appliance into units and work surfaces.

Connection Cable Specifications

Details the correct type of mains cable for connection.

Technical Information

Cooking Zone Specifications

Details power, duration, and minimum cookware diameter for zones.

Environment Concerns

Information on recycling and environmentally friendly disposal.

Notes

Electrolux Warranty Terms

Warranty Coverage and Exclusions

Details what is covered and excluded under the warranty.

Claiming Under Warranty

Steps and contact information for making a warranty claim.

Overview

This document describes the Electrolux EHI645BB and EHI845BB induction hobs, providing comprehensive information on their functions, usage, and maintenance. These appliances are designed for household and similar applications, including staff kitchen areas, farmhouses, hotels, motels, and bed and breakfast environments.

Function Description

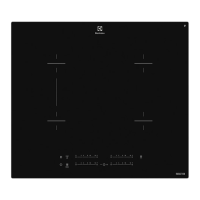
The induction hob features multiple cooking zones, with the EHI845BB model having five and the EHI645BB model having four. Each cooking zone is an induction type, meaning it generates heat directly in the cookware's bottom through an electromagnetic field. A central control panel allows for easy operation of all functions.

The hob includes a "Power function" that provides increased power to induction cooking zones for a maximum of 5 minutes, after which it automatically reverts to a lower heat setting. This function is particularly useful for rapidly boiling large quantities of water. The power management system intelligently distributes power between two cooking zones in a pair, ensuring optimal performance.

A "Bridge function" is available, specifically designed for the two left-side cooking zones. When activated, these two zones operate as a single, larger zone, ideal for use with accessories like the Infinite Plancha. This function can be activated or deactivated via the control panel, allowing the cooking zones to operate independently when not bridged.

The appliance incorporates an "Automatic heat up" function, which temporarily sets the cooking zone to its highest heat setting before reducing it to the desired level, thus accelerating the cooking process.

The hob also features a "Stop+Go" function, which sets all active cooking zones to the lowest heat setting. This is useful for temporary interruptions during cooking, as it maintains warmth without continuing to cook. While "Stop+Go" is active, the timer function remains operational.

For enhanced safety, the hob includes a "Lock" function that prevents accidental changes to the heat settings while cooking zones are active. Additionally, a "Child safety device" prevents unintended operation of the hob altogether. Both functions are activated and deactivated through specific sequences on the control panel.

A notable feature is the "Hob2Hood" function, an advanced automatic system that connects the hob to a compatible rangehood via an infrared signal. This allows the rangehood's fan speed to adjust automatically based on the hob's mode setting and the temperature of the hottest cookware. Users can also manually control the fan speed from the hob. The rangehood's automatic light activation can also be configured through this function.

The "OptiHeat Control" is a 3-step residual heat indicator, displaying the level of residual heat on the glass ceramic surface. While induction zones heat cookware directly, the glass ceramic can still become hot from the cookware, and this indicator helps prevent burns.

The hob is equipped with various timer functions. A "Count down timer" allows users to set a specific duration for cooking, after which the cooking zone automatically switches off. A "Count up timer" monitors the elapsed time a cooking zone has been operating. A "Minute minder" can be used independently of the cooking zones to set a general reminder.

The appliance also features an "OffSound Control" function, allowing users to deactivate or activate the acoustic signals for various operations, such as touching the control panel or when timers elapse.

Usage Features

To activate the appliance, users touch the designated sensor field for 1 second. The appliance automatically deactivates under several conditions, including when all cooking zones are turned off, no heat setting is selected after activation, spills or objects are detected on the control panel for an extended period, the appliance overheats, incorrect cookware is used, or a cooking zone remains active without a heat setting change for too long.

Heat settings are adjusted by touching the control bar, allowing for precise control over cooking intensity. The "Power function" is activated by touching the 'P' sensor, and deactivated by selecting any heat setting between 1 and 14.

The "Bridge function" is activated by touching the designated sensor. Heat settings for the bridged zones are adjusted by touching any of the control sensors. Deactivating the "Bridge function" allows the zones to operate independently again.

The "Automatic heat up" function is initiated by touching 'P' and then immediately selecting the desired heat setting. To stop this function, the heat setting must be changed.

The "Stop+Go" function is activated by touching its sensor, and deactivated by touching it again, returning the zones to their previous heat settings.

The "Lock" function is activated by touching its sensor for 4 seconds, and deactivated by touching it again. The "Child safety device" is activated by starting the hob, not setting heat settings, and then touching the lock sensor for 4 seconds. It is deactivated by repeating this process. For a single cooking session override, the hob can be started, the lock sensor touched for 4 seconds, and a heat setting selected within 10 seconds.

For the "Hob2Hood" function, manual fan speed control is accessed by touching the designated sensor. Subsequent touches increase the fan speed, while reaching the intensive level and touching again sets the speed to 0. The automatic mode can be changed by deactivating the appliance, touching the lock sensor for 3 seconds twice, touching the Hob2Hood sensor a few times until the mode indicator appears, and then using the timer's '+' button to select a mode.

The "Count down timer" is set by selecting a cooking zone, then using the timer's '+' button to set the desired time. The "Count up timer" is started by selecting a cooking zone and then using the timer's '-' button. The "Minute minder" is set by touching the timer sensor and then using '+' or '-' to select the time. All timers can be stopped by touching the timer sensor.

Maintenance Features

Regular cleaning of the appliance is crucial to prevent surface deterioration. The hob should be cleaned after each use, and cookware with clean bottoms should always be used. Scratches or dark stains on the glass ceramic do not affect the appliance's operation.

For immediate removal of dirt, such as melted plastic, foil, or sugary food, a special scraper for glass should be used at an acute angle.

Once the appliance has cooled sufficiently, limescale rings, water rings, fat, stains, shiny metallic discolorations, and other marks can be removed using a special cleaning agent for glass ceramic or stainless steel. The appliance should then be cleaned with a moist soft cloth and neutral detergent, followed by drying with a clean cloth. Abrasive products, cleaning pads, solvents, or metal objects should not be used. Water spray and steam are also not recommended for cleaning.

The manual also provides troubleshooting guidance for common issues, such as the appliance not activating, acoustic signals sounding, residual heat indicators not appearing, or the Hob2Hood function not working. For example, if the appliance does not activate, it suggests checking if multiple sensor fields were touched simultaneously or if water/fat stains are on the control panel. If an error message like 'E4' appears, it indicates issues like dry-boiling cookware or incorrect cookware, and advises deactivating the appliance, removing hot cookware, and reactivating after 30 seconds.

The document emphasizes that damage caused by misuse, such as broken glass or scratches, is not covered under warranty. If issues persist after troubleshooting, users are advised to contact their dealer or customer service, providing data from the rating plate and any error messages.

Electrolux EHI645BB Specifications

General IconGeneral
TypeInduction Hob
Number of Cooking Zones4
Total Power7400 W
Control TypeTouch Control
Dimensions (W x D)590 x 520 mm
Installation TypeBuilt-In
Width590 mm
Frame TypeBevelled
Boost FunctionYes
Residual Heat IndicatorYes
Child Safety LockYes
TimerYes
Power Levels9
Dimensions (W x D x H)590 x 520 x 44 mm