Any electrical and/or plumbing work required to install
this appliance should be carried out by a qualified
electrician and/or plumber or competent person.
Remove all packaging before positioning the machine.
If possible, position the machine next to a water tap and a
drain.
During all operations that involve accessibility to internal
components the dishwasher has to be unplugged.
When inserting the machine, ensure that the water inlet hose,
the drain hose and the supply cable are not kinked or
squashed.
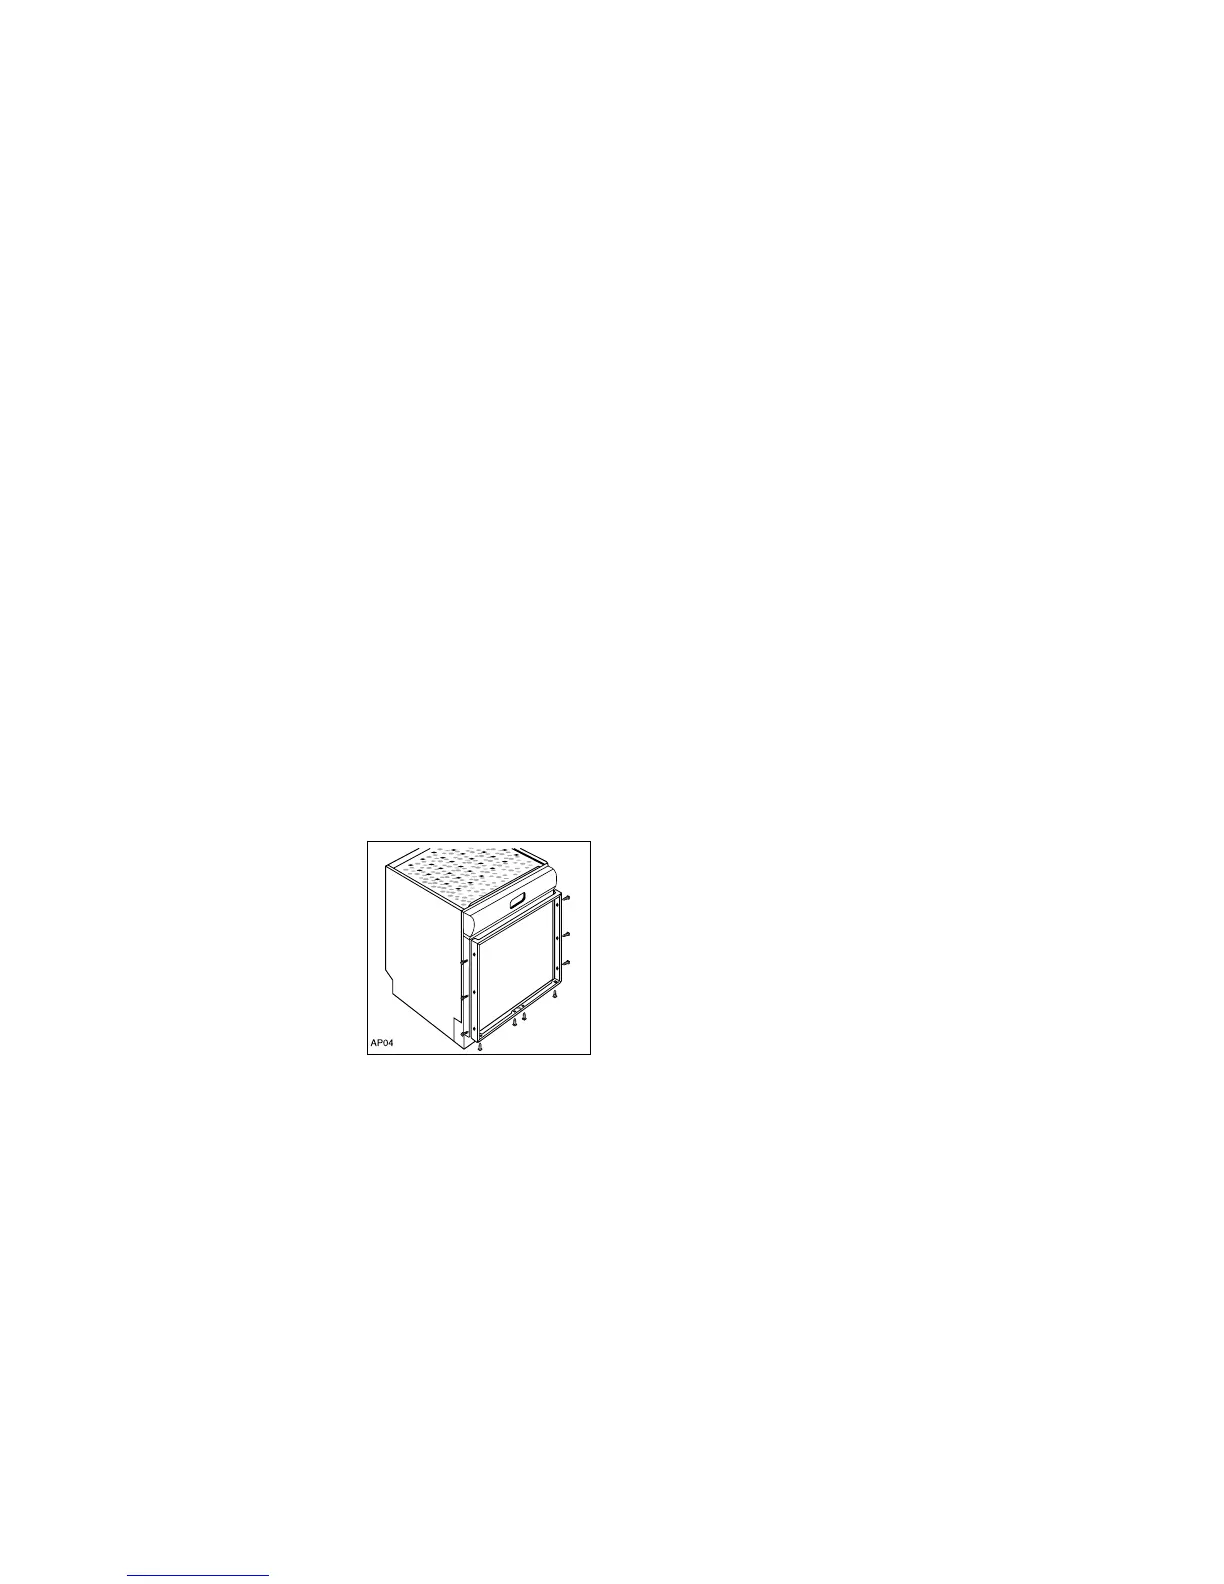
Fitting a decor panel on the door
The door of this machine has frames for fitting a laminate
decor panel in the colour required to match the dishwasher
with the rest of the kitchen furniture.
Note!
The panel should be fitted before positioning the machine.
The panel must have the following dimensions:
Width: mm 588
Height: mm 586
Thickness: mm 4 max.
To fit the panel:
- Take the door frame off after removing the retaining screws
around the edge.
- Position the panel, refit the frame and tighten the retaining
screws around the edge.
Water supply connections
This dishwasher may be connected to a cold water supply.
For making the connection itself, the coupling nut fitted to the
machine’s supply hose is designed to screw onto a 3/4" inch
BSP thread.
The water pressure must be within the limits given in the
"Technical specifications". Your local Water Authority will
advise you on the average mains pressure in your area.
The water inlet hose must not be kinked, crushed, or entangled
when it is being connected.
The dishwasher features fill and drain hoses which can be
turned either to the left or the right to suit the installation by
means of the locknut. The locknut must be correctly fitted
to avoid water leaks. (Attention! NOT all models of
dishwashers have fill and drain hoses provided with locknut. In
this case, this kind of facility is not possible).
If the machine is connected to new pipes or pipes which have
not been used for a long time, you should run the water for a
few minutes before connecting the inlet hose.
Do not use, for connection, old hoses which have been
used with another appliance.
The dishwasher is fitted with safety devices that prevent the
wash water returning into the drinking water system and
comply with the applicable plumbing regulations.
Water inlet hose with safety valve
After connecting the double-walled water inlet hose, the safety
valve is next to the tap. Therefore the water inlet hose is only
under pressure while the water is running. If the water inlet
hose starts to leak during this operation, the safety valve cuts
off the running water.
Please take care when installing the water inlet hose:
- The electrical cable for the safety valve is in the double-
walled water inlet hose. Do not immerse the water inlet hose
or the safety valve in water.
- If water inlet hose or the safety valve is damaged, remove
the mains plug immediately.
- A water inlet hose with safety valve must only be replaced by
a specialist or by the authorised Service Centre.
- Place the water inlet hose in such a way that it is never
higher than the bottom edge of the safety valve.
Installation instructions
16



 To Next Page