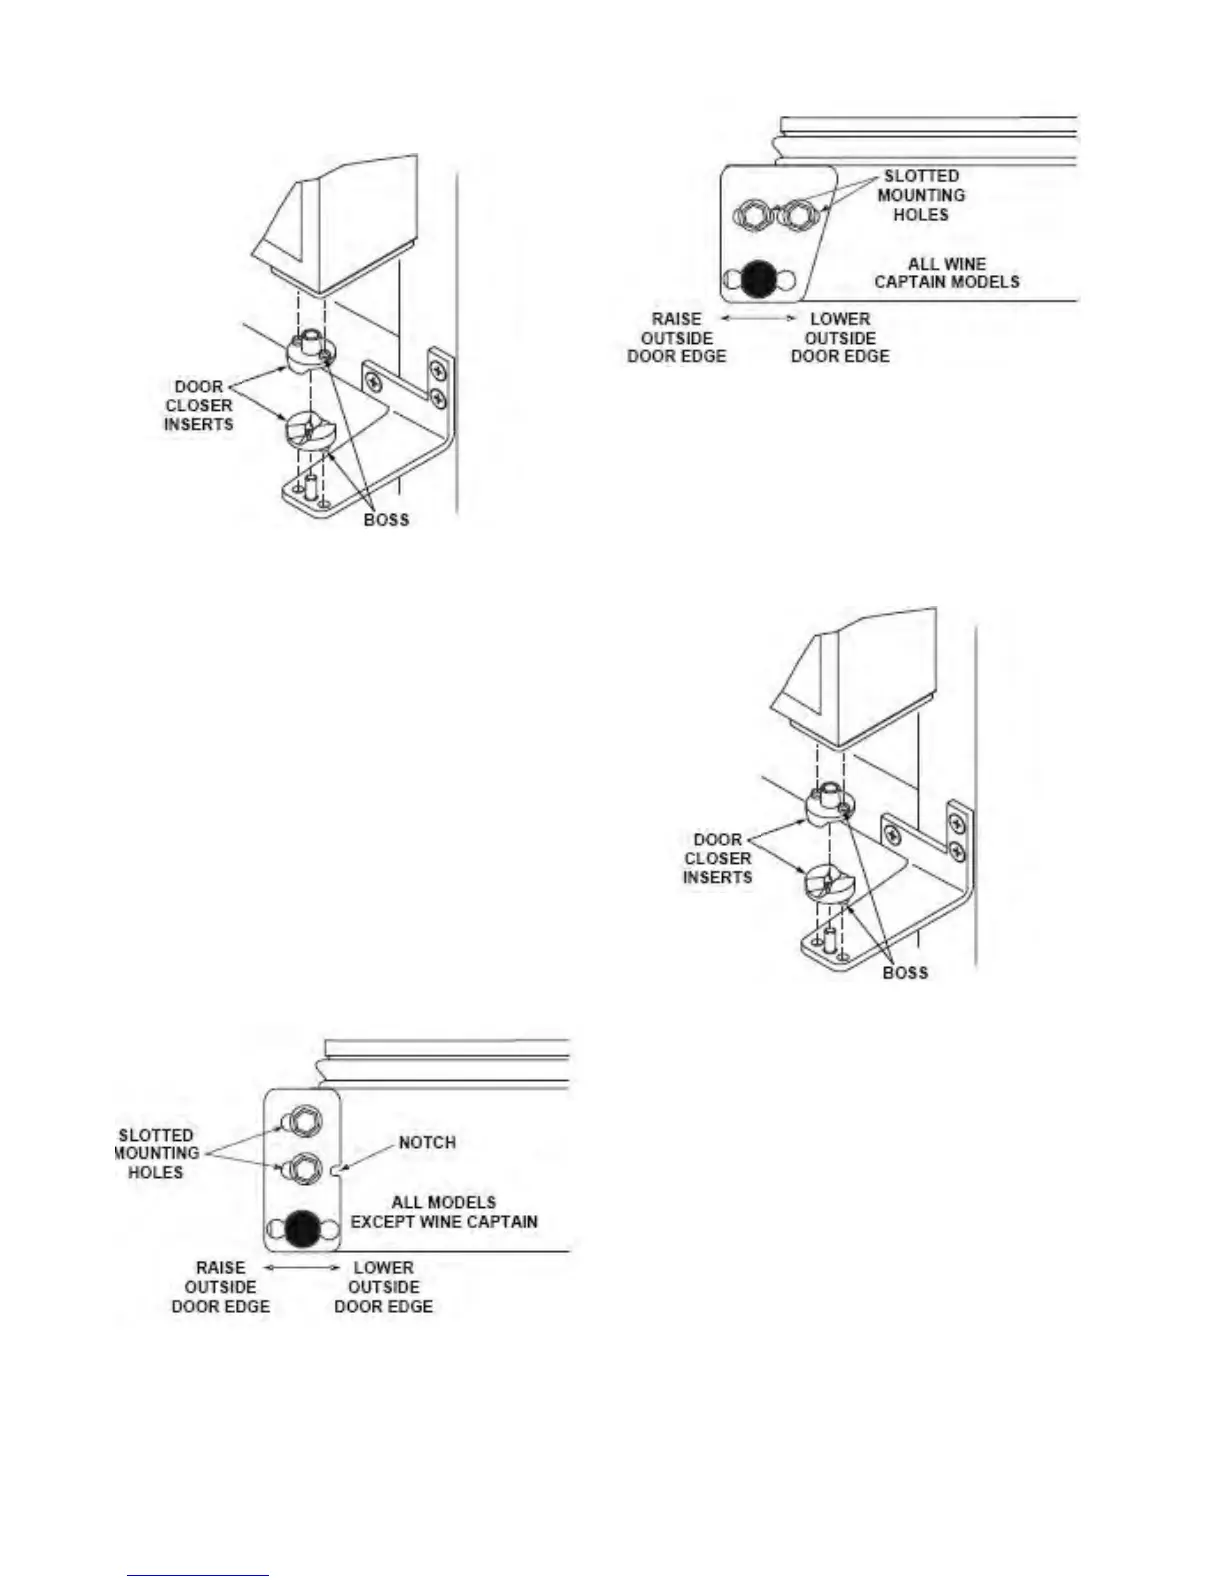
6
Be careful not to lose door closer inserts.
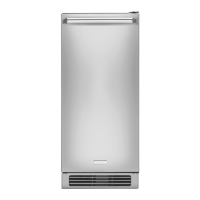
Note: The hinge plate on some models do not
have the holes slotted for adjustment. New
hinge plates are available from Electrolux Parts.
3. With door upside-down, inspect the bottom hinge
plate mounting holes.
a. If your plate has slotted mounting holes, loosen
but do not remove the two hinge plate screws.
b. If your plate does not have slotted mounting
holes, remove the old plate and install the new
plate with the notch to the inside of the door.
4. If door edge opposite the hinges needs to move up,
move plate toward outside of door. If door edge
needs to move down, move plate toward inside of
door. Repeat until top edge of door is parallel with
top of cabinet and tighten screws securely.
5. After adjustment is complete, remove the door
closers from the bottom hinge, clean thoroughly and
apply petroleum jelly to the mating surfaces of the
closers. Be sure that bosses on closers align with
holes in hinge and hinge plate. Mount door and
install top hinge pivot pin.