CCoommppoonneenntt TTeeaarrddoowwnn
4-21
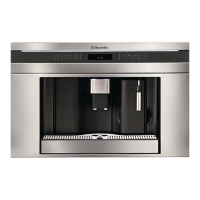
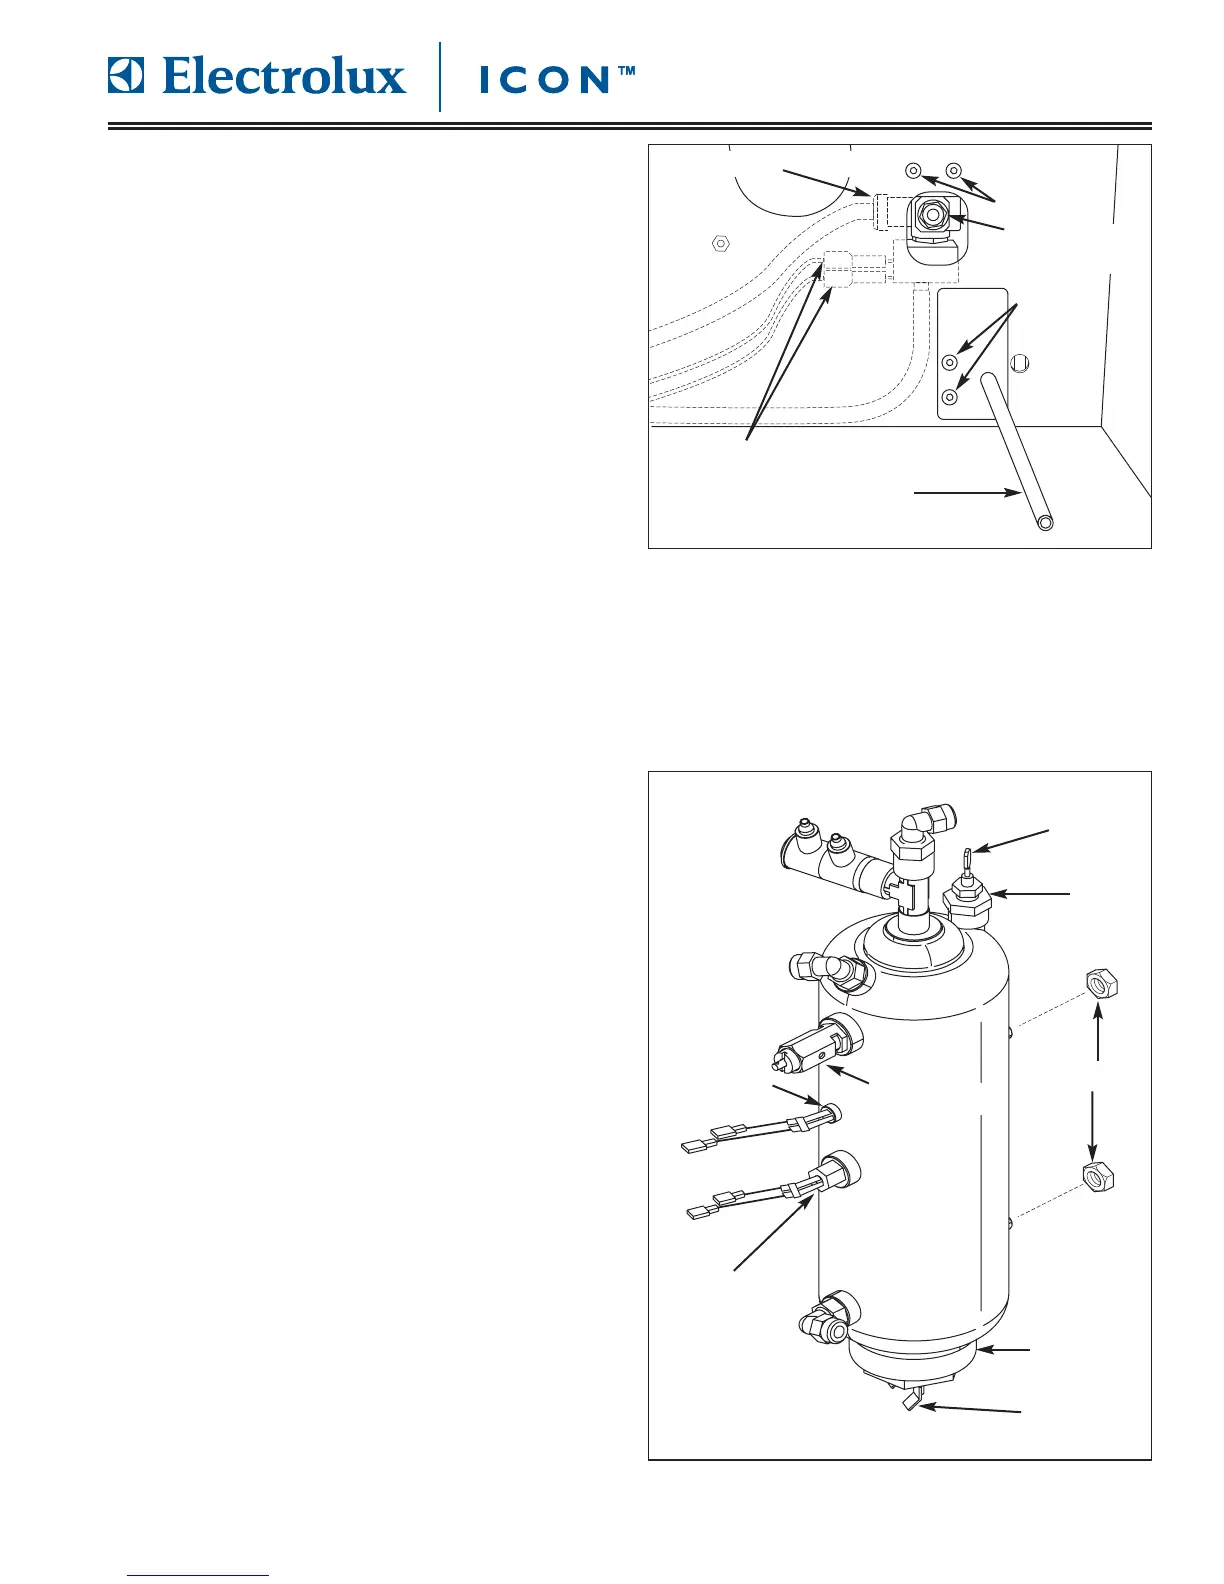
FFiigguurree 44--4455.. BBooiilleerr AAsssseemmbbllyy RReemmoovvaall
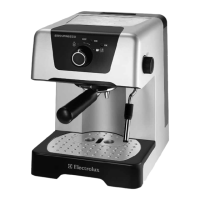
FFiigguurree 44--4444.. 33--WWaayy SSoolleennooiidd aanndd DDrraaiinn TTuubbee
RReemmoovvaall
NNOOTTEE:: FFoorr ccllaarriittyy,, tthhee bbrreewwiinngg aasssseemmbbllyy aanndd ggrriinnd
deerr
aasssseemmbbllyy aarree nnoott sshhoowwnn..
Drain Tube
Electrical Connections
Screws
Screws
Remove Water
Line Here
Compression Fitting
Water
Level
Probe
Nuts
Element
Thermostat
Safety Valve
Wire
Terminal
Wire
Terminals
Temperature
Sensor
33--WWaayy SSoolleennooiidd aanndd DDrraaiinn TTuubbee RReemmoovvaall
The 3-way solenoid is located above drain tube in the
brewing compartment. Screws secure the 3-way
solenoid to the unit inner frame. In order to access
the water lines of 3-way solenoid, the drain tube
water line must be removed from drain tube to allow
the 3-way solenoid assembly to be pulled out from
under the boiler area.
To remove the 3-way solenoid (See Figure 4-44):
1. Pull unit out from installation and remove from the
installation cavity.
2. Open door and remove drip tray and coffee
grounds drawer from unit. Remove door assembly.
3. Remove top stainless steel cover assembly and left
side cover panels.
4. Disconnect water line from front of solenoid.
5. Using a 2mm allen wrench, extract screws securing
the drain tube assembly to inner frame. Remove
water line from drain tube assembly.
6. Pull 3-way solenoid out from under the boiler in
order to access the electrical connections and
water lines.
7. Using a 12mm open end wrench, remove water line
fittings from solenoid. Use a pliers to remove wire
clamp from the bottom of the 3-way solenoid.
8. Disconnect wire leads from solenoid terminals.
BBooiilleerr AAsssseemmbbllyy RReemmoovvaall
The boiler assembly is secured to the inner frame by
two threaded studs that pass through the unit frame
and are secured with nuts.
To remove the boiler assembly (See Figure 4-45 ):
1. Pull unit out from installation and remove from the
installation cavity.
2. Open door and remove drip tray and coffee
grounds drawer from unit. Remove door assembly.
3. Remove top stainless steel cover assembly and left
side cover panels.
4. Disconnect electrical leads water level sensor and
heating element.
5. Disconnect wire leads for the thermostat and
temperature sensor at the quick disconnects.
6. Using a 12mm open end wrench, remove water
lines from compression fittings mounted to boiler
assembly.
7. Using a 13mm socket or open end wrench, remove
nuts from brewing area. Pull boiler from unit.