EasyManua.ls Logo

Electrolux EBA63810X - User Manual

Electrolux EBA63810X
28 pages
Print Icon
To Next Page IconTo Next Page
Loading...
EBA63810X
EBA64510X
S Bruksanvisning
DK Brugervejledning
N Instruksjons
veiledning
veiledning
SF Käyttöopas
GB Instructions
DE Bedienungsanleitung
FR Mode d’emploi
I T Istruzioni per l’uso
NL Gebruiksaanwijzingen
ES Instrucciones para el uso
PT Instruções de utilização
GR Οδηγίες χρήσης
CZ Návod k použití
PL Instrukcja obsługi
HU Használati kézikönyv
SK Návod na použitie
SI
Upor
Uporabniški priročnik
HR Priručnik sa uputstvima
RS Priručnik sa uputstvima
RO Manual instrucţiuni
LV Instrukciju rokasgrāmata
LT Naudotojo vadovas
EE Kasutusjuhend
TR Kullanım talimatları
BG Наръчник с инструкции
RU Инструкции по эксплуатации

Table of Contents

Question and Answer IconNeed help?

Do you have a question about the Electrolux EBA63810X and is the answer not in the manual?

Summary

Introduction and Safety Information

Understanding Instruction Symbols

Explains symbols used for warnings and important information in the manual.

Bracketed References

Refers to the legend in the appliance description section for clarity.

Troubleshooting and Repair Guidance

Guides users on resolving problems using specific sections or customer service.

Fundamental Safety Warnings

Provides crucial safety guidelines for the proper and safe use of the household appliance.

Appliance Description

Appliance Components Overview

Details all the components and parts of the coffee maker for user reference.

Control Panel Functions

Explains the functions of each button and icon on the appliance's control panel.

Preliminary Checks and Setup

Post-Transport Checks

Instructions on checking the product for completeness and damage after unpacking.

Appliance Installation

Guidelines for the proper and safe installation of the coffee maker.

Connecting to Power

Instructions for safely connecting the appliance to the mains power supply.

Disposal Guidelines

Built-In Installation Procedures

First-Time Appliance Usage

Initial Filter Installation

Guides on installing the water softener filter and its initial setup process.

Filter Replacement and Reset

Instructions for replacing the filter and resetting the appliance's filter indicator.

Removing the Water Filter

Steps to remove the filter and notify the appliance of its removal.

Appliance Powering and Heating

Brewing with Coffee Beans

Coffee Quantity Adjustment

Coffee Mill Adjustment

Brewing with Pre-Ground Coffee

Dispensing Hot Water

Adjusting Hot Water Volume

Making Cappuccino with Steam

Multi-Cup Brewing with Jug

Jug Brewing Parameter Customization

Cleaning Procedures

General Coffee Maker Cleaning

General instructions for cleaning the appliance's exterior and main components.

Waste Coffee Container Cleaning

Steps for emptying and cleaning the waste coffee container.

Drip Tray Cleaning

Instructions for cleaning the drip tray and its water level indicator.

Water Tank Cleaning

How to clean the water tank to maintain hygiene and performance.

Spout Cleaning

Guidance on cleaning coffee and hot water spouts to prevent blockages.

Pre-Ground Coffee Funnel Cleaning

Instructions for cleaning the funnel used for pre-ground coffee.

Internal Appliance Cleaning

How to clean the interior surfaces of the coffee maker.

Brewing Unit Cleaning

Detailed steps for cleaning the removable brewing unit.

Coffee Jug Cleaning

How to clean the coffee jug without damaging its appearance.

Menu Parameter Settings

Setting the Display Language

How to change the appliance's display language.

Rinsing Function

Function to obtain hotter coffee and preheat the brewing unit.

Adjusting Auto Shut-Off Time

Adjusting the automatic shut-off time for the appliance.

Setting the Clock

Instructions for setting the current time on the appliance.

Setting Auto-Start Time

How to program the machine to turn on automatically at a set time.

Changing Coffee Temperature

Adjusting the coffee brewing temperature to low, medium, or high.

Setting Water Hardness

How to set water hardness for optimal operation and descaling frequency.

Programming Coffee Quantity

Refers to changing coffee quantity settings.

Programming Jug Function

Refers to changing jug function parameters.

Programming Hot Water Quantity

Refers to changing the default hot water quantity.

Resetting to Default Values

How to restore the appliance to its original factory settings.

Machine Statistics

Displays usage statistics such as coffee made and water delivered.

Buzzer Settings

How to activate or deactivate the audible feedback buzzer.

Display Contrast Adjustment

How to adjust the contrast level of the display screen.

Water Filter Information

Refers to instructions for installing the water filter.

Descaling Procedure

Turning Off the Appliance

Technical Specifications

Electrical Connection (UK)

Displayed Error Messages

Fill Tank Message

Indicates the water tank is empty or incorrectly positioned; requires refilling.

Grind Too Fine; Press OK

Grinding is too fine or filter not installed correctly; requires adjustment.

Grind Too Fine; Press OK; Fill Tank

Tank removed during delivery; requires re-insertion and refilling.

Empty Waste Coffee Container

Waste container is full or too long since last emptying; requires cleaning.

Insert Waste Coffee Container

Waste container was not replaced after cleaning; requires re-insertion.

Add Pre-Ground Coffee Alert

Pre-ground coffee function selected without coffee, or funnel blocked.

Please Descale Warning

Indicates the appliance requires the descaling procedure.

Less Coffee Indicator

Too much coffee used; requires milder taste or less quantity.

Fill Bean Container Alert

The coffee beans have run out and the container needs refilling.

Insert Brewing Unit Alert

The brewing unit was not replaced after cleaning.

Close Door Alert

The service door is open and needs to be closed.

General Alarm Notification

Internal dirtiness or other issues; requires cleaning or service.

Replace Filter Notification

The water softener filter needs to be replaced.

Troubleshooting Common Issues

Coffee Not Hot Enough

Possible causes and remedies for coffee served at an inadequate temperature.

Coffee Lacks Creaminess

Reasons and solutions for coffee lacking a satisfactory crema.

Slow or Dripping Coffee Delivery

Troubleshooting for slow coffee delivery or dripping issues.

Coffee Delivered Too Quickly

Remedies for coffee being dispensed too rapidly.

No Coffee from One Spout

Solutions when coffee fails to dispense from a single spout.

Coffee Leaking Around Service Door

Addresses issues where coffee leaks around the service door.

Water Dispensed Instead of Coffee

Troubleshooting when only water, not coffee, is dispensed.

Overview

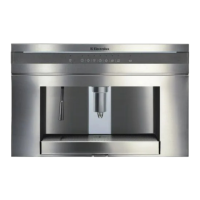
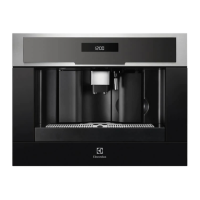
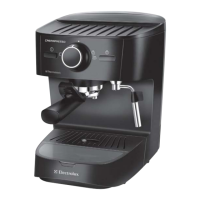
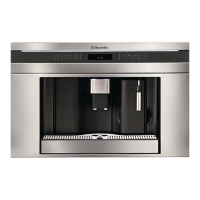
This document is a user manual for an Electrolux built-in coffee maker, models EBA63810X and EBA64510X. It provides comprehensive instructions for installation, operation, maintenance, and troubleshooting.

The coffee maker is designed to prepare various coffee beverages and heat drinks. It features a sleek design with a control panel that guides the user through different functions. The appliance can be installed in a column, and specific measurements are provided to ensure correct installation. It is important to note that all installation and maintenance operations must be performed with the appliance disconnected from the mains electricity supply. The kitchen furniture in direct contact with the appliance must be heat resistant (65°C min), and a gap at the bottom of the cabinet is required for proper ventilation.

Function Description:

The coffee maker offers a wide range of functions to customize your coffee experience:

  • Coffee Preparation: The appliance can make coffee using either coffee beans or pre-ground coffee. Users can select the desired coffee taste (extra-mild, mild, strong, extra-strong) and the type of coffee (espresso, small cup, medium cup, large cup, mug). The quantity of coffee in the cup can also be programmed.
  • Jug Function: A unique feature is the ability to make multiple cups of coffee (4 or 6) directly into a provided jug, which helps keep the coffee hot. The jug program can be customized for coffee taste and quantity per cup.
  • Hot Water Delivery: The appliance can deliver hot water, with the quantity being programmable.
  • Cappuccino/Steam Function: The cappuccino maker allows for the preparation of cappuccinos by delivering steam to froth milk.
  • Grinding Adjustment: The coffee mill's grinding adjustment knob allows users to fine-tune the grind for optimal coffee delivery speed and creaminess. This adjustment should only be made when the coffee mill is in operation.
  • Menu Parameters: The internal menu provides access to various settings, including language selection, rinsing, shut-off time, clock setting, auto-start time, coffee temperature, water hardness, and programming for coffee, jug, and water functions.
  • Descaling: The appliance has a descaling program to maintain its performance and extend its lifespan.
  • Reset to Default: Users can reset all programmed values to the factory default settings.
  • Statistics: The appliance tracks statistics such as the number of coffees made, descaling cycles performed, and total liters of water delivered.
  • Buzzer: The buzzer, which sounds when an icon is pressed or an accessory is inserted/removed, can be activated or deactivated.
  • Contrast Adjustment: The display contrast can be adjusted to suit user preference.
  • Water Filter: The appliance supports the installation of a water softener filter to improve water quality and extend the appliance's working life.

Usage Features:

  • First-Time Use: Before initial use, the appliance requires a self-diagnosis cycle, language setting, water tank filling, and a hot water delivery cycle through the cappuccino maker. It is recommended to make 4-5 cups of coffee and cappuccinos to achieve satisfactory results.
  • Turning On/Off: The appliance performs an automatic preheat and rinse cycle each time it is turned on. It also performs a rinse cycle before turning off.
  • Coffee Bean Filling: The bean container is easily accessible by pulling out the appliance and lifting the lid.
  • Pre-ground Coffee Use: Pre-ground coffee can be added through a dedicated funnel. It is crucial to use only one measure at a time and never introduce pre-ground coffee when the machine is off.
  • Adjustable Coffee Spout: The coffee spout's height is adjustable to accommodate different cup sizes and ensure a creamier coffee.
  • Water Tank: The water tank has a MAX line indicator and can accommodate a water softener filter.
  • Drip Tray and Waste Coffee Container: These components collect excess water and used coffee grounds, and their status is indicated on the display.
  • Displayed Messages: The display provides helpful messages and instructions for various operations and alerts, such as "FILL TANK," "EMPTY WASTE COFFEE CONTAINER," and "PLEASE DESCALE!"

Maintenance Features:

Regular cleaning and maintenance are essential for the appliance's hygiene and optimal performance.

  • General Cleaning: The coffee maker should be cleaned with a soft damp cloth, avoiding solvents or abrasive detergents. None of the components should be washed in a dishwasher.
  • Waste Coffee Container: This container (A4) needs to be emptied and cleaned regularly, especially when the "EMPTY WASTE COFFEE CONTAINER" message is displayed or after 3 days of use to ensure hygiene. It is crucial to empty it completely whenever the drip tray is extracted.
  • Drip Tray: The drip tray (A14) has a red level indicator. It must be emptied and cleaned before the indicator protrudes from the cup tray to prevent overflow.
  • Water Tank: The water tank (A12) should be cleaned monthly with a damp cloth and mild washing-up liquid.
  • Spouts: The coffee (A13), hot water (A11), and cappuccino maker spouts (A10) should be cleaned periodically with a sponge. Blocked holes can be cleared with a toothpick.
  • Pre-ground Coffee Funnel: The pre-ground coffee funnel (A21) should be checked monthly for blockages and cleaned if necessary, using a knife to clear any obstructions.
  • Inside of the Coffee Maker: The interior, accessible after opening the service door (A2), should be checked weekly for coffee deposits and cleaned with a sponge or vacuum cleaner.
  • Brewing Unit: The brewing unit (A5) must be cleaned at least once a month. It is removed by pressing two red release buttons and pulling it outwards. It should be soaked in water for 5 minutes and rinsed, but never cleaned with washing-up liquid, as this can remove the lubricant.
  • Coffee Jug: The coffee jug (A27) should be cleaned with a damp cloth and mild washing-up liquid, but not in a dishwasher.
  • Descaling: The appliance will display "PLEASE DESCALE !" when descaling is required. The descaling process involves using a recommended descaler, following specific steps to ensure thorough cleaning of the internal circuits. The water softener filter must be removed before descaling.
  • Water Softener Filter: If installed, the filter (A26) should be replaced every two months or when the "REPLACE FILTER" message appears. The date indicator on the filter helps track its lifespan. Instructions are provided for installing, replacing, and removing the filter.

Electrolux EBA63810X Specifications

General IconGeneral
TypeCoffee/Espresso
Dimensions (WxDxH)594 x 361 x 378 mm
Product typeEspresso machine
Water tank capacity1.8 L
Product colorBlack, Silver
Weight and Dimensions IconWeight and Dimensions
Weight22200 g

Related product manuals