EasyManua.ls Logo

Electrolux EBC54523AX - User Manual

Electrolux EBC54523AX
26 pages
Print Icon
To Next Page IconTo Next Page
Loading...
EBC54523AX SV Kaemaskin för espresso och cappuccino Bruksanvisning
DA Cappuccino- og kaemaskine Brugervejledning
NO Kae- og cappuccinomaskin Instruksjonsveiledning
FI Kahvi- ja cappuccinokeitin Käyttöopas
EN Automatic coee maker Instructions
DE Kaeevollautomat Bedienungsanleitung
FR Machine à café automatique Mode d’emploi
I T Macchina per caé automatica Istruzioni per l’uso
NL Automatisch koezetapparaat Gebruiksaanwijzingen
ES Cafetera automática Instrucciones para el uso
PT Máquina de café automática Instruções de utilização
EL Αυτόματη μηχανή του καφέ Οδηγίες χρήσης
CS
PŘÍSTROJ NA PŘÍPRAVU KÁVY A CAPPUCCINA Návod k použití
PL Automatyczny ekspres do kawy Instrukcja obsługi
HU KÁVÉ-ÉS CAPPUCCINO KÉSZÍTŐ GÉP Használati kézikönyv
SK
PRÍSTROJ NA PRÍPRAVU KÁVY A CAPPUCCINA Návod na použitie
SL
APARAT ZA PRIPRAVO KAVE IN KAPUČINA Uporabniški priročnik
HR APARAT ZA KAVU I CAPPUCCINO Priručnik sa uputstvima
SR APARAT ZA KAFU I KAPUĆINO Priručnik sa uputstvima
RO EXPRESOR PENTRU CAFEA ŞI CAPUCINO Manual instrucţiuni
LV MAŠĪNA KAFIJAI UN KAPUČĪNO Instrukciju rokasgrāmata
LT
ESPRESO IR KAPUČINO KAVOS APARATAS Naudotojo vadovas
ET KOHVI- JA CAPPUCCINO-MASIN Kasutusjuhend
TR KAHVE VE CAPPUCCİNO MAKİNASI Kullanım talimatları
BG МАШИНА ЗА КАФЕ И КАПУЧИНО наръчник с инструкции
RU
Автоматическая кофемашина Инструкции по эксплуатации
UK
Автоматична машина для приготування кави Інструкції з використання

Table of Contents

Question and Answer IconNeed help?

Do you have a question about the Electrolux EBC54523AX and is the answer not in the manual?

Summary

INTRODUCTION

Troubleshooting and repairs

Guides users on resolving problems and contacting customer services for repairs.

SAFETY

Fundamental safety warnings

Outlines essential safety precautions for using the appliance.

PRELIMINARY CHECKS

Installing the appliance

Guidance on the proper installation procedures for the appliance.

Connecting the appliance

Instructions for safely connecting the appliance to the power supply.

BUILT-IN INSTALLATION

USING THE APPLIANCE FOR THE FIRST TIME

Turning On and Heating Up

Explains the initial power-on sequence, including preheating and rinsing cycles.

Making Coffee Using Coffee Beans

Step-by-step guide on how to brew coffee using whole coffee beans.

CHANGING THE QUANTITY OF COFFEE IN THE CUP

ADJUSTING THE COFFEE MILL

Preparing Coffee with Pre-Ground Coffee

Instructions for using the machine with pre-ground coffee instead of beans.

Making Cappuccino

Step-by-step guide to preparing cappuccinos using the milk frothing system.

Changing the Quantity of Coffee and Milk for Cappuccino

Changing the quantity of milk

How to adjust the amount of milk used in cappuccino preparation.

MAKING A NUMBER OF CUPS OF COFFEE WITH THE JUG FUNCTION

CLEANING

Cleaning the milk container

CHANGING AND SETTING MENU PARAMETERS

Changing coffee temperature

Descaling

TURNING THE APPLIANCE OFF

TECHNICAL SPECIFICATION

DISPLAYED MESSAGES

TROUBLESHOOTING

Overview

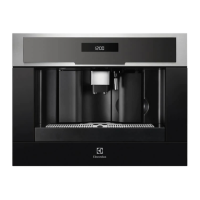
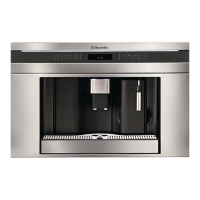
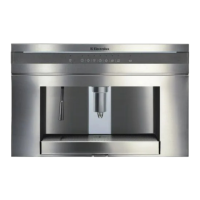
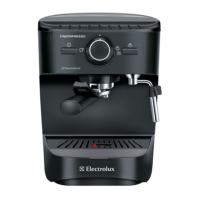
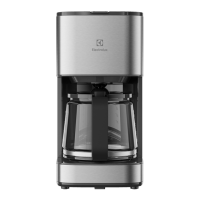
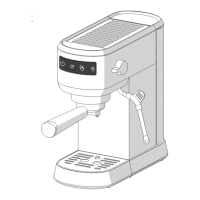
This document describes an automatic coffee maker designed to prepare coffee and heat drinks, including espresso and cappuccino. It is intended for household use and not for commercial purposes. The appliance can be installed over a built-in oven if the oven has a cooling fan at the rear.

Function Description

The coffee maker operates automatically, performing preheat and rinse cycles upon startup. It allows users to make coffee from whole beans or pre-ground coffee, prepare cappuccino, and dispense hot water.

For coffee preparation, users can select from various tastes (extra-mild, mild, strong, extra-strong) and cup sizes (espresso, small, medium, large, mug). The appliance grinds beans automatically and delivers coffee into the cup. For pre-ground coffee, users manually add the coffee into a dedicated funnel. The coffee mill's grinding adjustment knob allows for fine-tuning the coffee delivery speed and creaminess.

The cappuccino function enables the creation of frothed milk and coffee. Users fill a milk container, adjust the frothed milk regulator for desired froth density (between "CAPPUCCINO" for less dense and "CAFFELATTE" for denser froth), and the machine automatically delivers frothed milk and coffee.

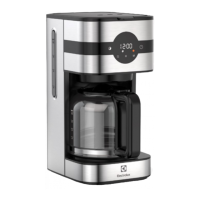
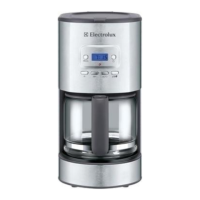
The "Jug" function allows for making multiple cups of coffee (4 or 6) directly into a provided jug, which helps keep the coffee hot. This function also offers various coffee tastes and adjustable quantities per cup.

The appliance also dispenses hot water, with a default quantity of 200 ml, which can be adjusted by the user.

Usage Features

The device features a control panel with a display that guides the user through operations and menu settings. Icons on the control panel allow users to select coffee taste, type of coffee, deliver one or two cups, dispense cappuccino, deliver hot water, and activate the "Jug" function. Navigation through menus is done using left and right arrow icons, and selections are confirmed with an "OK" icon.

Key usage features include:

  • Language Setting: Users can select their preferred language for the display messages.
  • Water Hardness Setting: The appliance allows customization of water hardness, which influences the descaling frequency.
  • Coffee Temperature: The coffee temperature can be adjusted to low, medium, or high.
  • Auto-Start Time: Users can program the machine to turn on automatically at a specific time.
  • Shut-Off Time: The automatic shut-off time can be adjusted (default is 30 minutes).
  • Rinsing Function: This function preheats the brewing unit and cups, contributing to hotter coffee.
  • Contrast Adjustment: The display contrast can be adjusted.
  • Buzzer: The buzzer sound, which activates when an icon is pressed or an accessory is inserted/removed, can be activated or deactivated.
  • Reset Function: All programmed values can be reset to their default factory settings.
  • Statistics: The appliance provides statistics on the number of coffees and cappuccinos made, times descaled, and total water delivered.

Maintenance Features

Regular cleaning is essential for optimal performance and hygiene. The manual outlines cleaning procedures for various components:

  • Coffee Maker Exterior: Clean with a soft damp cloth; avoid solvents or abrasive detergents.
  • Waste Coffee Container (A4) and Drip Tray (A14): These must be emptied and cleaned regularly, especially when the "EMPTY WASTE COFFEE CONTAINER" message is displayed. The drip tray has a red level indicator to show when it needs emptying.
  • Water Tank (A12): Clean about once a month with a damp cloth and mild washing-up liquid.
  • Coffee Spouts (A13): Clean periodically with a sponge, and use a toothpick to clear any blocked holes.
  • Pre-Ground Coffee Funnel (A21): Check monthly for blockages and clear with a knife if necessary.
  • Inside of the Coffee Maker: Clean weekly with a sponge to remove coffee deposits, and use a vacuum cleaner for residues.
  • Brewing Unit (A5): Clean at least once a month. This involves removing the unit, soaking it in water for 5 minutes, rinsing, and reinserting. Washing-up liquid should not be used on the brewing unit to preserve its lubricant.
  • Milk Container (C): Clean after each use, especially the tubes inside the lid. All components of the milk container can be washed in a dishwasher (top basket). The frothed milk regulator, milk spout, and intake tube should be thoroughly cleaned to remove milk residues.

Descaling

The appliance requires descaling when the "PLEASE DESCALE !" message is displayed. The descaling procedure involves emptying the water tank, adding descaler solution (following manufacturer instructions), placing a container under the hot water spout, and initiating the descaling program. The machine performs a series of deliveries and pauses. After descaling, the water tank must be rinsed and refilled with clean water. Only manufacturer-recommended descalers should be used to avoid invalidating the guarantee.

Electrolux EBC54523AX Specifications

General IconGeneral
Product TypeEspresso Machine
ModelEBC54523AX
BrandElectrolux
TypeAutomatic
Water Tank Capacity1.5 L
Coffee Type UsedGround Coffee
Pump Pressure15 bar
ColorStainless Steel
Power1350 W
Voltage220-240 V
FeaturesMilk Frother
MaterialPlastic and Stainless Steel

Related product manuals