Component Teardown
4-11
Door Disassembly
1. Disconnect the power supply cord and remove outer
case.
2. Open the door and block it open.
3. Discharge high voltage capacitor.
4. Remove the door assembly, referring to “Door
Replacement”.
5. Place the door assembly on a soft cloth with latch
heads facing up.
6. Replacement of the door components are as follows:
CHOKE COVER
7. Insert a putty knife (thickness of about 0.5 mm) into
gap between choke cover and door panel assembly.
8. Lift up the choke cover.
9. Now, the choke cover is free from the door panel
assembly.
DOOR HANDLE ASSEMBLY
10. Remove the two (2) screws securing the door handle
assembly to the door panel assembly through the
door frame.
DOOR PANEL ASSEMBLY, LATCH HEAD RIGHT AND
LATCH HEAD LEFT
11. Remove the fourteen (14) screws securing the door
panel assembly to the door frame.
12. Remove door panel assembly from door frame.
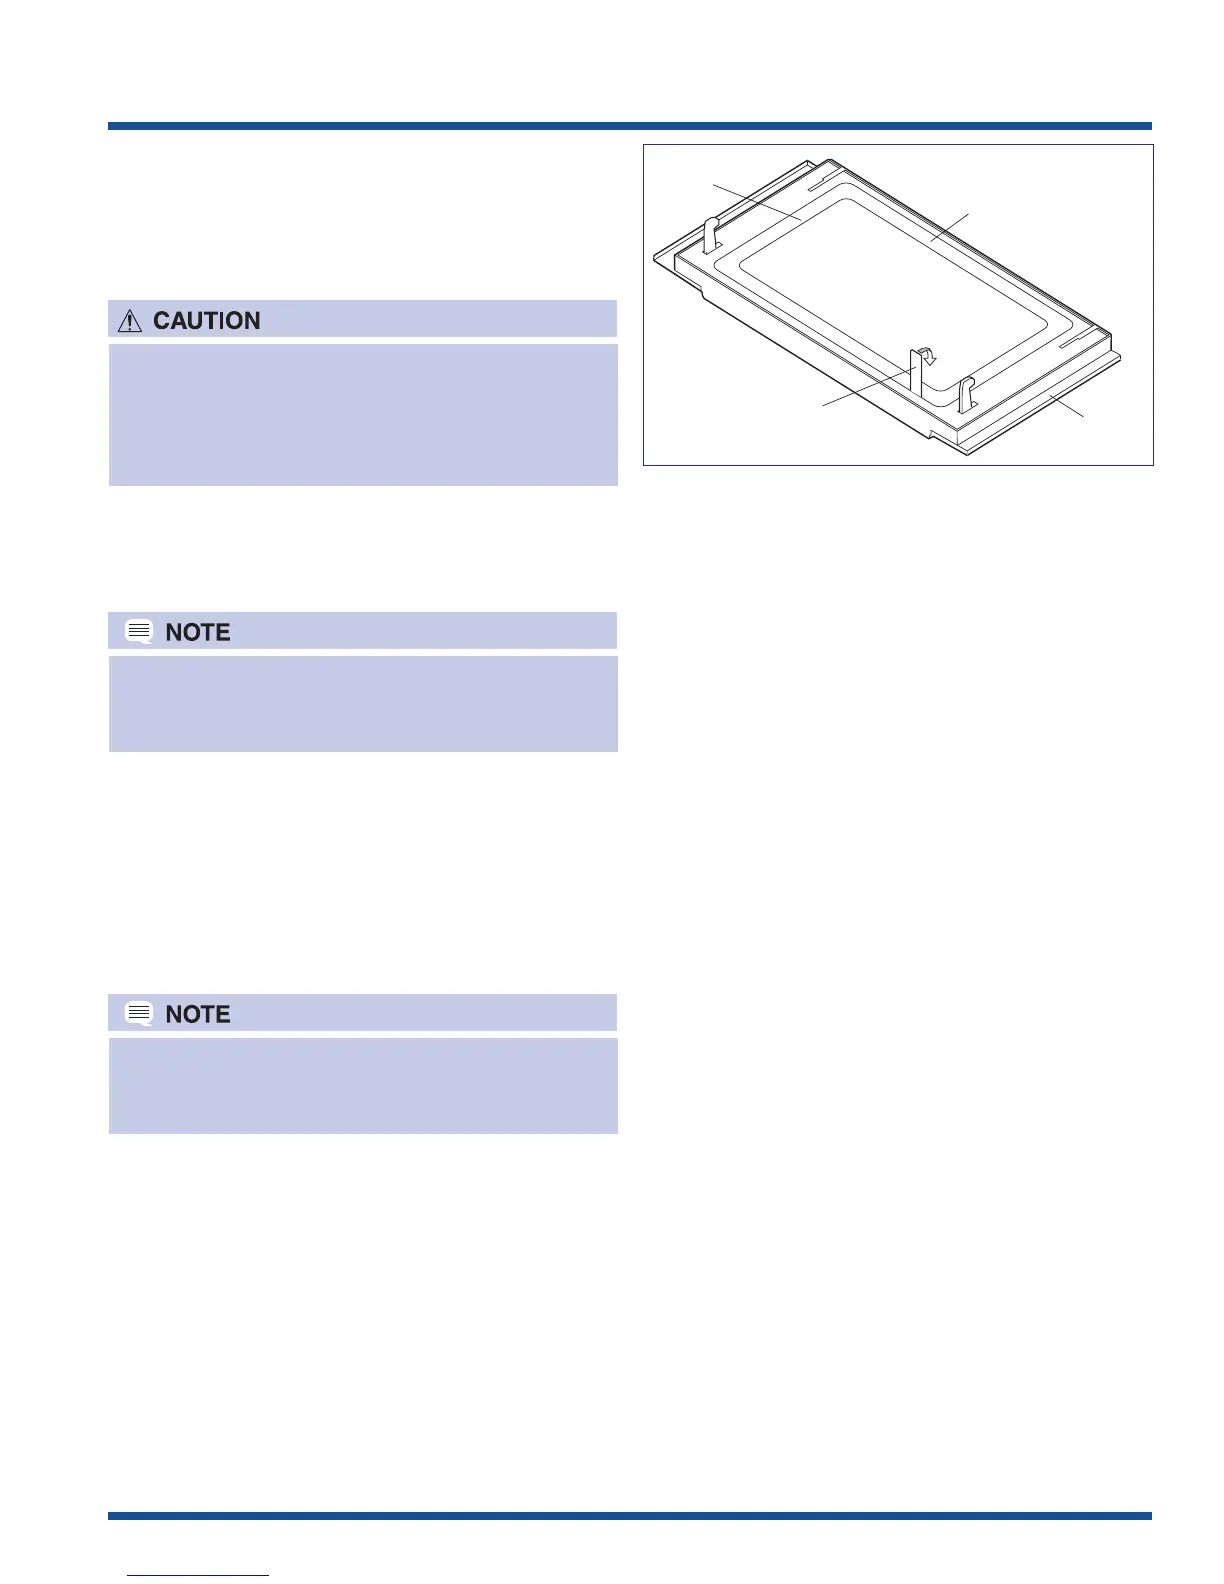
Choke
Cover
Door
Frame
Door Panel
Assembly
Putty Knife
Figure 4-7. Door Disassembly
To discharge the high voltage capacitor, wait for 60
seconds and then short-circuit the connection of
the high-voltage capacitor (that is the connecting
lead of the high-voltage rectifier) against the
chassis with the use of an insulated screwdriver.
As the engaging part of choke cover and door
frame are provided at 16 places, do not force any
particular part.
When carrying out any repair to the door, do not
bend or wrap the slit choke (tabs on the door
panel assembly) to prevent microwave leakage.
13. Remove the one (1) screw securing the latch head R
to the door panel assembly.
14. Remove the latch spring R from the latch head R and
the handle lever.
15. Now, the latch head R is free.
16. Remove the one (1) screw securing the latch head L
to the door panel assembly.
17. Remove the latch spring L from the latch head L and
the handle lever.
18. Now, the latch head L is free.
19. Release the two (2) handle springs from the two (2)
handle levers.
20. Pull out the two (2) handle pins from the two (2)
handle levers.
21. Remove the two (2) handle levers from the door
panel.
MIDDLE DOOR GLASS
22. Remove the two (2) screws securing the glass
mounting angle B to the door frame.
23. Remove the middle door glass from the door frame.
FRONT DOOR GLASS
24. Remove each two (2) screws securing the two glass
mounting angles A to the door frame.
25. Remove the two (2) glass mounting angles A from
the door frame.
26. To release the two (2) tabs securing the lower end
of the front door glass, slide the front door glass
upward.
27. Release the three (3) tabs securing the upper end of
the front door glass and remove the front door glass
from the door frame.