9
6 7
8
10
11
9
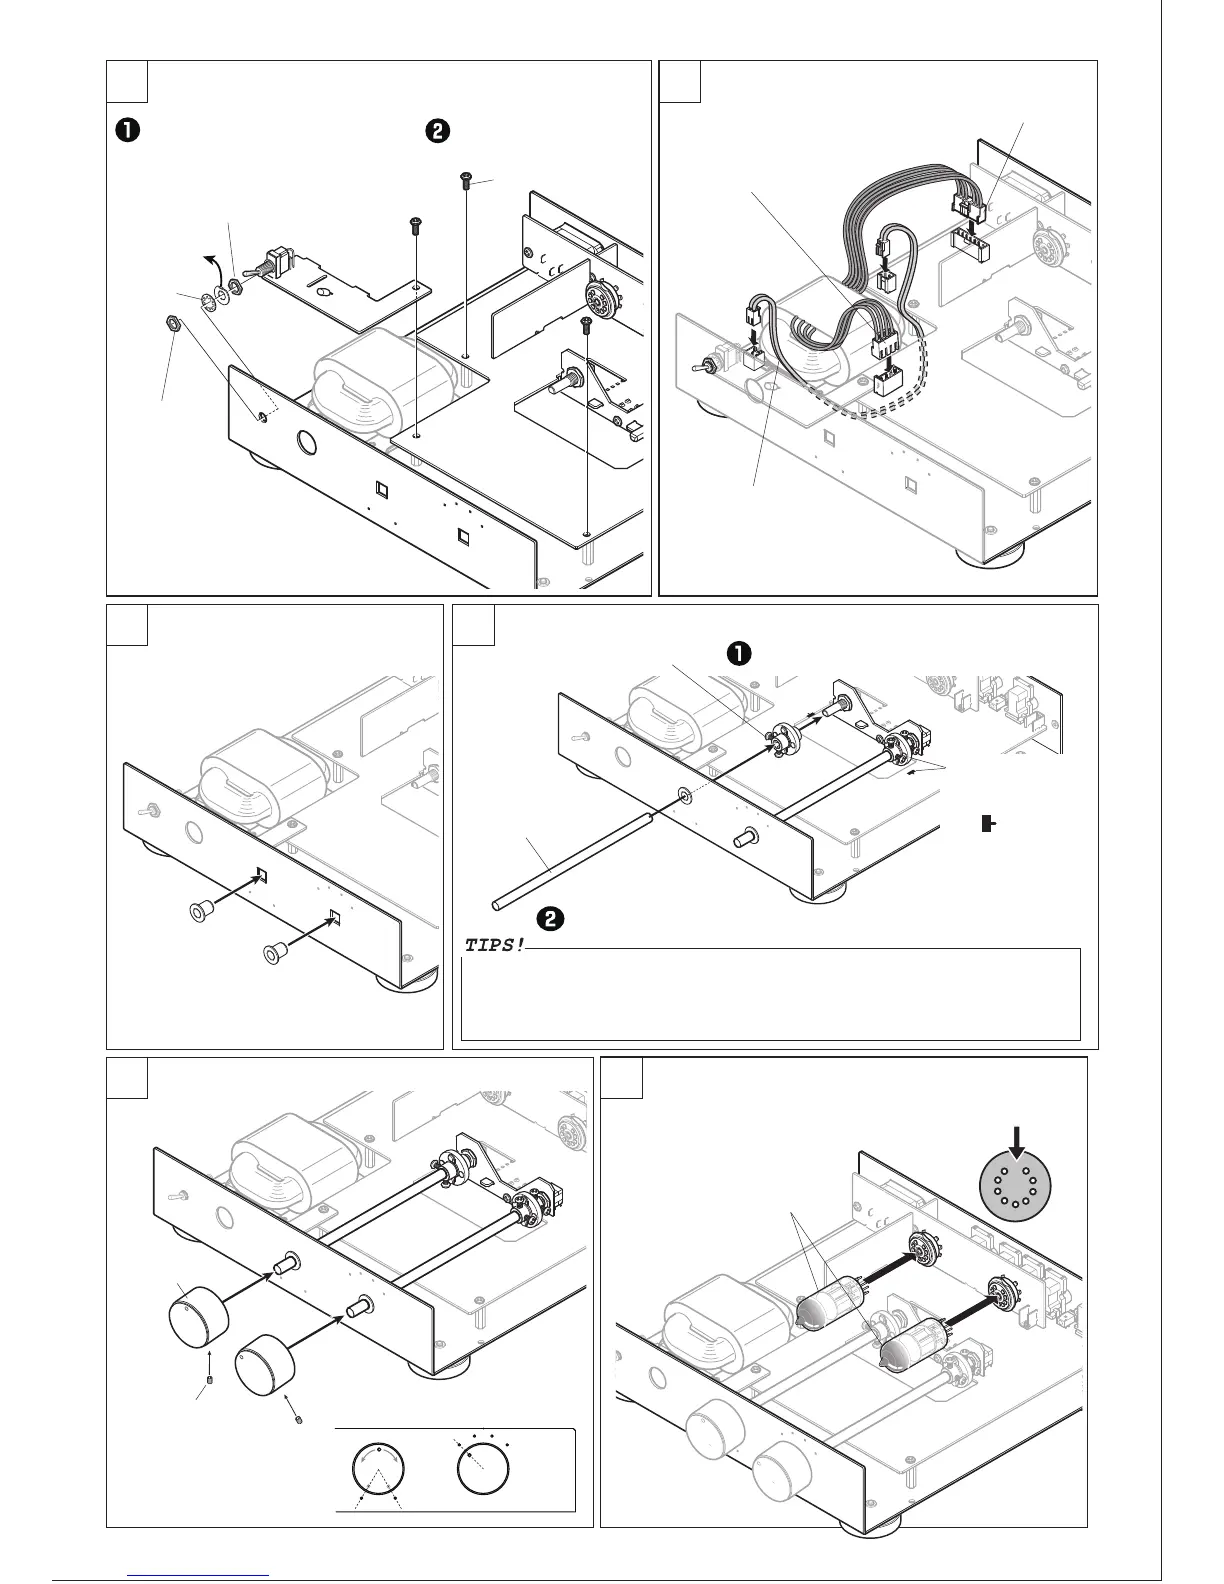
Install UNIT-4.
Install flange bushings.
Nut (Thread till end of the shaft)
This washer
is not used.
Claw washer
Nut
UNIT-4
Binding screw small
3pcs
7-pin connector
4-pin connector
Connector cable
Push hard into the square holes.
Flange bushing
2pcs
Metal shaft Long
2pcs
Ceramic coupling 2pcs
Install metal shafts.
Install knobs.
Knob
2pcs
Screw for knob
Install vacuum tubes
to the socket.
Vacuum tube
12AU7
Remove the nut and washer from the
toggle switch. Install Unit-4 to the
bottom chassis. Thread the remaining
nut on the toggle switch from the front.
Fix UNIT-1 and UNIT-4 with
binding screw small.
Install the cables with connectors as shown.
Push the cables with connectors
into their sockets between the
transformer and UNIT-1.
Set ceramic couplings to the shafts of the
volume and the rotary switch.
Insert the metal shafts into the ceramic coupling. Once fully seated, back
the shaft out approx. 1mm from the coupling and tighten the set screws.
Leaving 1-2mm
clearance between the
knob and chassis, fix the
knobs with attached
screws to each shaft.
Align the knobs to the indicators on
the chassis.
Check if the pins are correctly
aligned to the socket.
Push in the white
disk part of the
ceramic coupling to
the position
indicated on the PCB
and fix with the
screws.
8500-02
There must be a clearance between the shaft and the flange bushings in order for the shaft to rotate
smoothly. However, due to this allowance the shaft may not sit firmly in the bushing. Adding a small
amount of grease between the bushing and shaft is recommended. Select a high viscosity grease
(Catagory 3 or higher) for best results. Mixing baby powder at a 1:1 ratio with a lower viscosity
grease (below Catagory 3) can be substituted if needed.
 Loading...