Page 6011822 1-888-651-3431
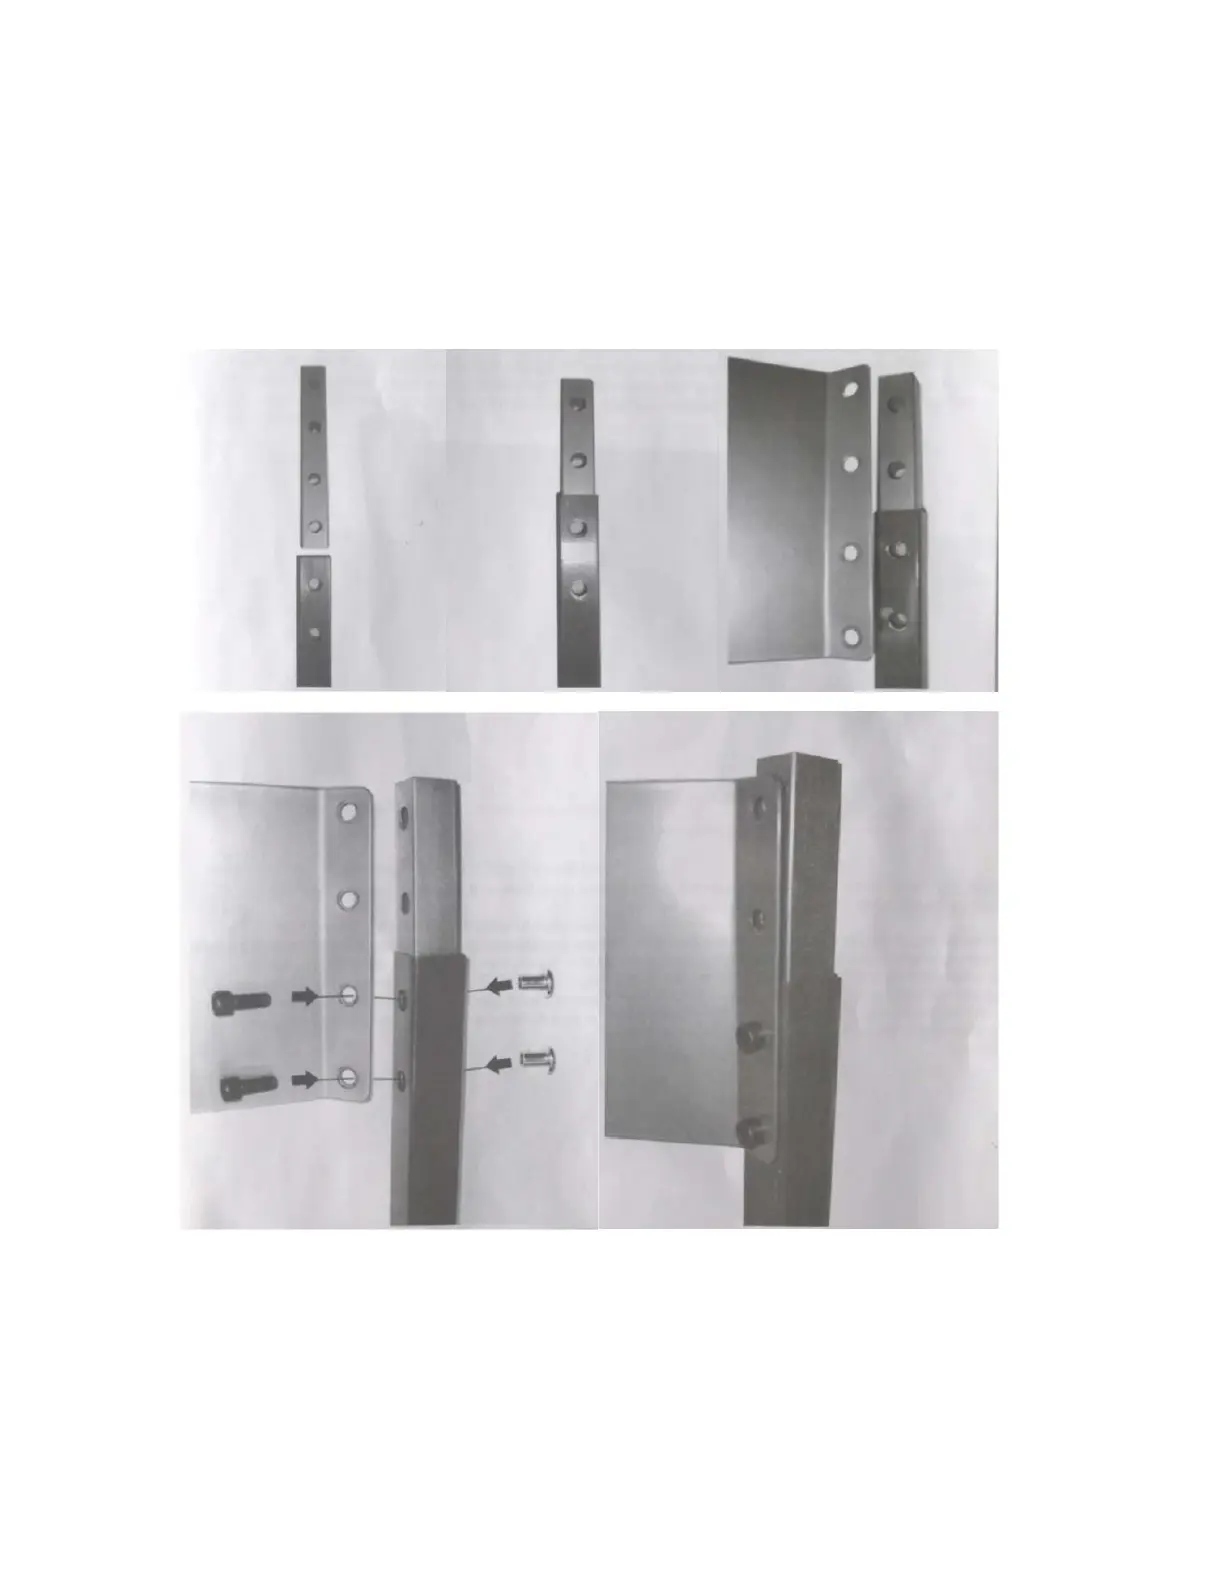
Step 8: For this Step you’ll need the assembly we’ve created, 1 Part J ( Upright Internal Connector),
Part E (Connector Plate), 2 Short SHC Screws, and 2 Cap Nuts. This Step is easiest achieved by
laying the assembly down on the oor. First, take Part J and insert it into one of the Part B uprights as
shown below making sure holes are lined up. Next, we’ll position Part E next to Part J and Part B as
shown in the diagram. Finally, we’ll insert 1 Cap Nut into the bottom hole of B and into J, and we’ll
then insert a small SHC Screw through the bottom hole of Part E, through Part B, through Part J and
into the Cap Nut. Hand-tighten,
DO NOT TIGHTEN ALL THE WAY YET-JUST SNUG. Repeat for hole above. Steps are indicated
below:
E
J
J J
JJ
B
B B
B B
EE
 Loading...