6. rröst Plot cti,ot ud sPCyiDg th.
boil.! fot
th. tiDt.t !.!!on
a) Yo! keep the bol]e! conrect€d
to the mins
and set the
thelnostät to flost
guard
"8".
fhus. the
{ater tehPelature
rs
tept above the fleezinq
point. fhe
electlicity
consuhPtion
for
this nethod is vely 1o{.
b) You
disconnec! tle boiler f.om
the nains
(yo!
puil
out the
plug)r
s"itch off the
punp
and
oPeh the dlain
Plug.
Tben,
vou
opeD
the
vater
tap so
thät äir
gets.tnto
the supPly lines.
If
the xate!
does not luD
out of the drain
ptug,
blo, into
the
opened rate!
tap until t'he
,at€r iuDs ou!
by itself.
r.lake
sure that all the vate! has !u. out.
Even
jf,
öniy a ]ittle
eater
is left iD the boiler, the boller
could blrst becalse
of
gilst
fitl the boile! vith water befole any
iene{ed oPelatiön,
see
tD!!.Il.tion
.nd
lDrtdction.
fo! Ut'
0'108
All devices är€ cäiefully checked befole
leavinq ou!
p]änt l,le
qrant
5
yeals
va!.anty
ob
alL
palts,
This
does not äpply
-rn
case
of
danaqe caused by flost, by operätion
vithout
tater, by
neddlinq, by ihploper Dse o! inprope! connection.
fiallanty can
only be claieed if this
rallanty
ceitifica!€
is filled
in aDd
returDed
togetb€r {ith the boiler
änd the
ploot
of
Pulchas€.
A1l
othe!
cläihs a!€ excluded.
t!6til
,
rh.gär€tenplatz 2
^,
D-81373 ütn€ietr
Boile!
purchased
fron tbe coßpany:
Do nol dispose of €lectdc
uniß wnh hoLsohold
saste.
Us€ an envircnrn€ntarry
{ribncly E)dng
syslom to dispos€ dl lhe
unll. acc€ssorjas
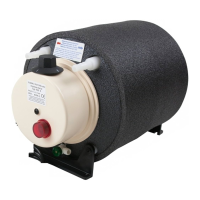
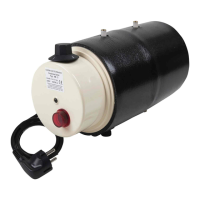
and
Ihe l(B 6
is a ]ov
pressule warn
waler boiler
contaihing
aPPror'
6
liters.
This
böil€i has
been designed
esPeciallv
for
boats,
caravans, nobile
noFes
and
vendinq vehicles
and
the like
and ls
iväi]able
in vatiö!s
models.
Ihis boile!
catr be
connected to
all neans
of uDPtessurized
laler
supply
such as subnelgible
Pumps,
foot
o! hand
Plhps
as
telt as to
"rlisi,.izea
eater suppty such
as autonätlc
punps or the
rater
ptPe
;sinq che co!responding
flttings
(See
vate! conneclion,
Poin!
2)
Choose
a
place
Dhich
is
a5 close
as
possible to the
pläces whele
you
Hant
to
tap hot
uater in o!de! to
ävoid uDrecessalv
loss of
lreat caused
by a long,ater suPply
llDe.
hstall the
boile! on
the
floor in
a horizontal
position
lrot
in a
veltical
position),
us€
rhe suppolt blackets
included in
the delively.
2, Il.t r Connectio!
rhe colrect
vater
connection
is
very iirportant
fo! the
Prope!
functioning of lhis
boile!. Use
nontoxic
Ptessurized
!ate! hoses
,iLb roven fabrics, internal
diamete!:
t0 to 12
m. instä1] the
hoses without any
bucttei use
ctanps to
fästen then
to the
:öhnectiDg
sleeves,
ä) connectlon to upr.r.ulir€it
t.!4.
luPPly
su.h
as submelgible
punps,
loot and
hand
punps
is
very easy You
do not
need anv
additional device,
just
use regula!
hoses !o
connect
the Ka6 to
one o! sevelal tapping
outlets
r4ake sule thät
there
ts do bäck
pressure
valve installed
iD either
t-ne
punp
o! in the
cold
rate!
plPe
bettseer
Pudp
and boile! as
otbelrise
possible
excess
plessule
cannot escaPe
and Fay cause
danage to
the boilei.
o, Connection to
p!..!u!l!.<l v!to! rq)Ply, e.g.
autoFätic
Püdps
rith back
plessure
valve o!
plessüiI2ed tater süPplv.
The KB 6
can only be connected
to one taPPing
outlet
using a
1ov-
pressure
fitting.
The lou-plessule
fitting Z 12 i5 ataitabre
ät
vour
distributor
o.
!!oh
llessls. ELGENA,
2-
Döte of
pllchas€:
X
I