INSTALLATION:
The air pump should be installed by following either of the two
recommended methods:
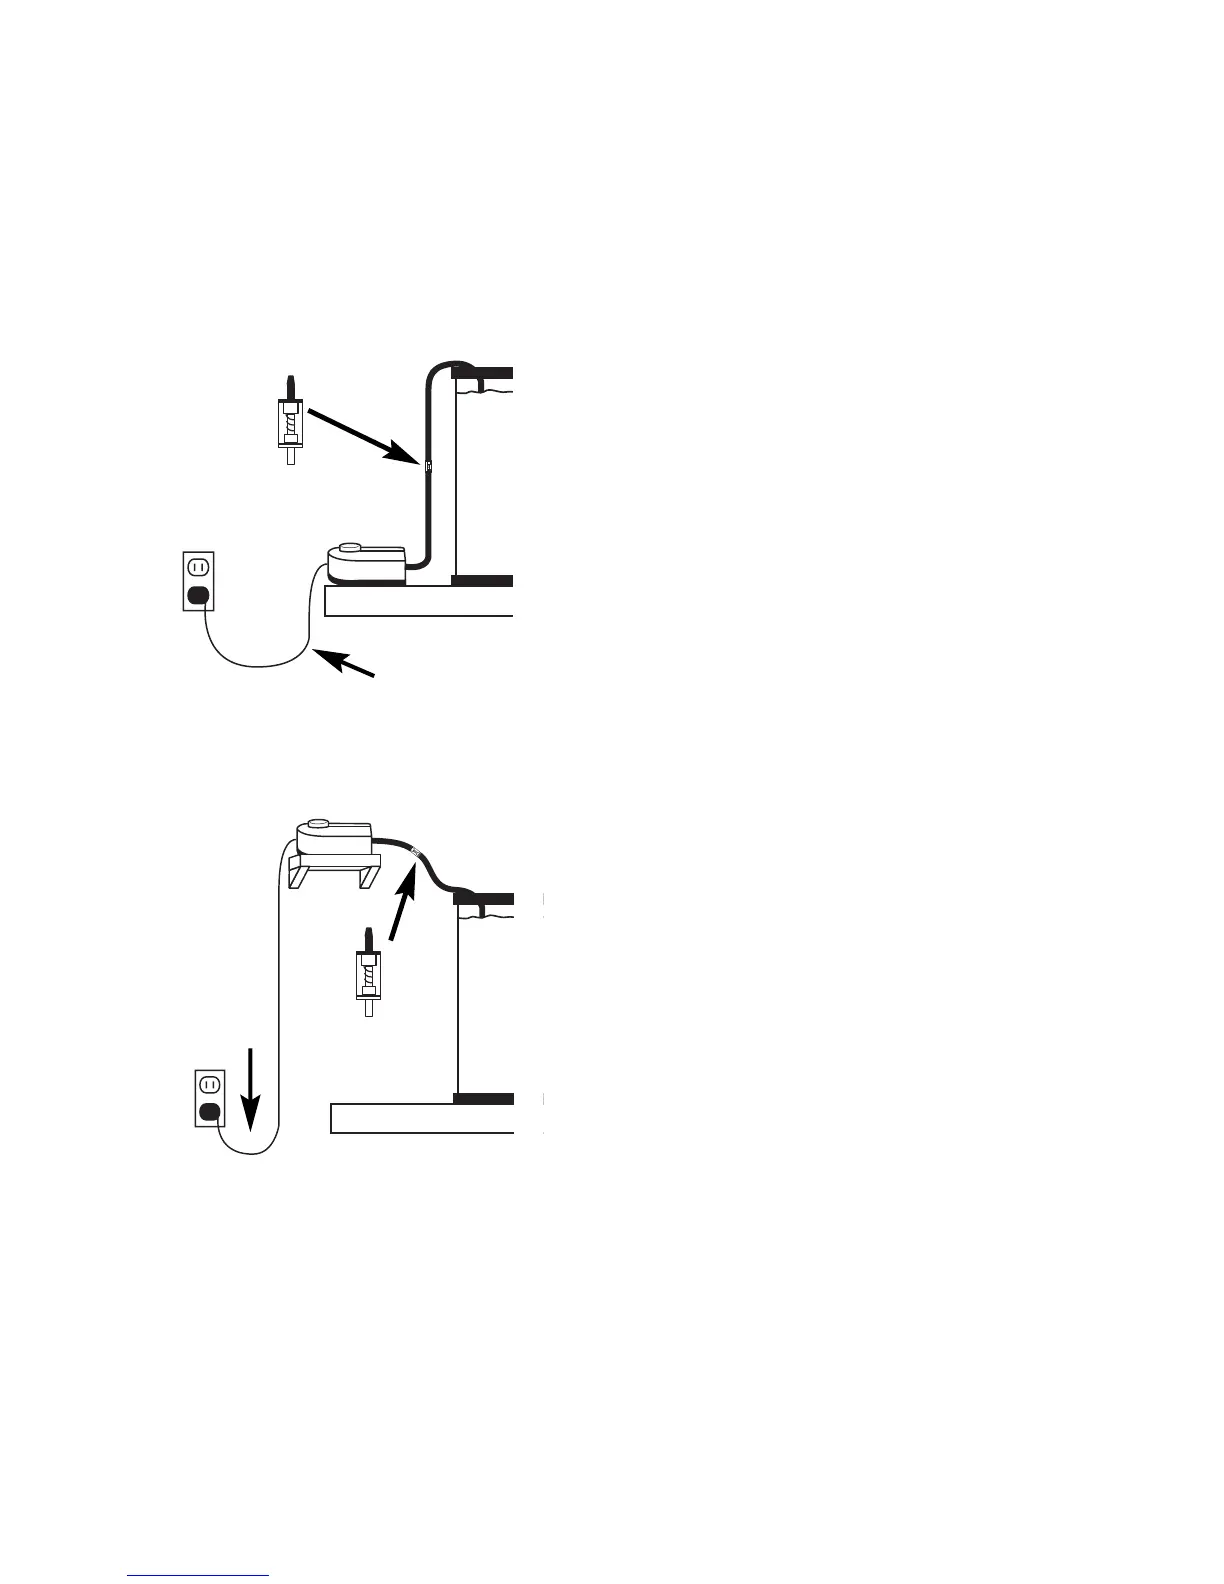
1. Place the air pump on a surface lower than the water level
of the aquarium. To avoid damage from accidentally spilled
water, do not place the air pump directly below the aquarium.
Important: It is recommended to
always use a Check Valve (sold
separately) in the air line between
the air pump and the aquarium.
The Check Valve will help prevent
water from siphoning out of the
aquarium through the air hose and
into the pump in the event of a
power failure, or when removing
filters and other air-driven
accessories from the aquarium.
2. Place the air pump on a surface higher than the water level,
such as a shelf. The surface should
be at least 12 inches (30 cm) higher
than the water level of the
aquarium, but not be positioned
directly above the aquarium. The
surface should have a raised edge to
prevent the air pump from sliding
off. Use a Check Valve (sold
separately) in the air line between
the air pump and the aquarium to
prevent back-siphoning.
Once the air pump has been installed, do the following:
1. Attach one end of the air line tubing (sold separately) to the air
outlet(s) on air pump.
2. Attach the other end of the air line tubing to filter(s), airstone(s),
ornament(s) or any other air-driven aquarium accessory.
Ensure that the airline tubing has no restrictions or kinks.
3. Plug air pump into outlet. Be sure to allow for a “drip loop”
(see illustration).
Check Valve
Check
Valve
Drip-Loop
Drip-Loop