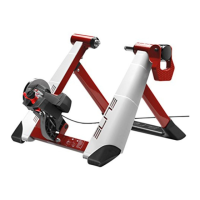
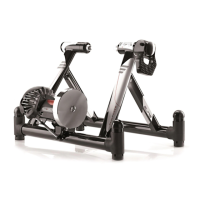
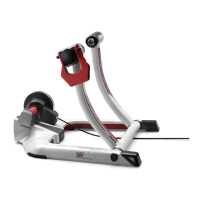
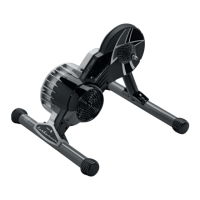
The Elite Crono Fluid Power Fluid trainer is a home-training device designed to simulate road cycling conditions indoors. It consists of a stand that holds a bicycle in place and a fluid resistance unit that provides a realistic pedaling feel.
Function Description
The Crono Fluid Power Fluid trainer allows cyclists to train indoors using their own bicycle. The resistance unit, which uses fluid technology, offers progressive resistance that increases with wheel speed, mimicking the feel of riding on the road. The trainer is designed to be stable and secure, ensuring a safe training experience. It accommodates various wheel sizes and types, with specific recommendations for optimal performance and tire longevity.
Important Technical Specifications
The trainer features an Elastogel roller, which is designed to reduce tire wear, noise, and vibrations. The roller has a thickness of 13 mm, and tests indicate that after 20,000 km of constant use, wear is minimal (approximately 0.1 mm), which does not affect functionality. The stand is designed to be robust and stable, with front legs that should be in a vertical position during use. The quick release mechanism provided with the trainer is crucial for secure bicycle attachment.
Usage Features
Assembly:
The Fluid stand comes pre-assembled. Users only need to place it on a level surface, ensuring the front stanchion (8) is vertical and the base (9) is horizontal. If the friction between the base and stanchion is insufficient to keep the stand open, the two hinge screws should be tightened.
Resistance Unit Assembly:
- Place the fluid resistance unit (11) onto the unit support (7).
- Secure the resistance unit to the support using the M6 x 25 mm screws and Ø 6.3 x 14 mm washers from the underside of the support, as shown in Illustration 2.
- Select the appropriate pair of holes for the bike's rear wheel: front holes for small diameter wheels, and rear holes for larger wheels. For a 28” (Ø 670 mm) race wheel, the central holes are recommended. For 700 mm diameter wheels, the rear holes are suggested.
Bicycle Installation:
- Replace the bicycle's standard rear wheel quick release with the quick release supplied with the trainer (10).
- Ensure the supplied quick release is tightly secured on the bicycle wheel.
- Position the locking ring (4) of the handle (5) as shown in Illustration 3a. Unscrew the fastening screw (3) until the right support cup (2) touches the frame stand (Illustration 3b).
- Verify that the front legs (8) of the stand are in a vertical position.
- Insert the left edge of the quick release into the left support cup (1) (Illustration 4a). Ensure the left support cup (where the quick release lever is blocked) faces upwards (Illustration 4b) for secure locking.
- Rotate the handle (5) to tighten the fastening screw (3) until the right support cup (2) touches the nut on the right side of the quick release lever (Illustration 5).
- After initial contact, rotate the handle (5) one full turn to firmly secure the bike to the top tube of the frame and move the saddle.
- Lock the fastening system by moving the locking ring (4) of the handle into a locking position (Illustration 6).
- Push the bike towards the resistance unit until the rear wheel contacts the Elastogel roller (Illustration 7).
- Verify the bike's stability by pushing the top tube of the frame and moving the saddle. If the bike is not fully secured, ensure the quick release and its lever are correctly positioned and the locking ring (4) is in the correct position. If still not fixed, tighten the handle (5) by another quarter turn.
- Crucially, never get on the bike if it is not firmly fastened to the stand, as this can lead to injury or damage.
- Once secured, training can begin. Resistance levels are adjusted using the bicycle's gear shifter, similar to road riding.
Bicycle Removal:
- Unlock the handle (5) by manipulating the locking ring (4) to touch the handle (5) (Illustration 3a).
- Hold the bicycle with one hand and unscrew the fastening screw (3) by rotating the handle (5) until the bicycle is freed, then remove the bike.
Maintenance Features
Important Considerations:
- Tire Compatibility: Use slick tires with a 23 mm or wider rigid casing. Tire pressure should be 7-8 atm for racing tires and 4 atm for MTB tires. Insufficient pressure or narrow tires can damage the Elastogel roller and tire.
- MTB Use: For mountain bikes, using a slick wheel improves traction, reduces tire and roller wear, and lowers noise and vibrations.
- Roller Slippage: The wheel must not slip on the roller. If it does, pedal more progressively. Regular slippage can damage the Elastogel roller and tire.
- Roller Wear: A slight sign of wear on the Elastogel roller is normal and does not affect performance.
- Quick Release Compatibility: If the supplied quick release pin (10) protrudes more than 3 mm from the locking nut, cut off the excess part (Figure 8).
- Cleaning: Before each training session, clean the bicycle tire with water or a cleaner.
Safety and Warranty:
- Do not block the rotation of the bicycle wheel using caliper or disk brakes, as this will severely damage the roller and tire.
- The resistance unit becomes very hot during use. Allow it to cool down before handling.
- The internal components are not user-serviceable. Opening or tampering with the unit will void the warranty.
- The stand is designed for use by a single cyclist only.
- Always verify the bike's safety and stability before each training session.
- The anti-slip feet may leave small traces on some floor surfaces.