10
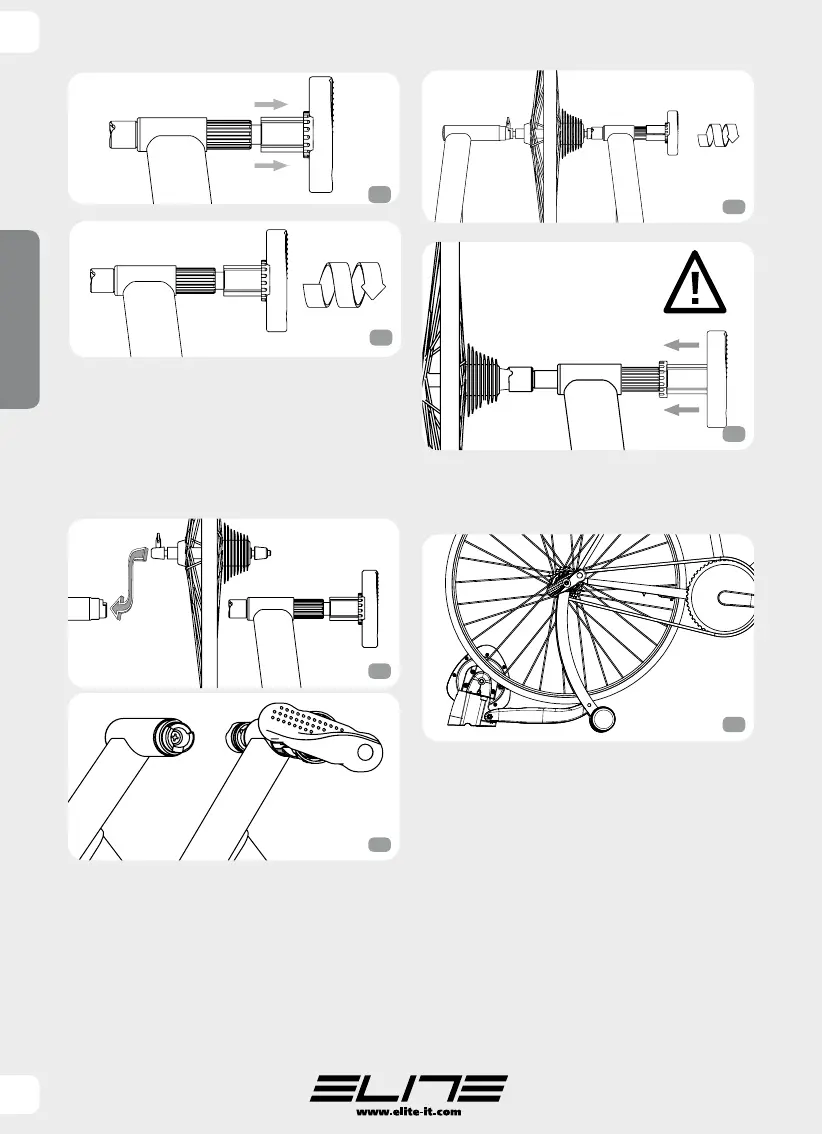
release lever is blocked) is positioned with the
undercutting facing upwards (See ill. 4b).
6 By rotating the handle , tighten the fastening
screw until the right support cup touches the
nut, right side, of the quick release lever (ill. 5).
7 After the contact, rotate the handle of
a complete turn to tightly firm the bike to the
support stand.
8 Lock the fastening system by using the locking
ring of the handle, moving it in a locking posi-
tion (ill. 6).
9 Push the bike towards the resistance unit,
until the rear wheel comes into contact with the
elastogel roller (ill. 7).
10 Verify the stability of the bike by pushing the
top tube of the frame and moving the saddle.
I f
the bike is not fully secured, make sure that
the quick release and its lever are correctly
positioned and the locking ring is in the
correct position. If the bike does not result
securely fixed, tighten the handle by another
one-quarter turn.
Do not ever get on the bike if it is not firmly
fastened to the stand, as injury to the user or
damage to the cycle may occur.
11 Now you can start your training. To have
different levels of resistance, use the bicycle’s
gear shifter just like you do when you ride on
the road.
BIKE REMOVAL
1 Unlock the handle by working on the locking
ring , making it touch the handle (ill. 3a).
ENGLISH
GB
4a
4b
5
6
7
3a
3b

 Loading...