Page 41000004299 (Rev. B - 04/2018)
LVRC8WS_2AWR, LVRCWS_2AWR
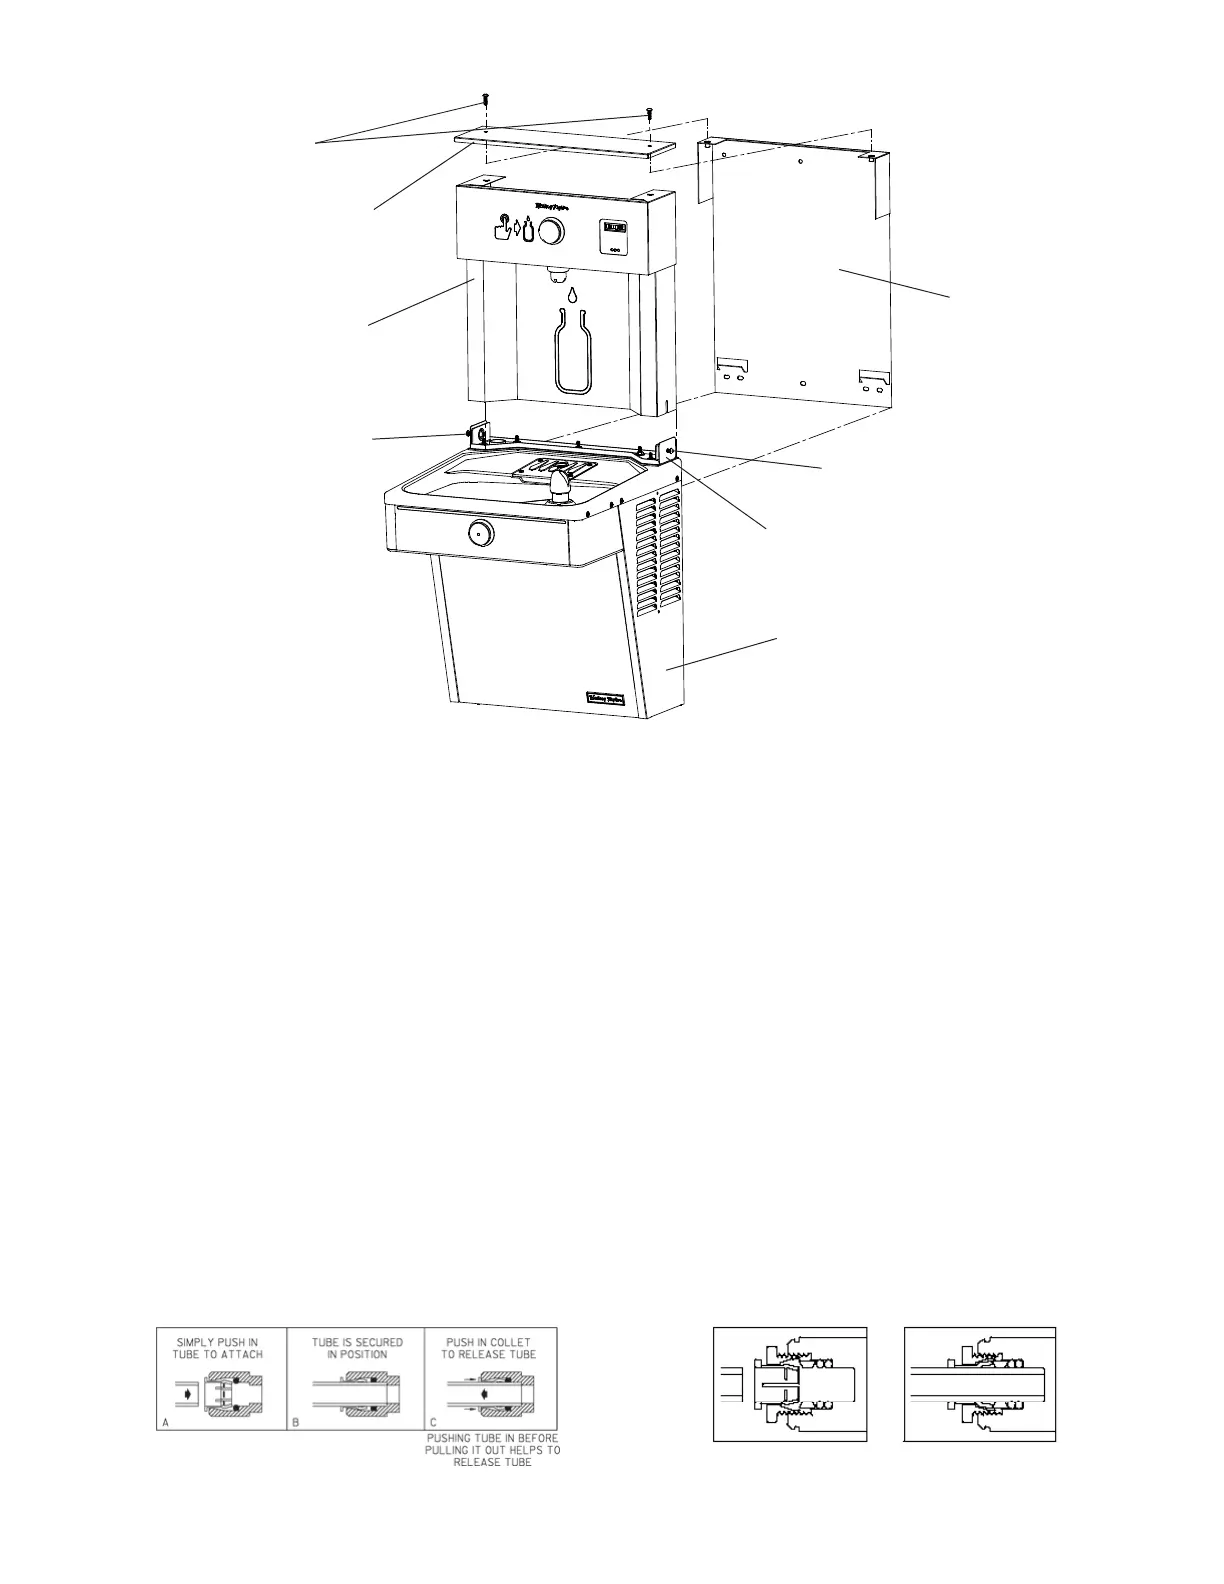
Installation: Bottle Filler Mounting
MOUNTING SCREWS
WATER COOLER
MOUNTING SCREW
DO NOT REMOVE
MOUNTING BRACKET
FOR FASTENING UNIT
TO WALL
TOP COVER
BOTTLE FILLER
MOUNTING SCREW
DO NOT REMOVE
NOTE: TRIM PLATES MUST
BE INSTALLED ON THE
INSIDE OF THE BOTTLE
FILLER SIDE PANEL SLOTS
1. Remove Bottle Filler from carton.
2. Lay Bottle Filler on water cooler basin and cut insulation from tube even with bottom of unit, remove this insulation from the 3/8” tube, but do
not discard.
NOTE: To prevent scratching the basin, place a towel or soft cloth over the entire basin when working above it.
3. Feed the waterline through the hole on top of water cooler.
4. Feed modular (C-13) end of International Power Cord Set up from the underside through hole on top of water cooler and hole in gasket, and
connect to Power Inlet on Bottle Filler. Do not plug into electrical outlet.
5. With the power cord and waterline through the hole on top of water cooler place Bottle Filler on to mounting bracket on basin.
NOTE: Make sure bottle ller is installed properly on the basin gasket.
6. Once Bottle Filler is installed on basin mounting bracket, tighten the two screws (supplied) one on each side of the bottle ller.
7. Install Top Cover on Bottle Filler with two mounting screws (supplied).
CAUTION: Do not over tighten screws.
8. Install remaining tube insulation to the water line from bottle ller, connect Bottle Filler waterline inside of the water cooler by connecting the
3/8” water line with the 3/8” to 1/4” union and short piece of poly tube that was previously installed to the tee at the evaporator outlet.
9. Install lter cartridge, remove lter from carton, remove protective cap, attach lter to head by rmly inserting into head and rotating lter
counterclockwise.
NOTE: If existing plumbing rough-in locations (Drain, Water In, Electric Supply) do not allow the lter to be mounted inside the coolercabinet the
lter can be installed horizontally below the unit. A retrot kit is available to mount the lter beneath the cooler.
Note: Screw the locknut hand tight to seal
 Loading...