6
4
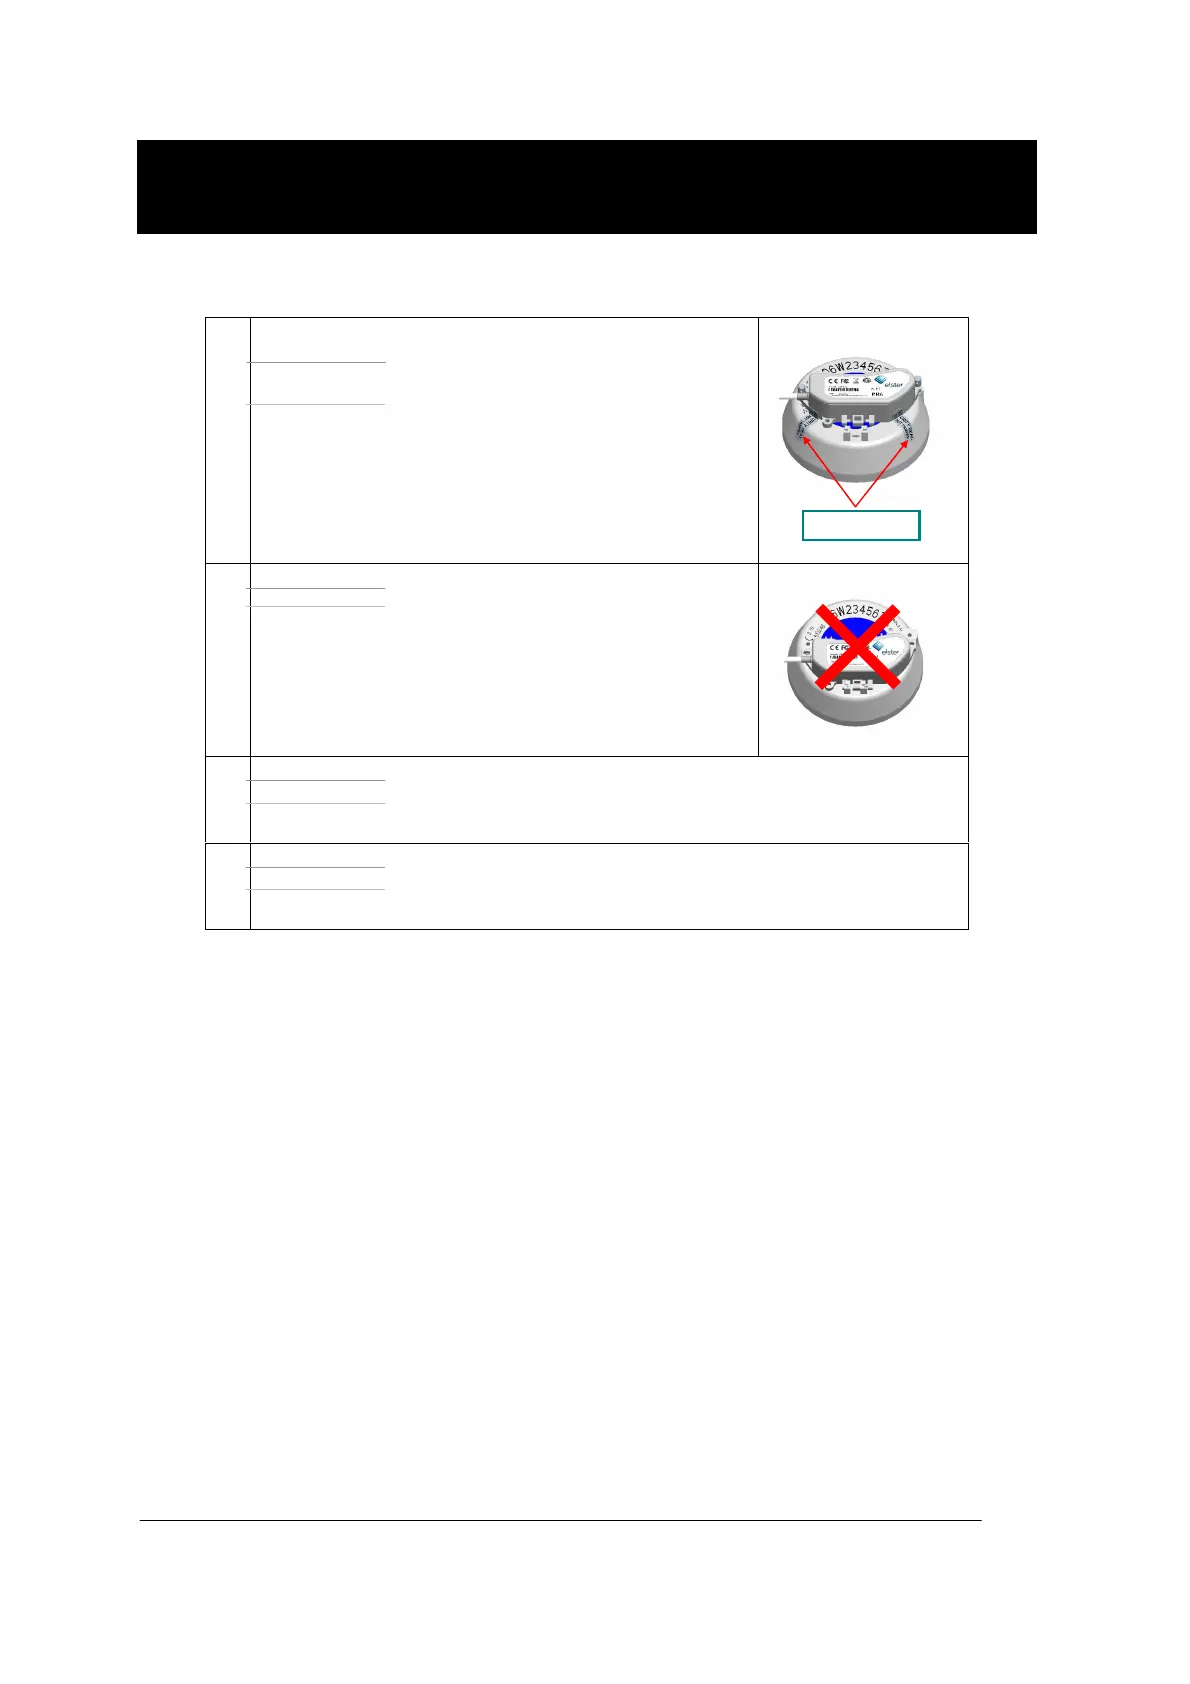
UK - The security labels provide evidence of any attempt to tamper with the
pulse unit attached to the meter. Fit them across the joint as shown.
FR - Avec l'émetteur fixe sur le compteur, les poinçons mettent en évidence
toute tentative de fraude. Fixer les comme indique ci-contre.
ES - Las etiquetas de seguridad proporcionan evidencia del intento de fraude
(desmontaje) con el emisor conectado al contador. Colóquelas en las
zonas de unión como se ilustra en el dibujo
5
UK - Note: Do not attach the PR6 unit to the hinge on the H4000P shroud.
FR - Ne pas attacher le PR6 sur la charnière de la coiffe du H4000P.
ES - Nota: NO coloque el PR6 en la bisagra de la tapa del contador H4000P
6
UK - For wiring details see connection table.
FR - Voir le tableau pour le branchement des câbles.
ES - Para detalles sobre el cableado, ver la tabla de conexión
7
UK - Reverse the step to remove the Falcon PR6 from the H4000P meter.
FR - Effectuer les opérations inverses pour retirer le PR6 du H4000P.
ES - Para desmontar el PR6 seguir el procedimeinto inverso
SECURITY LABELS