28
GB
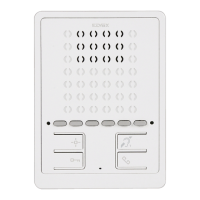
8) On the push-buttons entrance panels press the call push-button cor-
responding to the main (already programmed) interphone / video-inter-
phone, on the alphanumeric entrance panel, on the contrary, enter the
same call code of the “Master” interphone / video-interphone and
press “ ”.
9) If on the installation there is already an interphone / video-interphone with
the same associated identification code, the panel emits a low-pitched
tone and you must repeat the operation from the beginning.
10) Once the secondary identification code is associated to the video-in-
terphone, the communication is terminated.
To find out the assigned number, refer to the table given in the wiring dia-
grams section of the Two-Wire manual entrance panel or electronic unit.
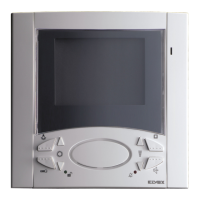
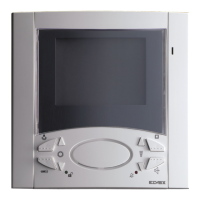
Programming the push-buttons
The video-interphone is supplied with 3 push-buttons for the following fun-
ctions: lock release, self-start and “stair light” auxiliary service, which acti-
vates the 1st relay of the 1st actuator (type 69HR), if connected to the
installation and with other 6 push-buttons for intercommunicating calls or
auxiliary services.
To change the operation type of push-buttons it is necessary to use pro-
grammer type 950C or SaveProg, with the exception of the assignation of
the functions for the intercommunicating calls and self-start to a specific
entrance panel.
Programming the push-buttons for the intercommunicating calls
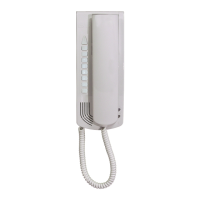
(In the audio/video door entry unit where the intercom call is to be sent
it is necessary to pick up the handset (8870, Petrarca and Giotto series)
or hold down push-button (for the 6600 and 7200 series).
Programming phase:
1) Press and hold down .
2) Press and hold down also together with .
3) Wait for nearly 3 seconds until the red led flashes.
4) Release both push-buttons and .
5) Press and hold down the push-button to be programmed (or
one of push-button: , , , ).
6) After 2 seconds the video-interphone emits a high-pitched tone, while
the other interphone / video-interphone emits a three-tone ascending
scale.
7) Release the push-button related to the intercommunicating call
(or one of push-button: , , , ).
8) On the interphone/monitor called (with the 3-tone ring), press the lock
release push-button.
9) A high-pitched tone confirms the end of the procedure.
Repeat the procedure also for the other interphones / video-interpho-
nes ad possible intercommunicating call push-buttons.
Programming the self-start push-button to a specific entrance panel.
Programming phase:
1) Press and hold down .
2) Press and hold down also
“”
together with “ ”.
3) Wait for nearly 3 seconds until the red led “ ” flashes.
4) Release both push-buttons and .
5) Press and hold down the “ ” push-button to be programmed
(or one of push-button: , , , ).
6) After nearly 2 seconds the video-interphone emits a high-pitched tone.
7) Release the push-button “ ” related to the self-start (or one of
push-button: , , , ).
8) On the entrance panels with push-buttons press the call push-button
corresponding to the video -interphone; on the alphanumeric entrance
panel, on the contrary, enter the call code and press “ ”.
9) A high-pitched tone will confirm the end of the procedure.
PROGRAMMING
There are three monitor programming modes: assignment of an identifica-
tion code or call code (indispensable), assignment of a secondary identifi-
cation code (for video interphones associated with a master video
interphone), programming of push-buttons for auxiliary services and inter-
communicating calls (when necessary).
Programming must be performed with the system switched on, without
active communication and only after connecting the interphones/video in-
terphones to the system and programming the panels.
Programming the identification code
The identification code is to be programmed by means of an entrance
panel (main- “Master”), present on the installation and already configura-
ted. The video-interphone is supplied without associated identification
code. To check this, press the push-button and the video-inter-
phone will emit a triple “Beep”.
Attention: during the interphone/video interphone identification code
programming you have 30 seconds from the moment you enter the
programming in the interphone/video interphone and the moment you
press the call push-button on the panel or you send the code.
Programming phase:
1) Press and hold down .
2) Press and hold down also together with .
3) Wait for nearly 3 seconds until the red led flashes.
4) Release both push-buttons and . You have now 5 se-
conds to carry out any of the described programmings.
5) Press and hold down the lock push-button.
6)
After approximately 2 seconds the video door entry unit emits a high tone,
it self-starts and communication is enabled with the main entrance panel.
7) On the entrance panels with push-buttons press the call push-button
corresponding to the video-interphone, on the alphanumeric entrance
panel, on the contrary, enter the call code and press “ ”.
8)
If the system already contains an audio/video door entry unit that has the
same associated identification code, the panel emits a low sound signal
and the operation needs to be repeated from the start in order to assign
a different code.
9) If not, the code is associated to the video-interphone and the com-
munication is terminated.
Programming the secondary identification code
The programming of the secondary identification code is required only
when you want more than a video- interphone to ring at the same time with
the same push-button or call code. The video-interphones which must ring
simultaneously are associated with the same push-button to the same
group. The “master” interphone / video-interphone is programmed in first
place by means of the previous procedure: “programming the identification
code”. The additional interphones / video-interphones are programmed
with the secondary identification code (see table page 44). A maximum of
three audio door entry units plus one group master can be associated with
the same group, without the need for programmer Type 950C or SaveProg.
Programming phase:
1) Press and hold down .
2) Press and hold down also together with
.
3) Wait for nearly 3 seconds until the red led flashes.
4) Release both push-buttons and .
5) Press both push-buttons and .
6) After 2 seconds the video-interphone emits a high-pitched tone and
gets in communication with the entrance panel.
7) Release the door lock and the self-start push-but-
tons.
 Loading...