EasyManua.ls Logo

Emerson dixell WING XW20L - User Manual

Emerson dixell WING XW20L
4 pages
Print Icon
To Next Page IconTo Next Page
Loading...
1592009221 XW20L-V GB r1.0 30.05.2011 XW20L – XW20V 1/4
WING
XW20L – XW20V
1. GENERAL WARNING
1.1 PLEASE READ BEFORE USING THIS MANUAL
This manual is part of the product and should be kept near the instrument for easy and quick
reference.
The instrument shall not be used for purposes different from those described hereunder. It cannot
be used as a safety device.
Check the application limits before proceeding.
1.2
SAFETY PRECAUTIONS
Check the supply voltage is correct before connecting the instrument.
Do not expose to water or moisture: use the controller only within the operating limits avoiding
sudden temperature changes with high atmospheric humidity to prevent formation of
condensation
Warning: disconnect all electrical connections before any kind of maintenance.
Fit the probe where it is not accessible by the End User. The instrument must not be opened.
In case of failure or faulty operation send the instrument back to the distributor or to “Dixell S.r.l.”
(see address) with a detailed description of the fault.
Consider the maximum current which can be applied to each relay (see Technical Data).
Ensure that the wires for probes, loads and the power supply are separated and far enough from
each other, without crossing or intertwining.
In case of applications in industrial environments, the use of mains filters (our mod. FT1) in
parallel with inductive loads could be useful.
2. GENERAL DESCRIPTION
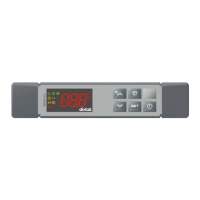
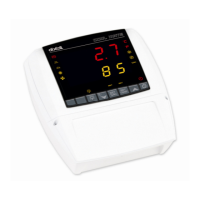
Model XW20L, 38x185 mm format, and model XW20V, 100x64 format, are microprocessor based
controllers suitable for applications on medium or normal temperature refrigerating units. They are
provided with 2 relay outputs to control compressor and the lights.
They are also provided with 1 NTC or PTC probe inputs for temperature control. There are 1 digital
inputs (free contact) configurable by parameter.
An output allows the user to programme the parameter list with the “Hot Key”.
3. CONTROLLING LOADS
3.1 THE COMPRESSOR
The regulation is performed according to the temperature measured by the thermostat probe with a
positive differential from the set point: if the temperature increases and reaches set point plus
differential the compressor is started and then turned off when the temperature reaches the set point
value again.
In case of fault in the thermostat probe the start and stop of the compressor are timed through
parameters “COn” and “COF”.
3.2 FAST FREEZING
When defrost is not in progress, it can be activated the keypad by holding the o key pressed for about
3 seconds. The compressor operates in continuous mode for the time set through the “CCt” parameter.
The cycle can be terminated before the end of the set time using the same activation key, o for about
3 seconds.
3.3 DEFROST
The defrost interval is control by means of parameter “EdF”: (EdF=in) the defrost is made every “IdF
time, (EdF=Sd) the interval “IdF” is calculate through Smart Defrost algorithm (only when the
compressor is ON).
Defrost is performed through a simple stop of the compressor. Parameter “IdF” controls the interval
between defrost cycles, while its length is controlled by parameter “MdF”.
4. KEYBOARD
To display and modify target set point; in programming mode it selects a parameter or
confirm an operation.
By holding it pressed for 3s when max or min temperature is displayed it will be erased.
To see the max. stored temperature; in programming mode it browses the parameter
codes or increases the displayed value. By holding it pressed for 3s the fast freezing cycle
is started.
To see the min stored temperature; in programming mode it browses the parameter codes
or decreases the displayed value.
By holding it pressed for 3s the defrost is started.
Switch ON and OFF the light of the cold-room
Switch ON and OFF the instrument.
KEY COMBINATIONS
+
To lock and unlock the keyboard.
+
To enter the programming mode.
+
To exit the programming mode.
4.1 USE OF LEDS
Each LED function is described in the following table.
LED MODE Function
ON The compressor is running
FLASHING
- Programming Phase (flashing with LED
)
- Anti-short cycle delay enabled
FLASHING
Programming Phase (flashing with LED
)
ON The defrost is enabled
FLASHING Drip time in progress
ON The Fast Freezing cycle is enabled
ON - ALARM signal
- In “Pr2” indicates that the parameter is also present in “Pr1”
ON The light is on
4.2 HOW TO SEE THE MIN TEMPERATURE
1. Press and release the n key.
2. The “Lo” message will be displayed followed by the minimum temperature recorded.
3. By pressing the n key or waiting for 5s the normal display will be restored.
4.3 HOW TO SEE THE MAX TEMPERATURE
1. Press and release the o key.
2. The “Hi” message will be displayed followed by the maximum temperature recorded.
3. By pressing the o key or waiting for 5s the normal display will be restored.
4.4 HOW TO RESET THE MAX AND MIN TEMPERATURE RECORDED
To reset the stored temperature, when max or min temperature is displayed :
1. Press SET key until “rST” label starts blinking.
N.B. After the installation RESET the temperature stored .
4.5 HOW TO SEE AND MODIFY THE SET POINT
1. Push and immediately release the SET key: the display will show the Set point value;
2. The SET LED start blinking;
3. To change the Set value push the o or n arrows within 10s.
4. To memorise the new set point value push the SET key again or wait 10s.
4.6 TO START A MANUAL DEFROST
1. Push the DEF key for more than 2 seconds and a manual defrost will start.
4.7 TO ENTER IN PARAMETERS LIST “PR1”
To enter the parameter list “Pr1” (user accessible parameters) operate as follows:
1. Enter the Programming mode by pressing the Set and DOWN key for few
Question and Answer IconNeed help?

Do you have a question about the Emerson dixell WING XW20L and is the answer not in the manual?

Overview

The Dixell XW20L and XW20V are microprocessor-based controllers designed for medium or normal temperature refrigerating units. These devices are available in two formats: XW20L (38x185 mm) and XW20V (100x64 mm). They feature two relay outputs for controlling the compressor and lights, and one NTC or PTC probe input for temperature control. Additionally, they include one configurable digital input (free contact) and an output for programming the parameter list using a "Hot Key."

Function Description

Compressor Control: Regulation is based on the temperature measured by the thermostat probe and a positive differential from the set point. The compressor starts when the temperature reaches the set point plus differential and turns off when it returns to the set point value. If the thermostat probe fails, compressor operation is timed by "COn" and "COF" parameters.

Fast Freezing: This function can be activated by holding the UP key for approximately 3 seconds when defrost is not in progress. The compressor operates continuously for the duration set by the "CCt" parameter. The cycle can be terminated prematurely by pressing the same activation key for about 3 seconds.

Defrost: Defrost interval control is managed by the "EdF" parameter. If "EdF=in," defrost occurs every "IdF" time. If "EdF=Sd," the "IdF" interval is calculated using the Smart Defrost algorithm, which activates only when the compressor is ON. Defrost is performed by simply stopping the compressor. The "IdF" parameter controls the interval between defrost cycles, while "MdF" controls its duration.

Keyboard Usage:

  • SET Key: Displays and modifies the target set point. In programming mode, it selects a parameter or confirms an operation. Holding it for 3 seconds when max or min temperature is displayed erases it.
  • UP Key: Displays the maximum stored temperature. In programming mode, it browses parameter codes or increases the displayed value. Holding it for 3 seconds starts the fast freezing cycle.
  • DOWN Key: Displays the minimum stored temperature. In programming mode, it browses parameter codes or decreases the displayed value. Holding it for 3 seconds starts defrost.
  • Light Key: Switches the cold-room light ON and OFF.
  • ON/OFF Key: Switches the instrument ON and OFF.

Key Combinations:

  • UP + DOWN: Locks and unlocks the keyboard.
  • SET + DOWN: Enters programming mode.
  • SET + UP: Exits programming mode.

LED Indicators:

  • Compressor LED (ON): Compressor is running.
  • Compressor LED (FLASHING): Programming phase or anti-short cycle delay enabled.
  • Defrost LED (FLASHING): Programming phase (with defrost enabled).
  • Defrost LED (ON): Defrost is enabled.
  • Defrost LED (FLASHING): Drip time in progress.
  • Fast Freezing LED (ON): Fast Freezing cycle is enabled.
  • Alarm LED (ON): Alarm signal.
  • Alarm LED (ON, in Pr2): Indicates the parameter is also present in Pr1.
  • Light LED (ON): Light is on.

Viewing and Modifying Temperatures:

  • Min Temperature: Press and release the DOWN key. "Lo" message appears, followed by the minimum recorded temperature.
  • Max Temperature: Press and release the UP key. "Hi" message appears, followed by the maximum recorded temperature.
  • Reset Stored Temperature: When max or min temperature is displayed, press the SET key until "rST" blinks.
  • Set Point: Push and release the SET key. The display shows the set point value, and the SET LED blinks. Use UP or DOWN arrows to change the value within 10 seconds. Push SET again or wait 10 seconds to memorize.
  • Manual Defrost: Push the DEF key for more than 2 seconds.

Parameter Lists:

  • Pr1 (User Accessible Parameters): Enter by pressing SET and DOWN keys for a few seconds.
  • Pr2 (Hidden Parameters): Enter Pr1, then press SET and DOWN keys for 7 seconds.

Digital Input Functions (I2F parameter):

  • dor (Door Switch): Manages door open/close.
  • EAL (External Alarm): Triggers an external alarm.
  • bAL (Serious External Alarm): Triggers a serious external alarm.
  • PAL (Pressure Switch Alarm): Triggers a pressure switch alarm.
  • dFr (Start Defrost): Initiates a defrost cycle.
  • AUS (Not Used): Digital input is not used.
  • ES (Energy Saving): Activates energy saving mode.
  • OnF (Remote ON/OFF): Switches the instrument ON/OFF remotely.

Important Technical Specifications

  • Housing: Self-extinguishing ABS.
  • Dimensions:
    • XW20L: Facia 38x185 mm, depth 76mm.
    • XW20V: Facia 100x64 mm, depth 76mm.
  • Mounting:
    • XW20L: Panel mounting in a 150x31 mm cut-out with two Ø3x2mm screws (165mm distance). Also available for 56x72 mm cut-out with two Ø3x2mm screws (40mm distance).
  • Protection: IP20 (IP65 with optional frontal gasket RG-L for XW40L; RGW-V for XW40V).
  • Connections: Screw terminal block ≤ 2.5 mm² (heat-resistant wiring) and 6.3mm Faston.
  • Power Supply: 230Vac or 110Vac ± 10%.
  • Power Absorption: 7VA max.
  • Display: 3 digits, red LED, 14.2 mm high.
  • Inputs: 1 NTC or PTC probe, 1 free voltage digital input.
  • Relay Outputs (Total current on loads MAX. 20A):
    • Compressor: SPST 20(8) A, 250Vac or SPST 8(3) A, 250Vac.
    • Light: XW20L: SPDT 8(3) A, 250Vac; XW20V: SPST 16(6) A, 250Vac.
  • Other Output: Alarm buzzer (optional).
  • Data Storing: Non-volatile memory (EEPROM).
  • Kind of Action: 1B.
  • Pollution Grade: Normal.
  • Software Class: A.
  • Operating Temperature: 0÷60 °C.
  • Storage Temperature: -25÷60 °C.
  • Relative Humidity: 20÷85% (non-condensing).
  • Measuring and Regulation Range:
    • PTC probe: -50÷150°C (-58÷302°F).
    • NTC probe: -40÷110°C (-58÷230°F).
  • Resolution: 0.1 °C or 1°C or 1°F (selectable).
  • Accuracy (ambient temp. 25°C): ±0.5 °C ±1 digit.

Usage Features

  • Easy Parameter Configuration: The "Hot Key" allows for quick uploading and downloading of parameter lists, simplifying setup for multiple units.
  • Alarm Management: Includes various alarm signals such as probe failure ("P1"), maximum/minimum temperature ("HA"/"LA"), data/memory failure ("EE"), door switch ("dA"), external alarms ("EAL"/"BAL"), and pressure switch alarm ("PAL"). The buzzer can be silenced by pressing any key.
  • Alarm Recovery: Alarms automatically recover when conditions return to normal (e.g., probe working, door closed, temperature within limits). "EE" alarm requires pressing any key to reset.
  • Energy Saving: The "ES" function allows changing the set point value by adding a "HES" parameter, activated by the digital input.

Maintenance Features

  • Electrical Connections: Disconnect all electrical connections before any maintenance.
  • Probe Placement: Fit the probe where it is not accessible by the end user. Mount the probe bulb upwards to prevent liquid infiltration. Place the thermostat probe away from air streams for accurate average room temperature measurement.
  • Troubleshooting: In case of failure, send the instrument back to the distributor with a detailed description of the fault.
  • Environmental Considerations: Avoid exposing the controller to water or moisture, strong vibrations, corrosive gases, excessive dirt, or humidity. Ensure proper air circulation around the cooling holes.
  • Wiring: Separate probe wires from power supply wires, loads, and power connections to prevent interference. Use mains filters (e.g., Dixell FT1) with inductive loads in industrial environments.
  • "Hot Key" Operations:
    • Download: Turn off the instrument, insert the "Hot Key," then turn on. The parameter list downloads automatically, displaying "DoL." After 10 seconds, the instrument restarts with new parameters.
    • Upload: Turn off the instrument, insert the "Hot Key," then turn on. Press the UP key; "uPL" appears. Press SET to start uploading.
    • "end" indicates successful programming, "err" indicates failure. For failure, restart the download or remove the "Hot Key."

Emerson dixell WING XW20L Specifications

General IconGeneral
BrandEmerson
Modeldixell WING XW20L
CategoryTemperature Controller
LanguageEnglish

Related product manuals