Pull the hanger ball up tight against
the pin and securely tighten the
setscrew in the hanger ball. A loose
setscrew could create the fan to
wobble.
13. Install the hanger bracket, then hang
the fan in accordance with the
instructions in the ceiling fan Owner's
Manual.
14. Screw two 1-1/4" threaded studs
(supplied with the ceiling fan) into the
tapped holes in the hanger bracket
(Figure 9).
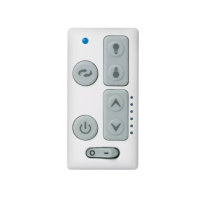
15. Position the receiver by passing the
opening in the receiver over the
hanger pipe (Figure 9).
5
NOTE 5: On Model CF2600, CF2650 and
CF2675 Series Ceiling Fans, if you have
installed the 18” downrod (supplied)
and are planning to install the
decorative support rods, proceed to
“Installation of Decorative Support
Rods Assembly” section in the ceiling
fan owner’s manual. After you have
installed the support rods assembly,
continue with the following installation
procedures.
NOTE 6: On Model CF4600 Series
Ceiling Fans, assemble the upper
housing, the upper glass and the
housing trim and slide the assembly
over the downrod in accordance with
the instructions in the ceiling fan
owner’s manual. Then proceed with
steps 11 through 19 below.
11. Position the ceiling cover over the
hanger pipe (Figure 8). Be sure the
cover is oriented correctly, with the
large opening at the top.
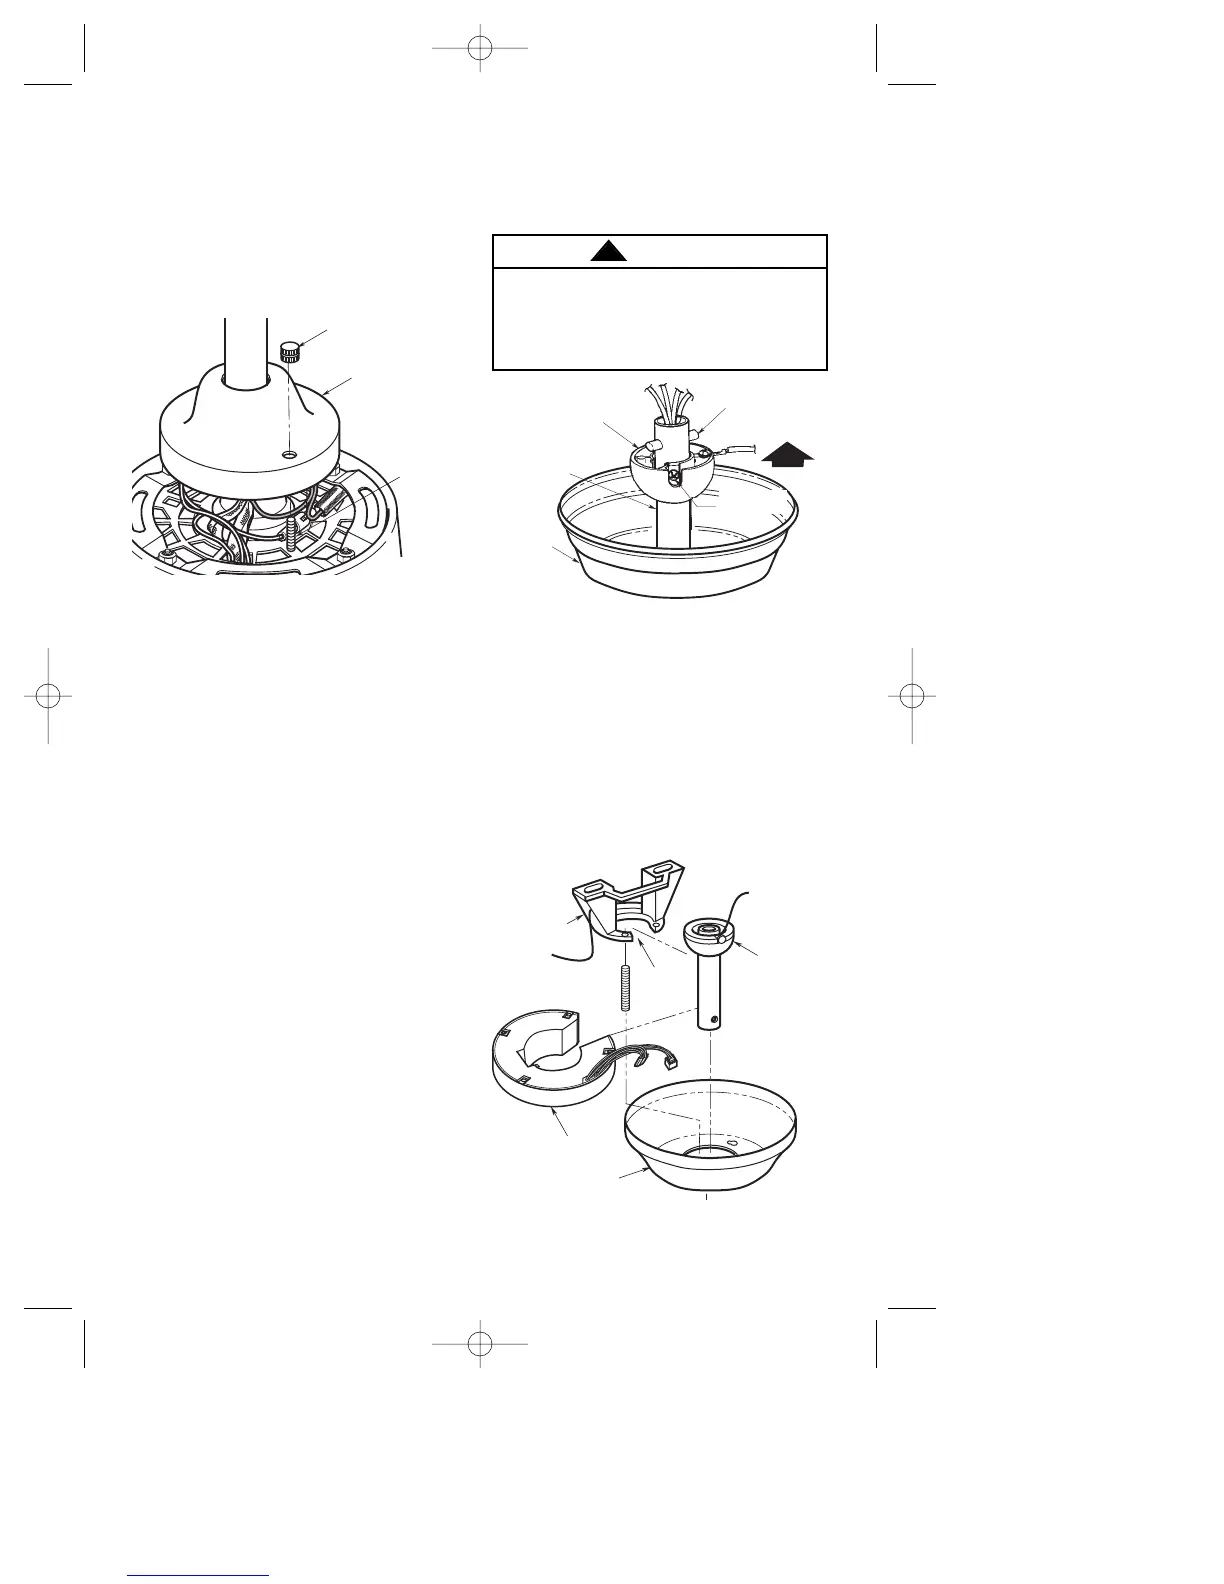
12. Install the hanger ball on the hanger
pipe as follows. Route the wiring
harness connectors through the
hanger ball and slide the hanger ball
over the hanger pipe. Install the pin
through the holes at the top of the
hanger pipe and slide the hanger ball
up the hanger pipe, aligning the ball
so the pin is captured in the groove in
the top of the hanger ball (Figure 8).
Figure 9
wire connectors around the motor
coupling, then slide the motor cover
over the hanger pipe and rotate the
motor cover until the threaded studs
protrude. Install two knurled knobs
(supplied with ceiling fan) to secure
the motor cover to the fan (Figure 7).
All wires and wire connectors must be
enclosed under the motor cover.