8. Select ‘DTS Output’ and press the ‘OK’ button. Set ‘DTS Output’ to
‘S/PDIF RAW’.
9. Select ‘AAC Output’ and press the ‘OK’ button. Set ‘AAC Output’ to ‘S/PDIF
LPCM’.
7.4 Setting up the network
During the wizard, the initial network setup was available. The network settings can be
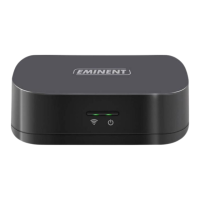
changed afterwards if necessary. Also, it is possible to connect a wireless USB dongle
such as the EM4576 or EM4579 to connect the media player wirelessly to your
network. During the next chapter we will explain how wired network settings can be
changed and how to setup a wireless connection.
7.4.1 Wired connection-Automatically using DHCP
1. Use the navigation buttons to go to ‘Setup’ and press the ‘OK’ button.
2. Select ‘Network’.
3. Select ‘Wired Lan Setup’ and press the ‘OK’ button.
4. Choose ‘DHCP IP (AUTO)’ to automatically obtain an IP-Address. Press the ‘OK’
button to confirm.
5. Choose ‘DNS (auto)’ and press the ‘OK’ button, after which the notification ‘Save
network settings appears’. Select ‘Yes’ and press the ‘OK’ button.
6. The connection will be tested. If correct, the notification ‘Connected’ will appear.
Also, an ‘IP-Address’ and ‘Submask’ will be shown. Press the ‘OK’ button.
7. Press the ‘Home’ button to return to the main menu.
7.4.2 Wired connection-Manually
In case your network does not have a DHCP server, or you want to manually ad an IP-
Address, you can use the following steps:
1. Use the navigation buttons to go to ‘Setup’ and press the ‘OK’ button.
2. Select ‘Network’.
3. Select ‘Wired Lan Setup’ and press the ‘OK’ button.
4. Choose ‘FIX IP (Manual)’ and press the ‘OK’ button.
5. Fill out an correct ‘IP-Address’ at ‘IP Address’. This IP-Address needs to be in
range with your network’s IP-Address.
6. Fill out a correct ‘Subnet Mask’ at ‘Subnet Mask’. This ‘Subnet Mask’ needs to be
the same as used in your network.
7. Fill out the ‘Default Gateway’ at ‘Default Gateway’. This Gateway is usually the
same as your router’s IP-Address.
8. Fill out a ‘DNS Server’ at ‘DNS Server IP address’. You can fill out the same
number as filled in at ‘Default Gateway’. You can also fill out a DNS server which
is in use by your provider.
9. Press the ‘OK’ button and choose ‘Yes’ at the ‘Save’ question. Press the ‘OK’
button again to save the settings.
 Loading...