8
Displaying Max/Min Measured Temperature and Humidity
Maximum and minimum readings of the measured indoor and outdoor temperature and humidity are
automatically recorded in the memory of the weather station. Press repeatedly MAX/MIN to display
the readings measured.
The memory of measured values is automatically erased every day at 00:00.
You can also clear the memory by long-pressing the MAX/MIN button.
Setting Outdoor Temperature Limits
Temperature limits can be set independently for up to 3 outdoor temperature sensors.
Min -20 °C to +49 °C
Max -19 °C to +50 °C
Resolution 1 °C
Press the CH button repeatedly to select sensor no. 1, 2 or 3 and proceed as follows for each sensor.
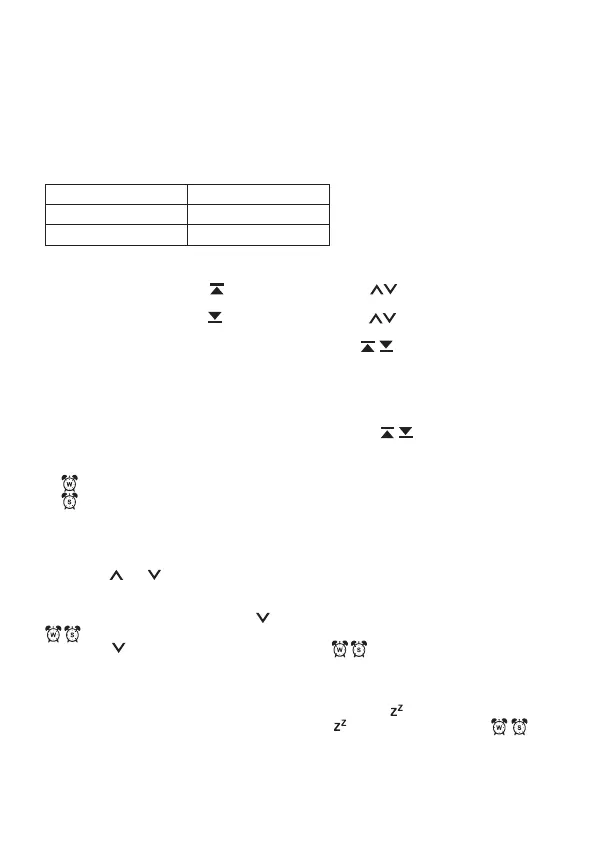
1. Long-press the ALERT button.
2. The max temperature icon
will start ashing, use the buttons to set the value and
conrm by pressing the ALERT button.
3. The min temperature icon will start ashing, use the buttons to set the value and
conrm by pressing the ALERT button.
4. Then short-press the ALERT button to activate the function;
icons will appear on the screen.
5. When the set temperature limit is exceeded, an acoustic alert will activate for 1 minute and the
temperature value will begin ashing.
Pressing any button on the screen cancels the alert sound, but the icon of an active alert and
the temperature value will continue ashing. Once temperature drops below the set limit, the
icon and the temperature value on the screen will stop ashing.
6. Pressing the ALERT button again deactivates the function; the
icons will not be displayed.
Setting an Alarm
The weather station allows setting 2 alarms.
A1
= setting only for workdays: Monday to Friday.
A2
= setting only for weekends: Saturday, Sunday.
Choose the alarm you want to set:
1. Press the ALARM button 1× to open settings for alarm A1.
Press the ALARM button 2× to open settings for alarm A2.
2. Long-press the ALARM button – the time setting will start ashing.
3. Use the and buttons to set the hours and minutes for the alarm; holding the button down
speeds up adjustment.
Conrm the set value by pressing the ALARM button.
Activate the alarm by short-pressing the button again; the screen will display one or both icons
.
Pressing the
button again deactivates the alarm; the icon disappears.
Snooze Function
The ringing of the alarm can be postponed by 5 minutes using the SNOOZE/LIGHT button located on
the top of the weather station.
Press the button when the alarm starts ringing. The alarm icon and
will be ashing.
To cancel SNOOZE mode, press any other button – the
icon will stop ashing and will
remain on the screen.
The alarm will trigger again the next day.
Station Screen Illumination
When powered via adapter:
Permanent screen illumination is set by default.