9
Repeatedly pressing the SNOOZE/LIGHT button will allow you to set 3 dierent levels of permanent
illumination (maximum, medium, o).
When powered only by 2× 1.5 V AA batteries:
Screen illumination is o. Pressing the SNOOZE/LIGHT button will turn screen illumination on for
10 seconds. When the station is only powered by batteries, permanent screen illumination cannot
be activated!
Note: The inserted batteries serve as backup for the measured/set data. If batteries are not inserted
and you unplug the adapter, all data will be erased.
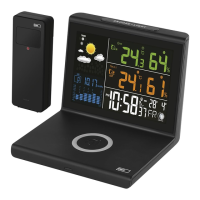
Wireless Charging
Check the cleanliness of the charging surface. Do not place any metal objects or aluminium stickers
onto the wireless charger.
Risk of re!
Plug the USB-C cable of the power adapter into the back of the weather station.
A blue LED will ash. The charger is ready for use.
Place a wireless device on the charger.
Check that the device is indeed charging; adjust the position of the device on the charger surface
if needed.
A blue LED will stay lit up during charging and once charging is complete.
If a red LED is ashing, the device is not charging – adjust the position of the device or remove it
from its case.
Check that the device is compatible with QI technology.
Disconnect the power adapter, wait for the device to cool down, then reconnect it.
Charging speed and charging values are dependent not only on the output of the adapter but also
the capabilities/parameters of the device which monitor and adjust charging values on the input.
Attention: The charger is not operational during a search for DCF signal!
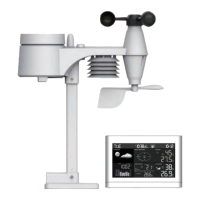
Weather Forecast
The station uses changes in atmospheric pressure to forecast weather for the next 12–24 hours for
an area within the radius of 15–20 km.
The accuracy of weather forecast is 70–75 %. The forecast icon is displayed in eld no. 4.
As the weather forecast may not be 100 % accurate, neither the manufacturer nor the seller can be
held responsible for any loss caused by an incorrect forecast.
When you rst set or reset the weather station, it takes approximately 12 hours before the weather
station begins forecasting correctly.
Weather Forecast Icons (see Fig. 5)
1 – Sunny
2 – Cloudy
3 – Overcast
4 – Rain
5 – Snow
A
icon will be displayed at outdoor temperatures lower than +4 °C.
Upkeep and Maintenance
The product is designed to serve reliably for many years if used properly. Here are some tips for
proper operation:
• Read the manual carefully before using the product.
• Do not expose the product to direct sunlight, extreme cold and humidity and sudden changes in
temperature. This would reduce detection accuracy. Do not place the product in locations prone
to vibration and shocks – may cause damage.
• Do not subject the product to excessive force, impacts, dust, high temperatures or humidity –
doing so may cause malfunction, shorten battery life, damage batteries and deform plastic parts.
• Do not expose the product to rain or moisture if it is not designed for outdoor use.
• Do not place any open ame sources on the product, e.g. a lit candle, etc.
• Do not put the product in places with inadequate air ow.
• Do not insert any objects into the product‘s vents.