10
WS9641-manual 0-0-0-K
EMOS spol. s r. o.
Uruchomienie i ustawinie czujnika
1. W pierwszej kolejności wkładamy baterie do czujnika. Do zasilania stosuje się
baterie alkaliczne 2 x AA, IEC LR6, 1.5V
2. Zdejmujemy pokrywę pojemnika na baterie i wkładamy baterie zwracając uwagę
na ich poprawną polaryzację zgodną z oznaczeniem na dnie pojemnika.
3. Zamykamy pokrywę pojemnika na baterie.
Uruchomienie i ustawinie jednostki centralnej
1. Przed upływem 30 sekund od uruchomienia czujnika wkładamy również baterie
do termometru.
2. Do zasilania termometru stosuje się baterie alkaliczne 2 x AA, IEC LR6, 1,5V.
3. Zdejmujemy pokrywę pojemnika na baterie i wkładamy baterie zwracając uwagę
na ich poprawną polaryzację zgodną z oznaczeniem na dnie pojemnika.
4. Zamykamy pokrywę pojemnika na baterie.
5. Po włożeniu baterii na chwilę zaświecą się na wyświetlaczu wszystkie dane i
termometr wyda krótkie „piknięcie“.
6. Następnie pojawi się czas 0.00, ikona chłopca oraz temperatura wewnętrzna i
wilgotność; jeżeli powyższe dane nie zostaną wyświetlone w czasie do 60 sekund,
należy wyjąć baterie; po odczekaniu 10 sekund ponownie wkładamy baterie.
7. Termometr zacznie odbierać dane transmitowane z czujnika. Temperatura
zewnętrzna pojawi się w górnej części wyświetlacza z ikoną ))); jeżeli w czasie
5 minut nie pojawi się odczyt temperatury zewnętrznej, należy wyjąć baterie z
czujnika i termometru a następnie powtórzyć procedurę według punktu 1.
8. Do poprawnej transmisji sygnału o częstotliwości 868 MHz jest wymagane
zapewnienie maksymalnej odległości miedzy czujnikiem a termometrem do 100
m na otwartej przestrzeni (w zastawionym różnymi przedmiotami pomieszczeniu
zasięg może gwałtownie zmaleć nawet do kilku metrów, również w zależności
od zastosowanych materiałów budowlanych). Szczegóły patrz rozdział: Zamo-
cowanie i odbiór sygnału o częstotliwości 868 MHz.
9. Po odebraniu sygnału i wyświetleniu temperatury zewnętrznej automatycznie
rozpocznie się poszukiwanie sygnału DCF niezbędnego do ustawienia zegara.
W idealnych warunkach zajmuje to od 3 do 5 minut.
Uwaga:
1. Termometr odbiera sygnał tylko z jednego zewnętrznego bezprzewodowego
czujnika temperatury; jeżeli sygnał DCF nie został odebrany w czasie do 10
minut, zegar można ustawić ręcznie za pomocą przycisku SET.
2. Każdego dnia pomiędzy godziną 02.00 i 03.00 ma miejsce synchronizacja
czasu. Jeżeli czas nie zostanie zsynchronizowany do godziny 03.00, to proce-
dura ta będzie powtarzana o godz. 04.00, 05.00 i 06.00 aż do poprawnego jej
wykonania. Przy braku synchronizacji nawet o godz. 06.00 ustawianie będzie
kontynuowane w następnym dniu o godz. 02.00. Poprawnie odebrany sygnał
DCF wprowadzi zmianę ręcznie ustawionego czasu. Data jest aktualizowana
jednocześnie z czasem.
3. W przypadku wymiany baterii w termometrze lub w czujniku należy wykonać reset
(wyzerowanie ) całego zestawu. Powodem tej operacji jest to, że zmienny kod
bezpieczeństwa jest wysyłany z nadajnika po jego włączeniu i musi zostać odebrany
i zapamiętany przez termometr w ciągu trzech minut od początku transmisji!
4. Żeby zapewnić bezproblemową pracę termometru i czujnika zaleca się okresowo
wymieniać w nich baterie.
Zegar sterowany sygnałem radiowym DCF-77
Sygnał DCF jest kodowany i nadawany na częstotliwości 77,5 MHz z Mainflingen
w pobliżu Frankfurtu. Zasięg wynosi około 1500 km wokół nadajnika. Zegar w
termometrze odbiera ten sygnał i ustawia dokładny czas zarówno letni, jak i zimowy.
Jakość odbioru zależy od położenia geograficznego. Jeżeli sygnał ma być odbierany w
promieniu 1500 km od Frankfurtu, to nie powinny występować żadne problemy.
Termometr po wyświetleniu temperatury zewnętrznej rozpoczyna odbieranie sygnału
DCF. Ten fakt pokazuje mrugająca ikona anteny w górnej części wyświetlacza, na
lewo od pozycji godzin. Po prawidłowym przyjęciu sygnału DCF na stałe zapali się
ikona sygnału DCF i zostanie ustawiony czas.
Jeżeli został odebrany sygnał DCF, ale ikona nadal mruga:
1. Termometr jest umieszczony zbyt blisko źródła zakłóceń elektromagnetycznych,
jak na przykład monitor komputerowy lub telewizor. Zalecana odległość wynosi
1,5 do 2 metrów.
2. Odbiór słabnie ze względu na obecność budowlanych konstrukcji żelbetowych
lub umieszczenie odbiornika w piwnicy. Żeby dobrze odbierać sygnał należy
umieścić termometr jak najbliżej okna.
3. Odbiór sygnału DCF jest czasami niemożliwy u podnóża gór lub wzniesień i nie
jest to wadą termometru.
Ustawianie ręczne
1. Ręcznie można ustawić następujące dane: strefę czasową, czas, kalendarz oraz
dokonać wyboru pomiędzy °C i °F.
2. Naciskamy przycisk SET na czas dłuższy od 3 sekund i wchodzimy kolejno do trybu
ustawiania (kolejne ustawienia zatwierdzamy zawsze przez naciśnięcie SET):
• strefy czasowej, która standardowo ustawiona jest na 0 godzin
Przyciskiem + można ustawić strefę czasową od +12 godz. do –12 godz. w odstępach
1 godziny; zatwierdzamy przyciskiem SET,
Uwaga: Ustawienia powrócą automatycznie do normalnego trybu, jeżeli podczas 3
sekund nie zostanie naciśnięty żaden przycisk.
• czasu
Ręczne ustawianie czasu jest możliwe w przypadku, gdy jego automatyczne
ustawianie nie działa z powodu zakłóceń, odległości itp. Zegar jest synchronizowany
wbudowanym kryształem kwarcu.
1. Za pomocą przycisku + wprowadzamy odpowiednią godzinę i ponownie naciska-
jąc przycisk SET, przechodzimy do ustawienia minut. Zatwierdzamy to naciskając
przycisk SET i przechodzimy do ustawiania kalendarza.
2. Termometr nawet po ręcznym ustawieniu zegara będzie co godzinę automa-
tycznie starał się odebrać sygnał DCF. Zegar jest wstępnie ustawiony w trybie 24
godzinnym.
• kalendarza
1. Wyjściową datą dla kalendarza jest 2006, 1.1. i MO. Po odebraniu sygnału
DCF kalendarz ustawi się automatycznie. Jeżeli automatyczne ustawianie nie
powiedzie się, można je przeprowadzić ręcznie.
2. Za pomocą przycisku + wprowadzamy odpowiedni rok (zakres od 2000 do 2029),
a następnie za pomocą SET przechodzimy kolejno do ustawienia miesiąca, daty,
dni w tygodniu (w kolejności od MO – poniedziałek do SU – niedziela),
• °C/°F
Za pomocą przycisku + wybieramy właściwą jednostkę do pomiaru temperatury.
Przyciskiem SET zatwierdzamy wybraną jednostkę do pomiaru temperatury i
jednocześnie kończymy ustawianie kalendarza.
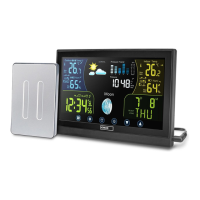
Przedstawianie temperatury i wilgotności
Dane o temperaturze wewnętrznej i wilgotności są przedstawiane w drugiej części
wyświetlacza.
Dane o temperaturze zewnętrznej są przedstawiane w pierwszej części wyświ-
etlacza.
Przedstawienie min. i maks. temperatury
1. W normalnym trybie pracy naciskamy przycisk MIN/MAX i pojawia się informacja
zawierająca minimalną temperaturę i czas, gdy była ona zmierzona.
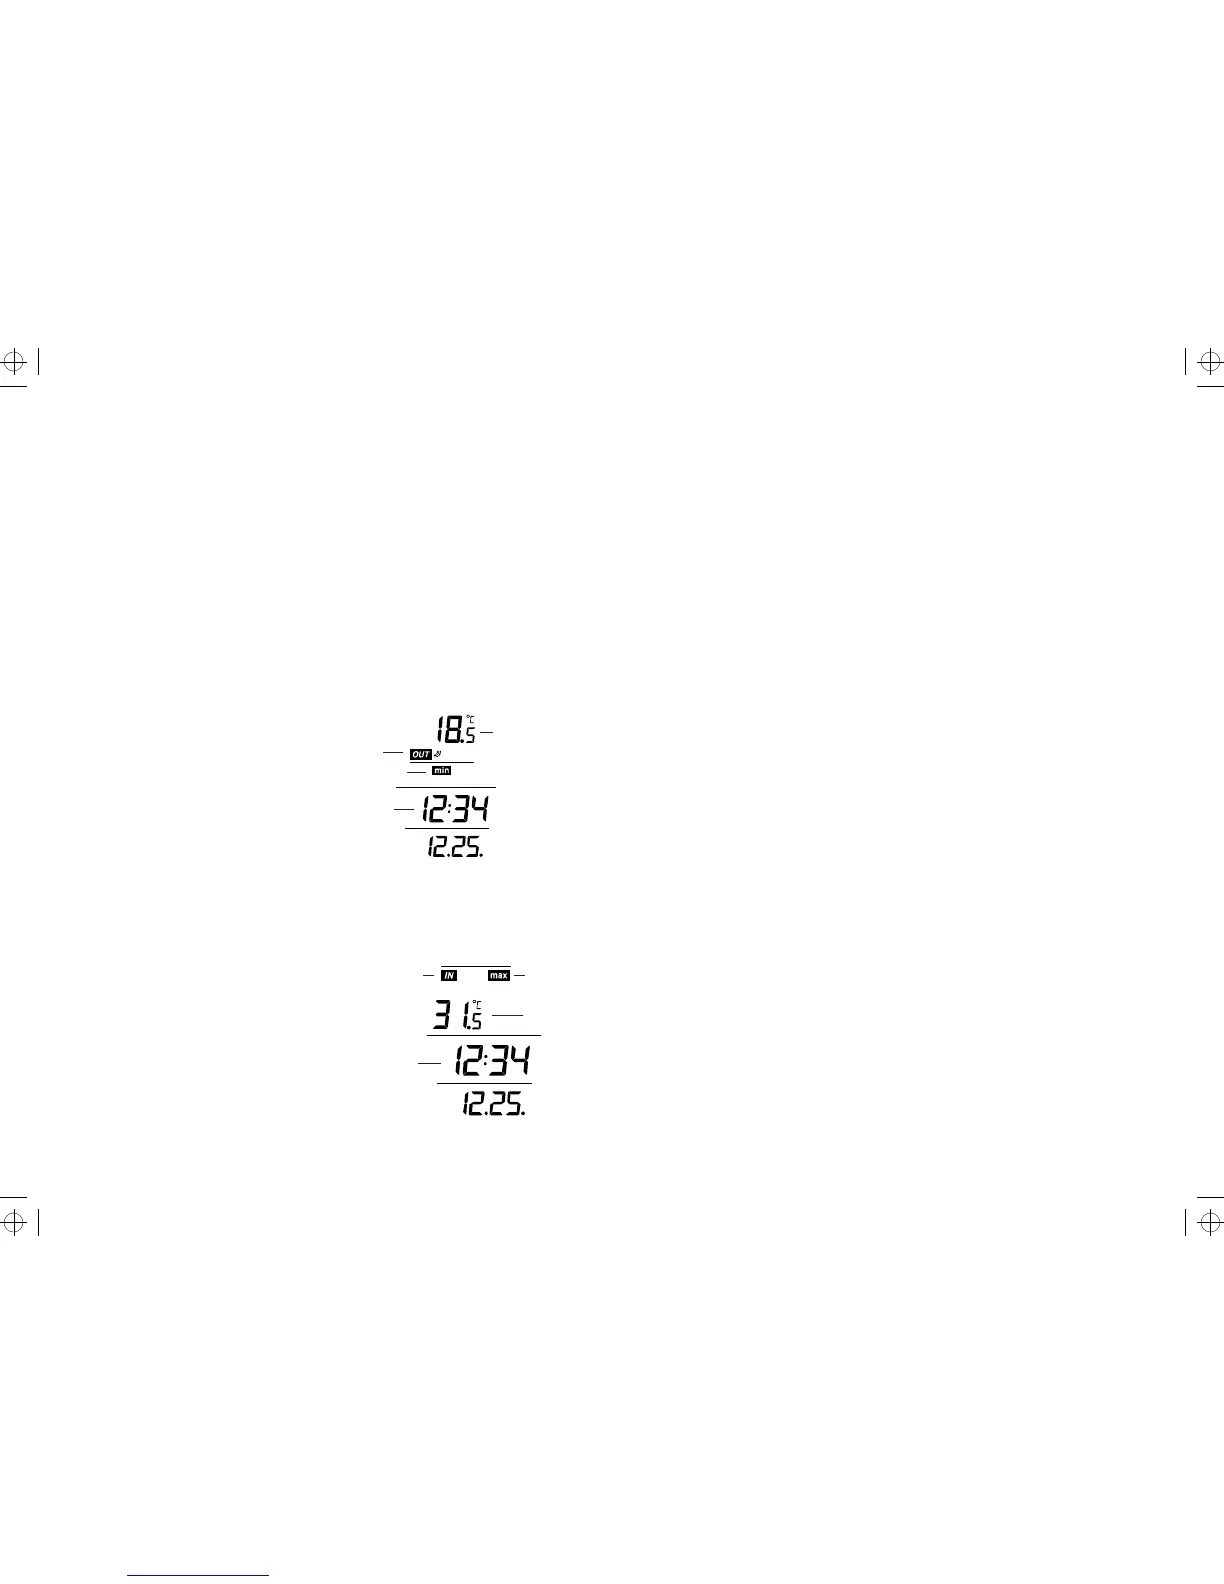
Min temperatura zewnętrzna
venkovní data
ikona minimální teploty
Czas pomiaru
2. Ponowne naciśnięcie przycisku MIN/MAX spowoduje wyświetlenie informacji o
maksymalnej temperaturze zewnętrznej i czasie, gdy była ona zmierzona.
3. Ponowne naciśnięcie przycisku MIN/MAX spowoduje wyświetlenie informacji
o minimalnej/maksymalnej temperaturze wewnętrznej i czasie, w którym była
ona zmierzona.
Przedstawienie minimum i maksimum zapamiętanej
temperatury wewnętrznej
1. W normalnym trybie trzy razy naciskamy przycisk MIN/MAX a na wyświetlaczu po-
jawia się minimalna temperatura zewnętrzna i czas, w którym była zapamiętana.
Ikona danych wewnętrznych Ikona maximum
Max temperatura
Czas pomiaru
2. Ponowne naciśnięcie przycisku MIN/MAX spowoduje wyświetlenie danych o mak-
symalnej temperaturze wewnętrznej i czasie, w którym została zmierzona.
3. Kolejne naciśnięcie przycisku MIN/MAX spowoduje przejście do normalnego
trybu pracy.
7
Section 3 - TIME AND CALENDAR
• Time display
• Display “Calendar” or “Second”
• In normal mode, display the time and calendar.
• A signal reception symbol is shown indicating that Atomic time (DCF time) signal
is received.
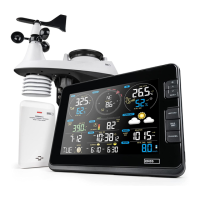
Function keys
Weather Station:
The Weather Station has four easy to use function keys.
SET key (Manual Setting):
• Press to enter the set mode for the following functions: Time zone, Manual time,
Year, Month, Date, Weekday and °C/°F settings.
MIN/ MAX key
• To toggle between the maximum/ minimum outdoor temperature and maximum/
minimum indoor temperature data
• Press to reset at the maximum or minimum temperature records of the indoor
and the outdoor channel (will reset all records to current level)
• Press to exit the setting mode
+ key
• To make adjustment for various settings
• In normal display, press to toggle between the display of the calendar and second
of time in the time display of LCD
ICE ALARM key
• To activate / deactivate the Ice Alarm (alarm will be triggered once the outdoor
temperature has dropped to 4°C (39.2°F))
• To exit from the manual setting mode
Setting up
1. First, insert the batteries into the Temperature transmitter. (see “Install and
replace batteries in the Temperature transmitter“).
2. Immediately after and within 30 seconds, insert the batteries into Weather
Station (see “Install and replace batteries in the Weather Station”). Once the
batteries are in place, all segments of the LCD will light up briefly. Following
the time as 0:00 and the “weather man” icon and indoor temperature and
humidity will be displayed. If these are not displayed after 60 seconds, remove
the batteries and wait for at least 10 seconds before reinserting them.
3. After inserting the batteries into the transmitter, the Weather Station will start
receiving data from the transmitter. The outdoor temperature and the signal
reception icon should then be displayed on the Weather Station. If this does
not happen after 5 minutes, the batteries will need to be removed from both
units and reset from step 1.
4. In order to ensure sufficient 868 MHz transmission there should be no more
than 330 feet (100 meters) between the final position of the Weather Station
and the transmitter (see notes on “Mounting” and “868 MHz Reception”).
When the outdoor signal is successfully received by the Weather Station, this
icon will be switched on. (If not successful, the icon will not be shown in LCD)
So user can easily see whether the last reception was successful (icon on) or
not (icon off). On the other hand, the short blinking of the icon shows that a
reception is currently taking place.
5. Once the remote temperature has been received and displayed on the Weather
Station, the DCF time (radio controlled time) code reception is automatically
started. This takes typically between 3-5 minutes in good conditions.
Note:
• The Weather Station will receive one outdoor transmitter only.
• If after 10 minutes, the Atomic time (DCF time) signal has not been received,
press the SET key to manually enter a time initially.
• Daily DCF reception is done at 02:00 and 03:00 every day. If the reception at
03:00 is not successful, then at 04:00 and 05:00 and 06:00 there are other
tries, until one is successful. If the reception at 06:00 is still not successful,
then the next try takes place at 02:00 next day. If reception is successful, the
received time will override the manually set time. The date is also updated with
the received time. (Please refer also to notes on “DCF Reception” and “Manual
Time Setting”)
Battery installation
Install and replace batteries in the weather station
The Weather Station uses 2 x AA, IEC LR6, 1.5V Alkaline batteries. To install and
replace the batteries, please follow the steps below:
1. Remove the cover at the back of the Weather Station.
2. Insert batteries observing the correct polarity (see marking).
3. Replace compartment cover.
Install and replace batteries in the temperature transmitter
The temperature transmitter uses 2 x AA, IEC LR6, 1.5V Alkaline battery. To install
and replace the batteries, please follow the steps below:
1. Remove the battery compartment cover.
2. Insert the batteries, observing the correct polarity (see marking).
3. Replace the battery cover on the unit.
Note: In the event of changing batteries in any of the units, all units need to be reset
by following the setting up procedures. This is because a random security code is
assigned by the transmitter at start-up and this code must be received and stored
by the Weather Station in the first 3 minutes of power being supplied to it
Battery change
It is recommended to replace the batteries in all units regularly to ensure optimum
accuracy of these units (Battery life see Specifications below).
Please participate in the preservation of the environment. Return used batteries
to an authorized depot.
DCF-77 radio controlled time
The time base for the radio controlled time is a Cesium Atomic Clock operated by the
Physikalisch Technische Bundesanstalt Braunschweig which has a time deviation
of less than one second in one million years. The time is coded and transmitted
from Mainflingen near Frankfurt via frequency signal DCF-77 (77.5 kHz) and has
a transmitting range of approximately 1,500 km. Your radio-controlled Weather
Station receives this signal and converts it to show the precise time in summer
or wintertime. The quality of the reception depends greatly on the geographic
location. In normal cases, there should be no reception problems within a 1,500
km radius around Frankfurt.
Once the outdoor temperature is displayed on the Weather Station after initial
set-up, the DCF tower icon in the clock display will start flashing in the upper left
corner. This indicates that the clock has detected that there is a radio signal present
and is trying to receive it. When the time code is received, the DCF tower becomes
permanently lit and the time will be displayed.
If the tower icon flashes, but does not set the time or the DCF tower does not appear
at all, then please take note of the following:
• Recommended distance to any interfering sources like computer monitors or
TV sets is a minimum of 1.5 - 2 metres.
• Within ferro-concrete rooms (basements, superstructures), the received signal is
naturally weakened. In extreme cases, please place the unit close to a window
and/or point its front or back towards the Frankfurt transmitter.
Manual settings
The following manual settings can be done in the setting mode:
• Time zone setting
• Manual time setting
• Calendar setting
• °C/ °F setting
Press and hold the SET key for about 3 seconds to advance to the setting mode:
Time zone setting
The time zone default of the Weather Station is “0 hour”. To change to another
time zone:
1. Press and hold the SET key for about 3 seconds to enter the time zone setting
(flashing).
2. Using the + key, set the time zone. The range runs between 12 to -12 hr, in
consecutive 1hour intervals.
3. Press the SET key to confirm and enter the “Manual Time Setting” or exit the
setting mode by pressing the MIN/MAX key
Manual time setting
In case the Weather Station is not able to detect the Atomic time (DCF) signal
(disturbances, transmitting distance, etc.), the time can be manually set. The clock
will then work as a normal Quartz clock.
To set the clock:
1. The hour digits start flashing in the time display section.
2. Use the + key to adjust the hours and then press SET key to go to the minute
setting.
3. The minute will be flashing. Press the + key to just the minutes.
4. Confirm with the SET key and enter the “Calendar Setting” or exit the setting
mode by pressing the MIN/MAX key
Note:
• The unit will still try to receive the signal at each full hour despite it being
manually set. When it does receive the signal, it will change the manually set
time into the received time.
• The time format is fixed to “24-hr” time display.
Calendar setting
The date default of the Weather Station is 1. 1. of the year 2006 after initial set-up.
Once the radio-controlled time signals are received, the date is automatically upda-
ted. However, if the signals are not received, the date can also be set manually.
1. Using the + key, set the year required. The range runs from 2000 to 2029
(default is 2006).
2. Press the SET key to enter the month setting mode.
3. The month digit will be flashing. Press the + key to set the month and then press
the SET key to go to the date setting.
4. The date digit will be flashing. Press the + key to set the date.
5. Confirm with the SET key and set the weekday.
 Loading...