Do you have a question about the EMOVE ROADRUNNER and is the answer not in the manual?
Measurement of the upper chassis to the foot pegs.
Measurement from the floor to the scooter's chassis.
Measurement of the handlebar length.
Measurement of the tire radius.
Measurement from the ground to the highest extended handlebar.
Locate and access the user manual via QR code.
Guidance on watching the Roadrunner set-up video.
Step-by-step instructions for assembling the scooter.
Instructions on how to charge the scooter battery.
Initial steps for powering on and operating the scooter.
Overview and adjustment of scooter performance settings.
Detailed steps for modifying the scooter's P-settings.
Specifications for scooter range and maximum speed.
Details on frame material and tire size.
Information on brakes, weight, and maximum load.
Specifications for charging time and battery capacity.
Details on motors, throttle type, and charger specifications.
Scooter dimensions, water resistance, and warranty information.
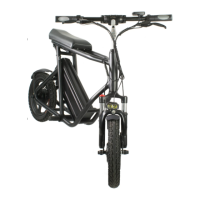
The EMOVE Roadrunner is an electric scooter designed for personal transportation, featuring a robust build and user-friendly controls. Its primary function is to provide an efficient and enjoyable riding experience, suitable for various commutes and leisure activities.
Upon unboxing, the initial setup involves a few straightforward steps. First, remove all packing materials to access the scooter components. The handlebar needs to be placed into the stem of the Roadrunner. It's crucial not to tighten the handlebars into place immediately, as this makes it easier to remove the scooter from its packaging. Once the scooter is out of the box, open the kickstand and place the scooter on the ground for stability.
Next, locate the foot pegs and the provided hex key set. The foot pegs attach to either side of the scooter; simply twist them into place until they are firm and secure. After the foot pegs are installed, you can proceed to secure the handlebars. With the handlebars positioned in the stem, insert a hex key and tighten the set screw until the handlebars are firmly in place.
The handlebars also feature a metal folding mechanism. To unfold them, unlatch this mechanism. There's a hook on the front side of the folding mechanism (the side facing the rider). Attach this side of the mechanism first, then press down on the metal clasp until it locks, ensuring the handlebars are securely in their riding position.
Charging the Roadrunner is a simple process. First, plug the charger into a standard electrical outlet. Then, insert the XLR connector into the charging port, which is located on the battery. The charger features an indicator light: a red light signifies that the scooter is currently charging, while a green light indicates that the battery is fully charged. The light will automatically change from red to green once charging is complete.
To power on the scooter, press the Power button located on the top left of the LCD display. The Roadrunner offers different power modes to suit various riding preferences and conditions. To toggle between these power modes, press the M (mode) button. The available modes are:
In addition to power modes, the Roadrunner supports both single and dual motor operation. To engage only the rear motor, press the R button. For enhanced power and performance, press the I button to engage both dual motors.
A key feature of the Roadrunner is its removable battery, which comes with a locking mechanism for security. To remove the battery, use the attached keys to unlock it. Once unlocked, grab the handle on the battery and apply a slight downward pressure as you slide the battery out from the rear of the scooter. This feature allows for convenient charging off the scooter or swapping out batteries for extended range.
The Roadrunner includes three adjustable performance settings, referred to as P-settings, which allow riders to customize their experience. These settings can be accessed and adjusted via the scooter's display. While P1 and P2 are generally not recommended for adjustment unless reconfiguring the scooter, P3 allows riders to limit the scooter's speed according to their preference.
To access the P-setting menu, power on the scooter. Then, hold both the power button and the mode (M) button simultaneously for 1-2 seconds. The screen will display the P-setting menu. To cycle through the different P-settings (P1, P2, P3), tap the power button. The value displayed on the screen will change accordingly.
To adjust a specific P-setting:
The manual provides information on the initial setup and operation, but specific maintenance features are not explicitly detailed beyond the charging process. However, the design with a removable battery suggests ease of battery replacement or maintenance. The inclusion of a hex key set for assembly implies that basic adjustments and tightening of components can be performed by the user. The water resistance rating indicates that the scooter is designed to withstand light rain, reducing concerns about minor exposure to moisture during use. For more in-depth maintenance, consulting the user manual via the QR code or the manufacturer's website would be necessary.
Inside the box, you will find a QR code. This QR code provides access to the user manual. To view the manual, use a smartphone camera to focus on the QR code. A link will appear on your screen, which you can tap to open the manual. If your camera does not have a built-in QR reader, you may need to download a dedicated QR reader app. Following the link will direct you to the manufacturer's website, where you can also watch a Roadrunner setup video and read the instructions online.
Overall, the EMOVE Roadrunner is designed for ease of assembly, straightforward operation, and customizable performance, making it a versatile option for urban commuting and recreational riding.
| Range | 50 miles |
|---|---|
| Tire Type | Pneumatic |
| Water Resistance | IPX4 |
| Brakes | Hydraulic disc brakes |
| Suspension | Front and rear suspension |
| Charging Time | 12 hours |