Fastlane
®
Swim Unit Installation
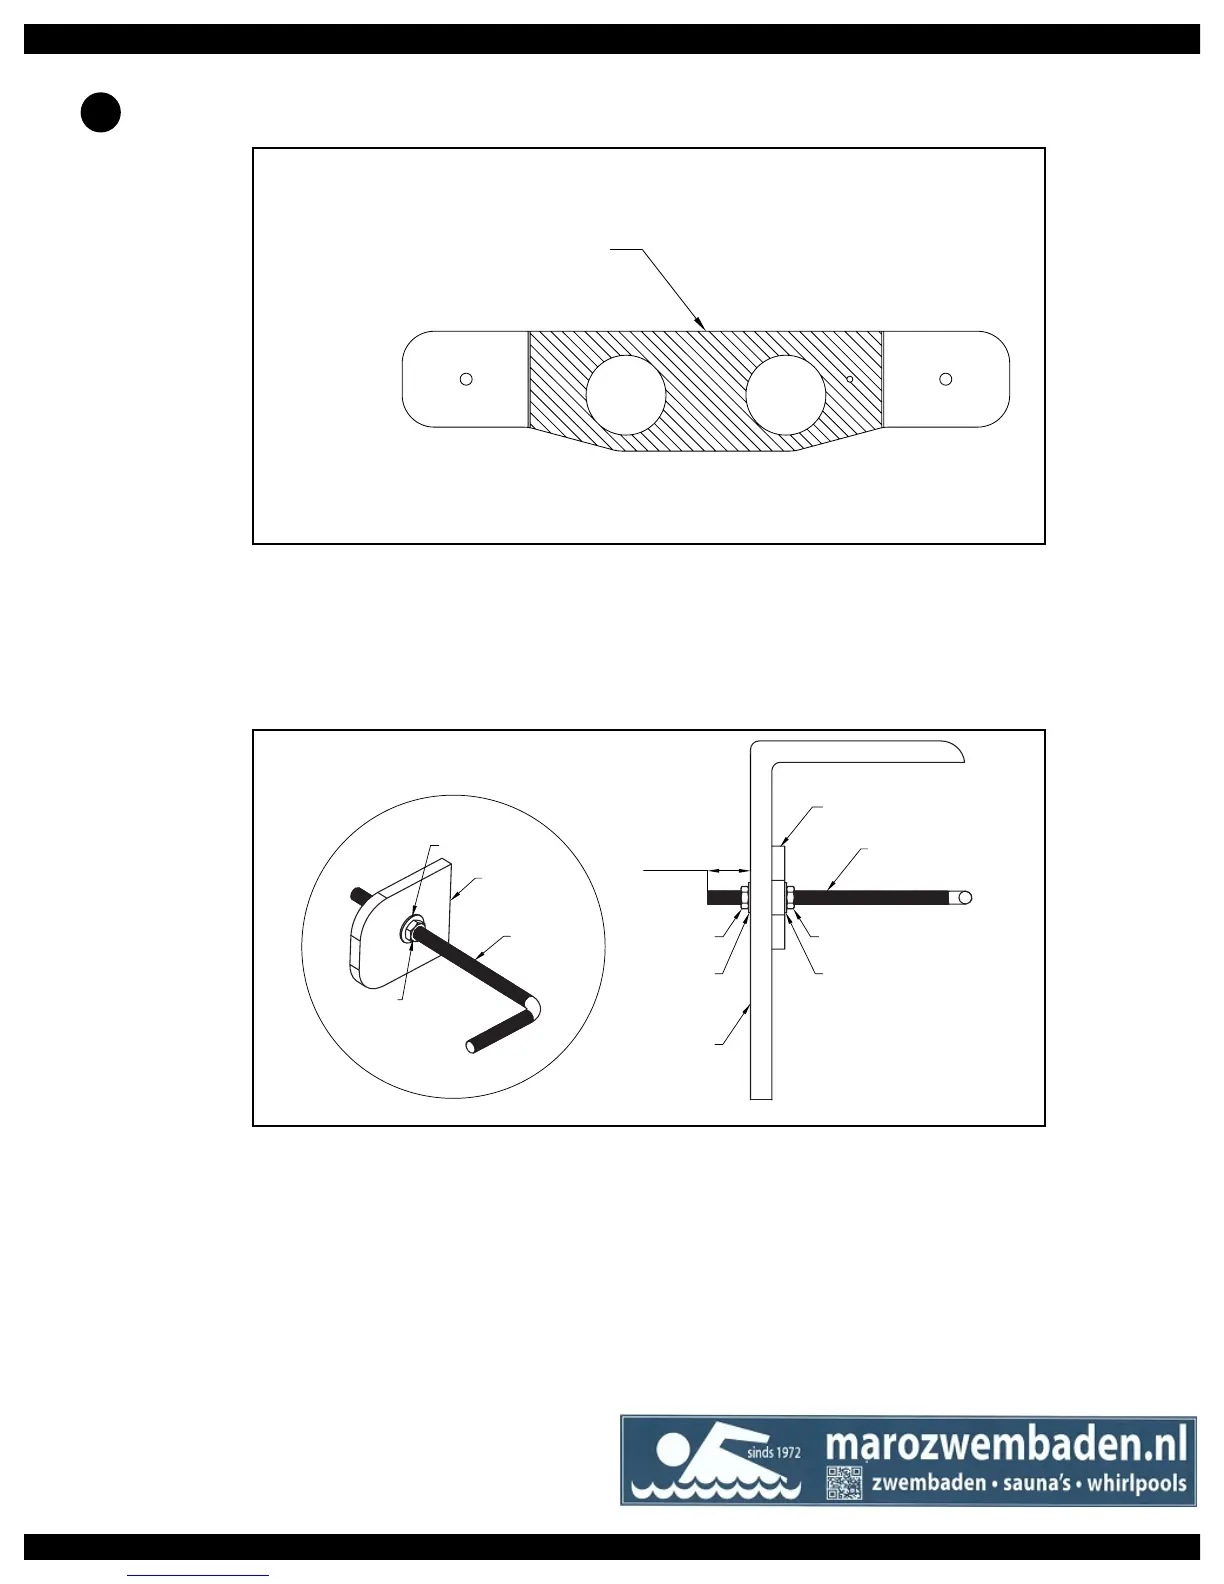
Cut the center portion out of the bracket using the etched marks in the brackets as a guide. The two end
portions will be used as washers on the backside of the pool wall (Fig 4.25).
FIBERGLASS FASTLANE INSTALLATION
Initial Release
Part Name:
TRIMMING OF BRACKET
Sheet Number:
Drawing Number:
Part#-Rev
Drawing Not To Scale
Description:
Drawing Name:
Date:
05-31-07
Revision:
A
Dwg By:
KGK
+/- tolerance, +/- tolerance°
Tolerance: (unless otherwise specified)
-
Material:
1
200 East Dutton Mill Road., Aston PA 19014
Website: http://www.endlesspools.com
Email: swim@endlesspools.com Phone: 484-768-1000
CUT BRACKET BETWEEN NOTCHES
DISCARD MIDDLE SECTION
Fig. 4.25
Insert the threaded rod into each PVC washer making sure there is a at washer and jam nut on the back-
side of the PVC washer (Fig 4.26 DETAIL A). Position and install each PVC washer and threaded rod as-
sembly against the backside of the pool wall. Adjust the hardware on the threaded rods so that they extend
approximately 1-1/2” (38mm) into the pool. Install an additional at washer and jam nut onto each threaded
rod on the inside of the pool (Fig 4.26 DETAIL B).
DETAIL A
DETAIL B
Threaded
Rod
PVC Washer
Jam Nut
Flat Washer
1-1/2"
(38mm)
Flat Washer
Jam Nut
Fiberglass
Shell
PVC Washer
Jam Nut
Flat Washer
Threaded
Rod